The premium Model S rear seat cup holders; (PARZ) is an integrated armrest upgrade that maintains the full functionality of the factory slider units.
Before we even jump into the review, let’s acknowledge the elephant in the room. PARZ stands for Premium Arm Rest Zarf, and if you’re anything like us and don’t know what a zarf is, wiki will tell you that a zarf is a handleless metal cup holder. A very fitting name considering these premium rear seat cup holders are made from full stainless steel.
Frank Tatum, founder of Hauptburg Industries, world-renown fabricator, and a Tesla owner, saw the need for premium Model S rear seat cup holders that would stand worlds apart from the basic 2nd row offering from Tesla Motors. Guided by the intent to complement and enhance the Model S interior design and functionality, the Premium Arm Rest Zarf was born: being sold exclusively through EVannex.
Do I Really Need Rear Seat Cup Holders?
Yes, and here’s why.
If you’ve ever chauffeured a pair of toddlers around, each with their own drippy sippy cup that seems to tumble endlessly across your precious back seats, or experienced the nervous thrill of clenching a grande latte between your knees for 2+ hours while on an extended road trip [to the 2013 SEMA Show], you’d know that there’s a definite need for Model S rear seat cup holders.
Installation
The PARZ installation guide clearly states that “professional installation” is required, however we’re not quite sure if that’s due to liability reasons or because unconventional tools are needed for the installation. Installation requires complete removal of the factory arm rest which may sound daunting at first, but we found it to be pretty straight-forward and not overly complex. That says a lot considering we’re not even that handy.
In our opinion, the installation can be performed in less than 1 hour by any savvy do-it-yourselfer (DIY). If you’re handy enough to perform basic drywall repairs or adept at changing your own oil + filter on an ICE vehicle (yes, we said the “I” word), then installation of the PARZ will come off as being pretty simple.
Tools Required (not included)
- Needle Nose Plier
- Body Trim Removal Tool
- T20 Standard Torx Screwdriver
- 8mm Nut Driver
Installation Time: 1 hour
Editor’s note: The installation time takes into account the time it took for us to document the entire process.
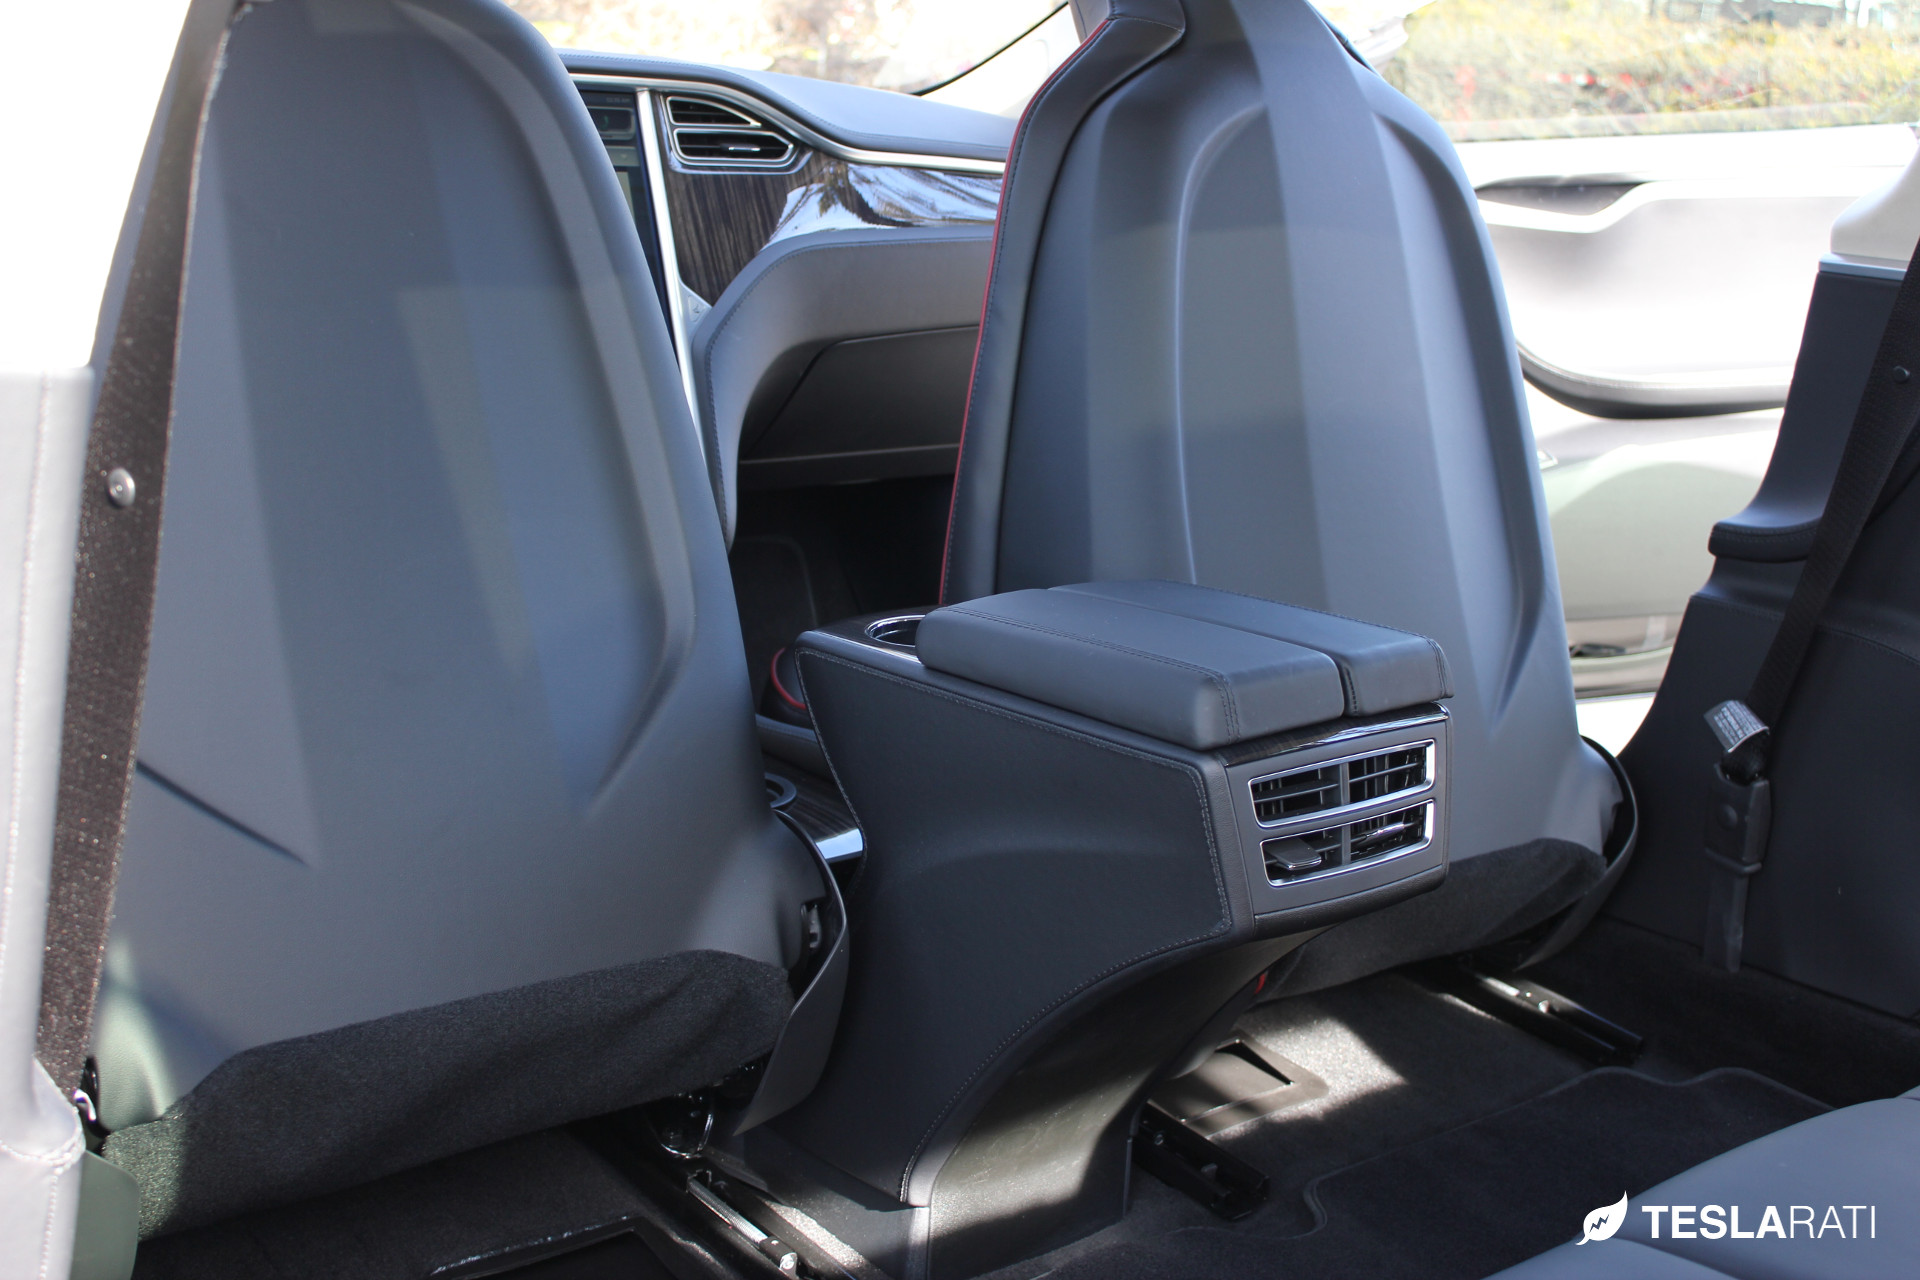
Before starting on the installation, you'll want to slide both front seats completely forward and tilt the seat backs all the way up in order to ensure maximum working space in the back seating area. This is where the entire PARZ installation process will take place.
MUST SEE: Tesla Model S Center Console Insert (CCI) Review
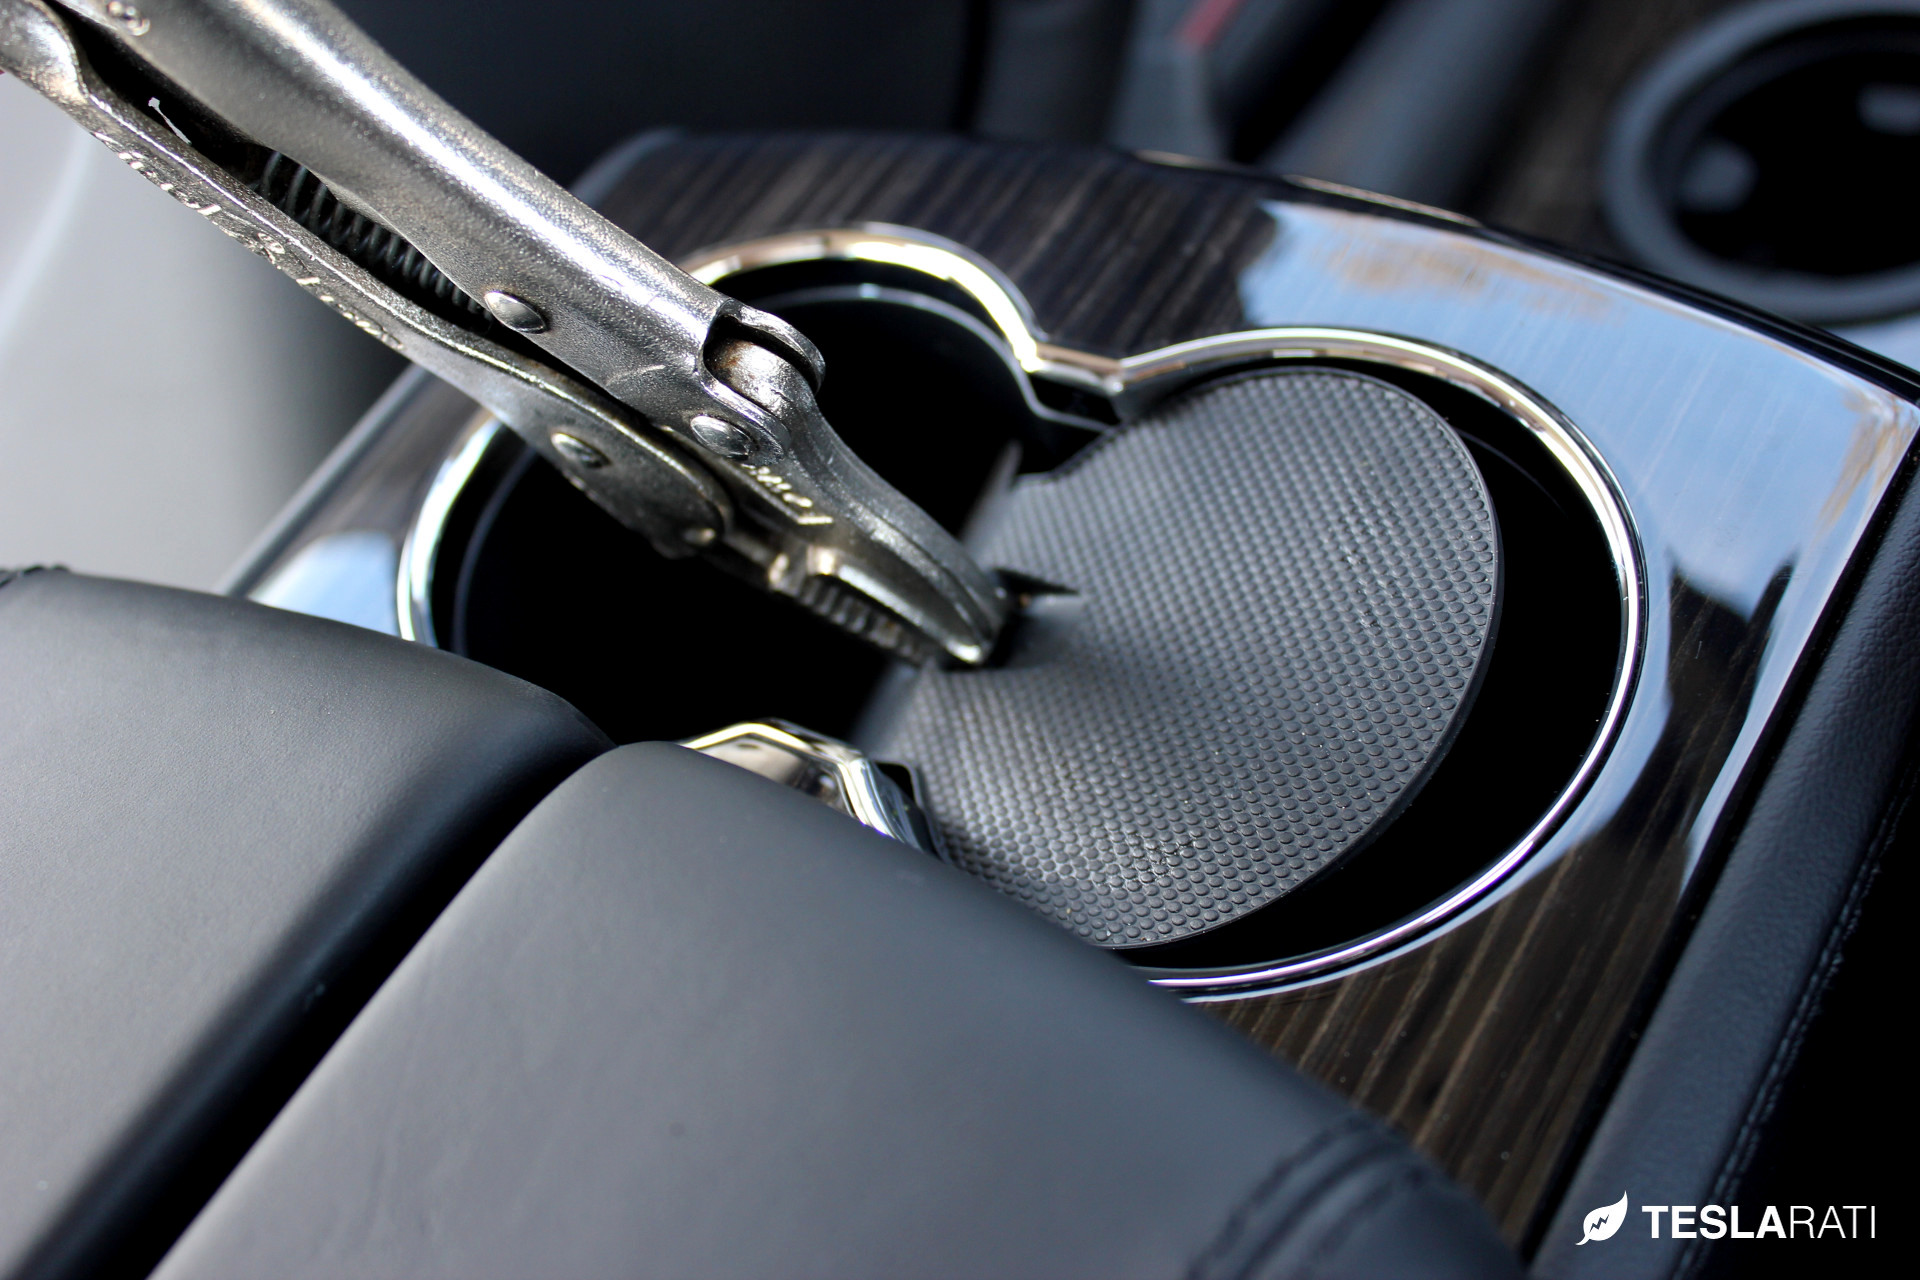
Slide back both of the factory arm rests and expose the front cup holders. Using a pair of pliers (we opted for a vice-grip), pinch the center indents of the non-slip rubber pad which lines the bottom and proceed to remove it from the cup holders. Loosen and remove the two T20 torx screws located on the bottom of the cup holders. Set aside screws for reuse.
Level of difficulty (1 easiest, 5 most difficult): 1
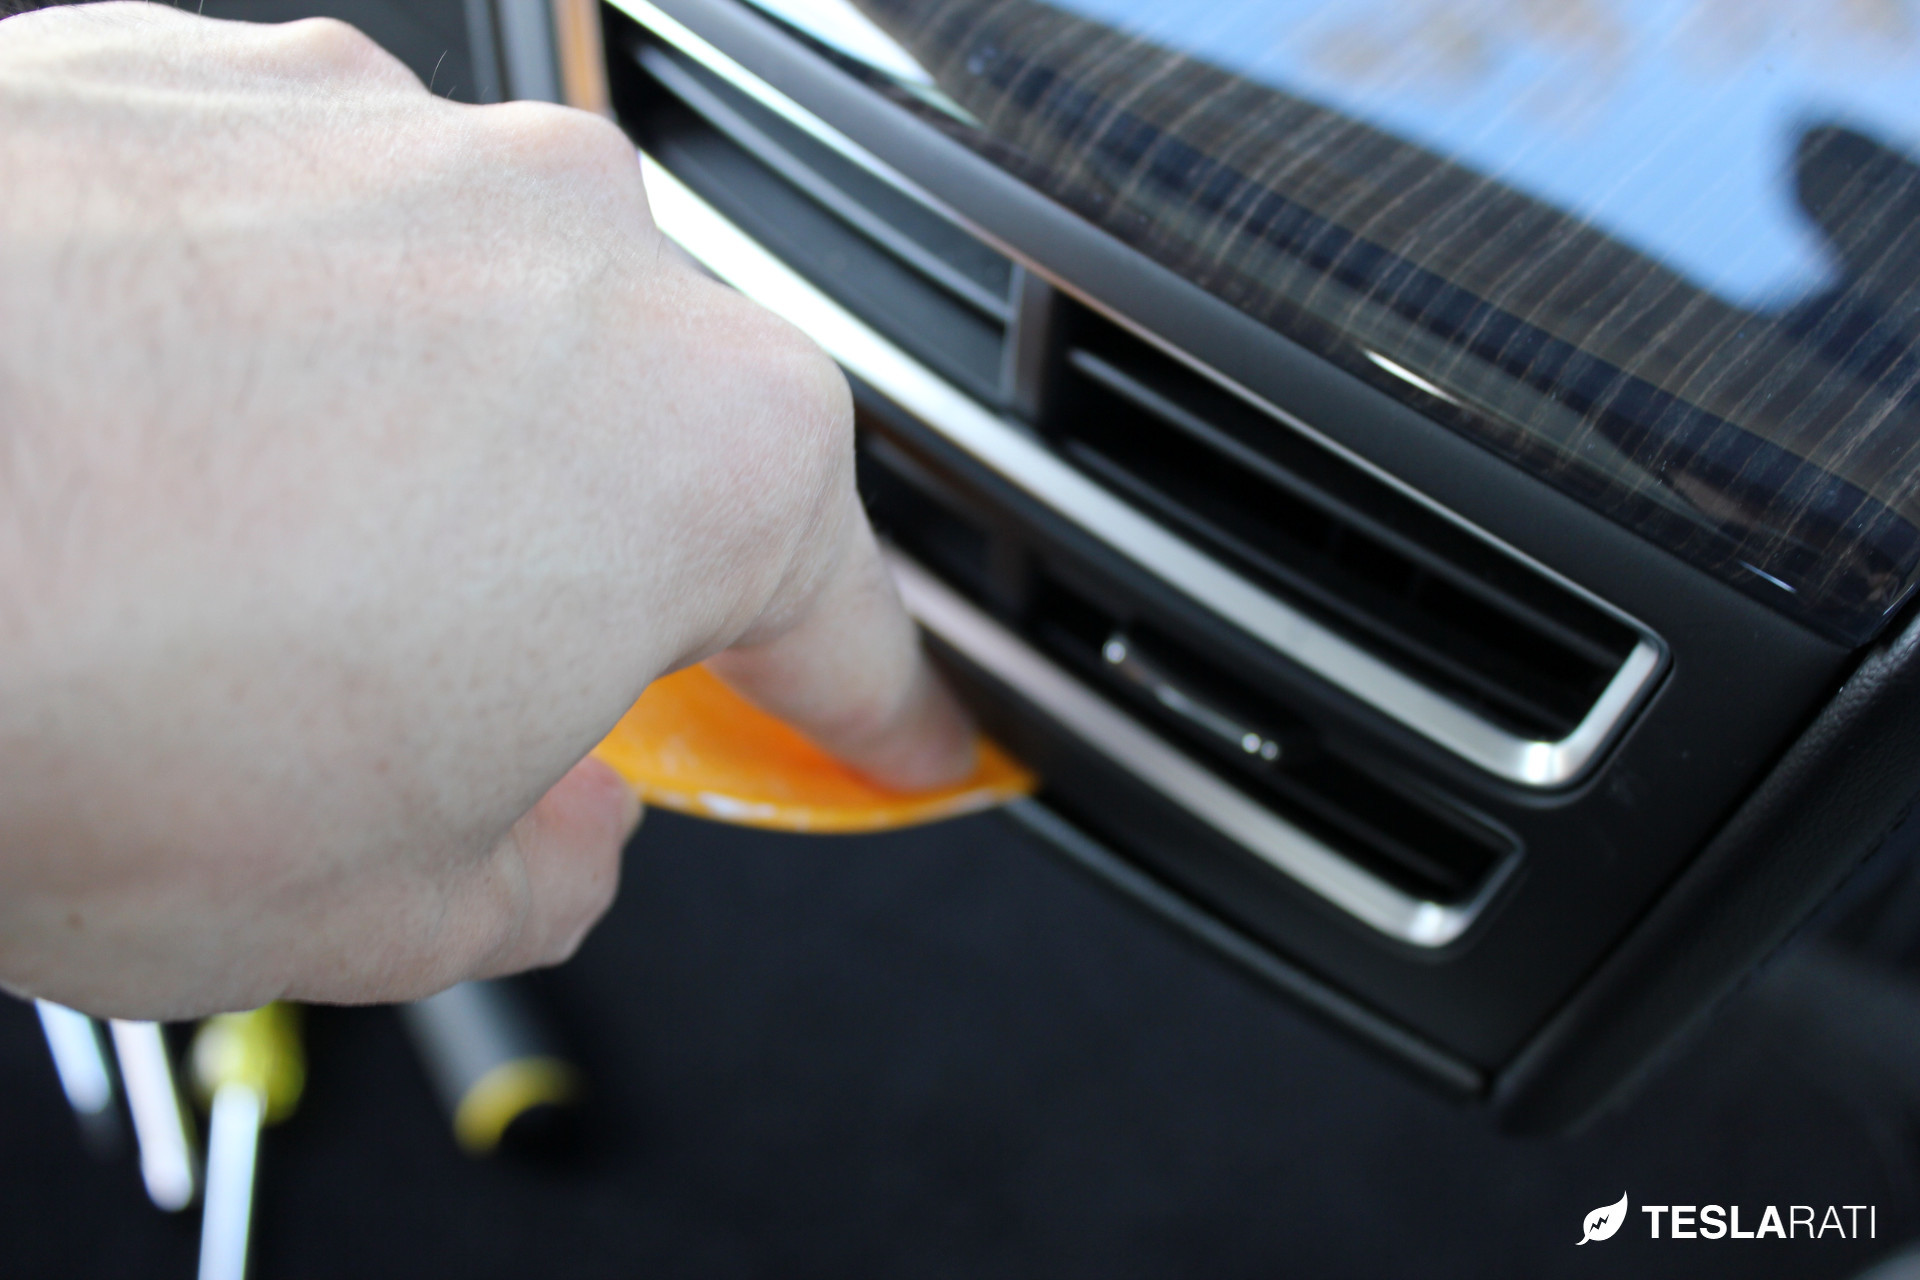
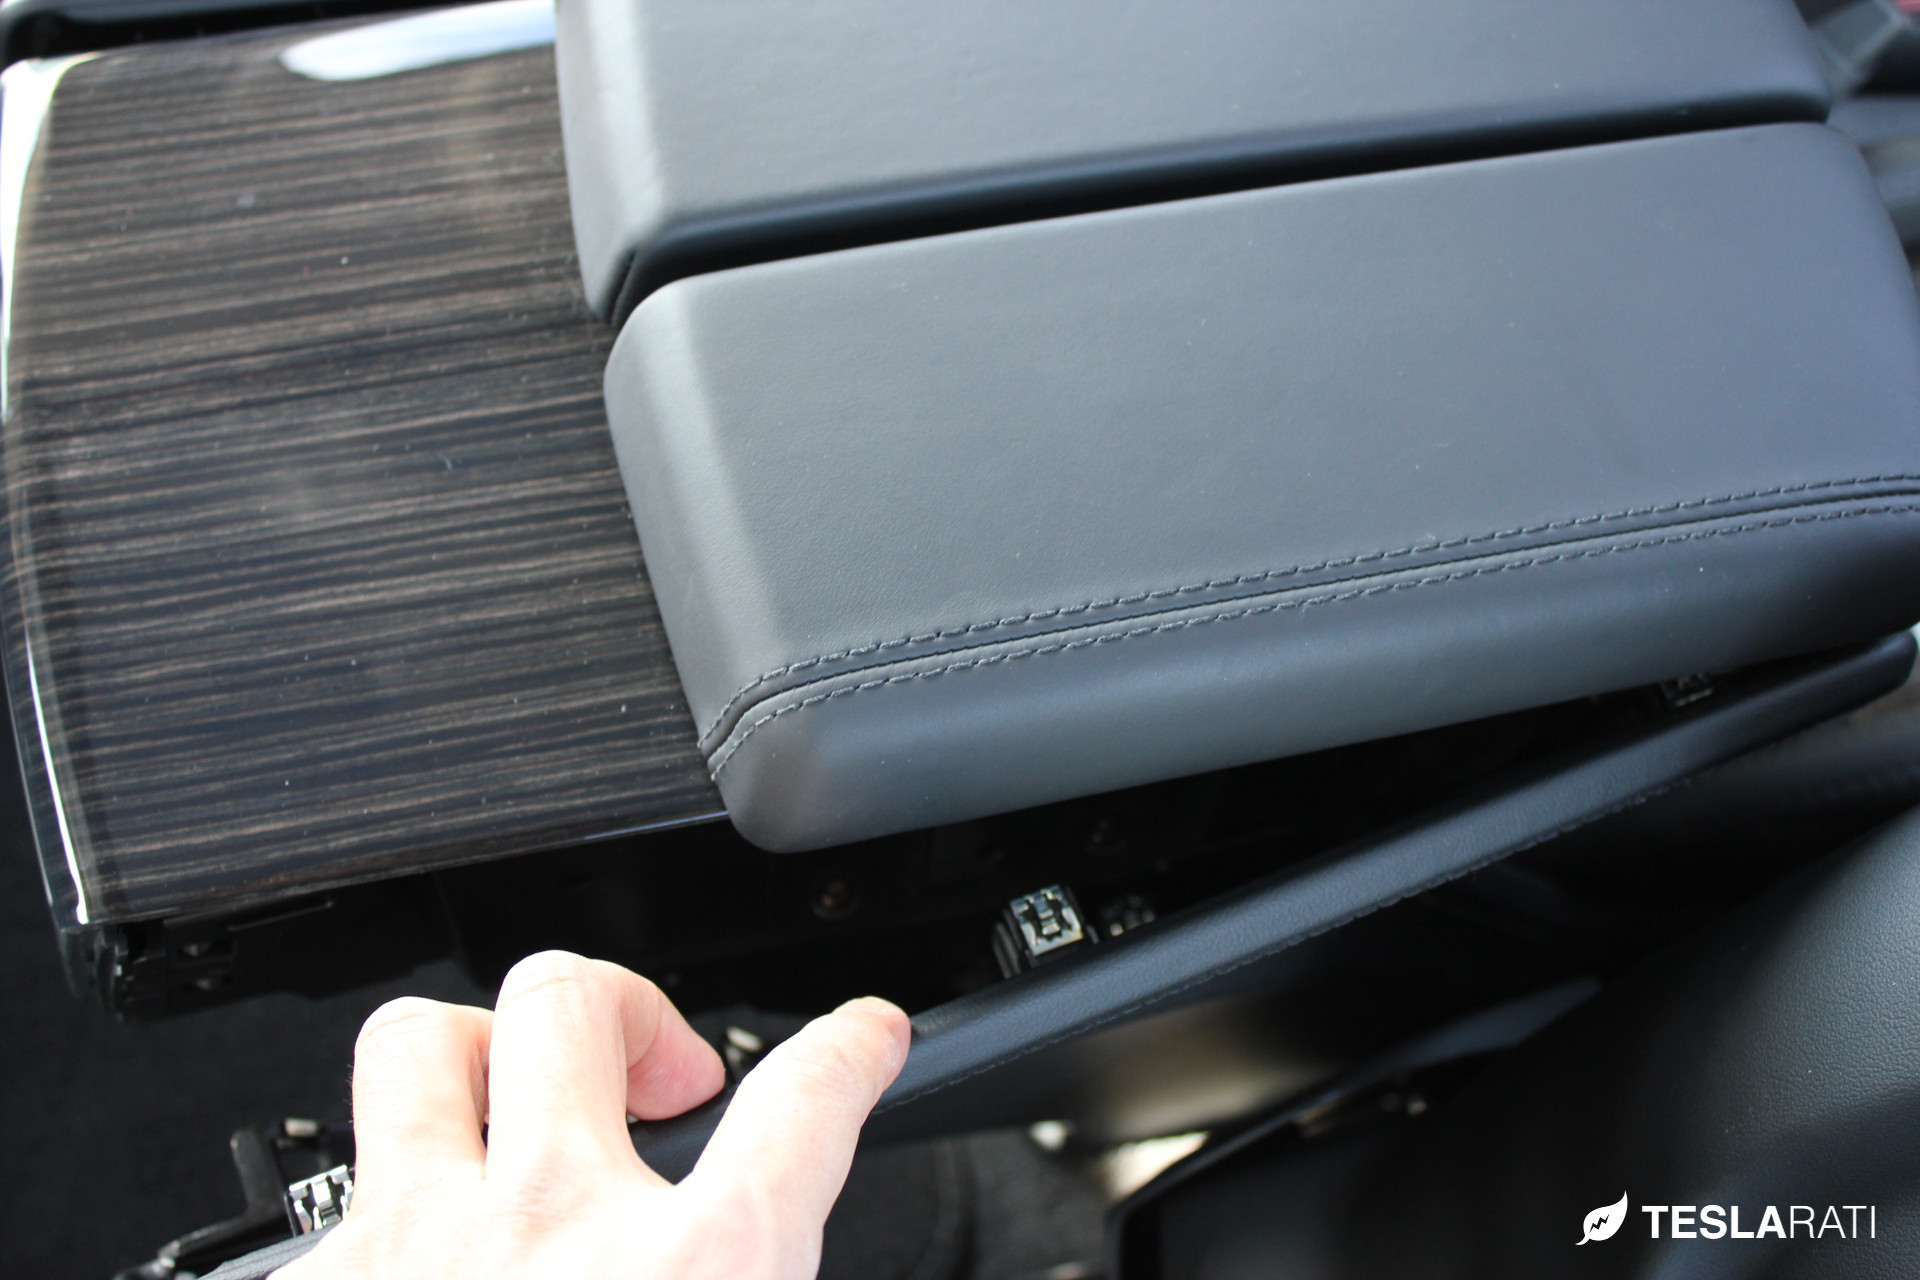
Slide the arm rests forward and remove the central arm rest assembly’s back panel by inserting the plastic putty knife blade in the gap directly beneath the air conditioning vents; gently wedging open the back panel enough to firmly grip it’s upper portion in your finger tips; pulling the panel down and completely away from the assembly, releasing the metal tension clips that hold the panel in place.
The plastic panels are fairly flexible and do not distort so do not be alarmed when prying the panels away from the metal tension clips. It will require a firm tug in order to release the clips. Courtesy of our service rep from the Santa Monica Tesla store.
Level of difficulty (1 easiest, 5 most difficult): 2
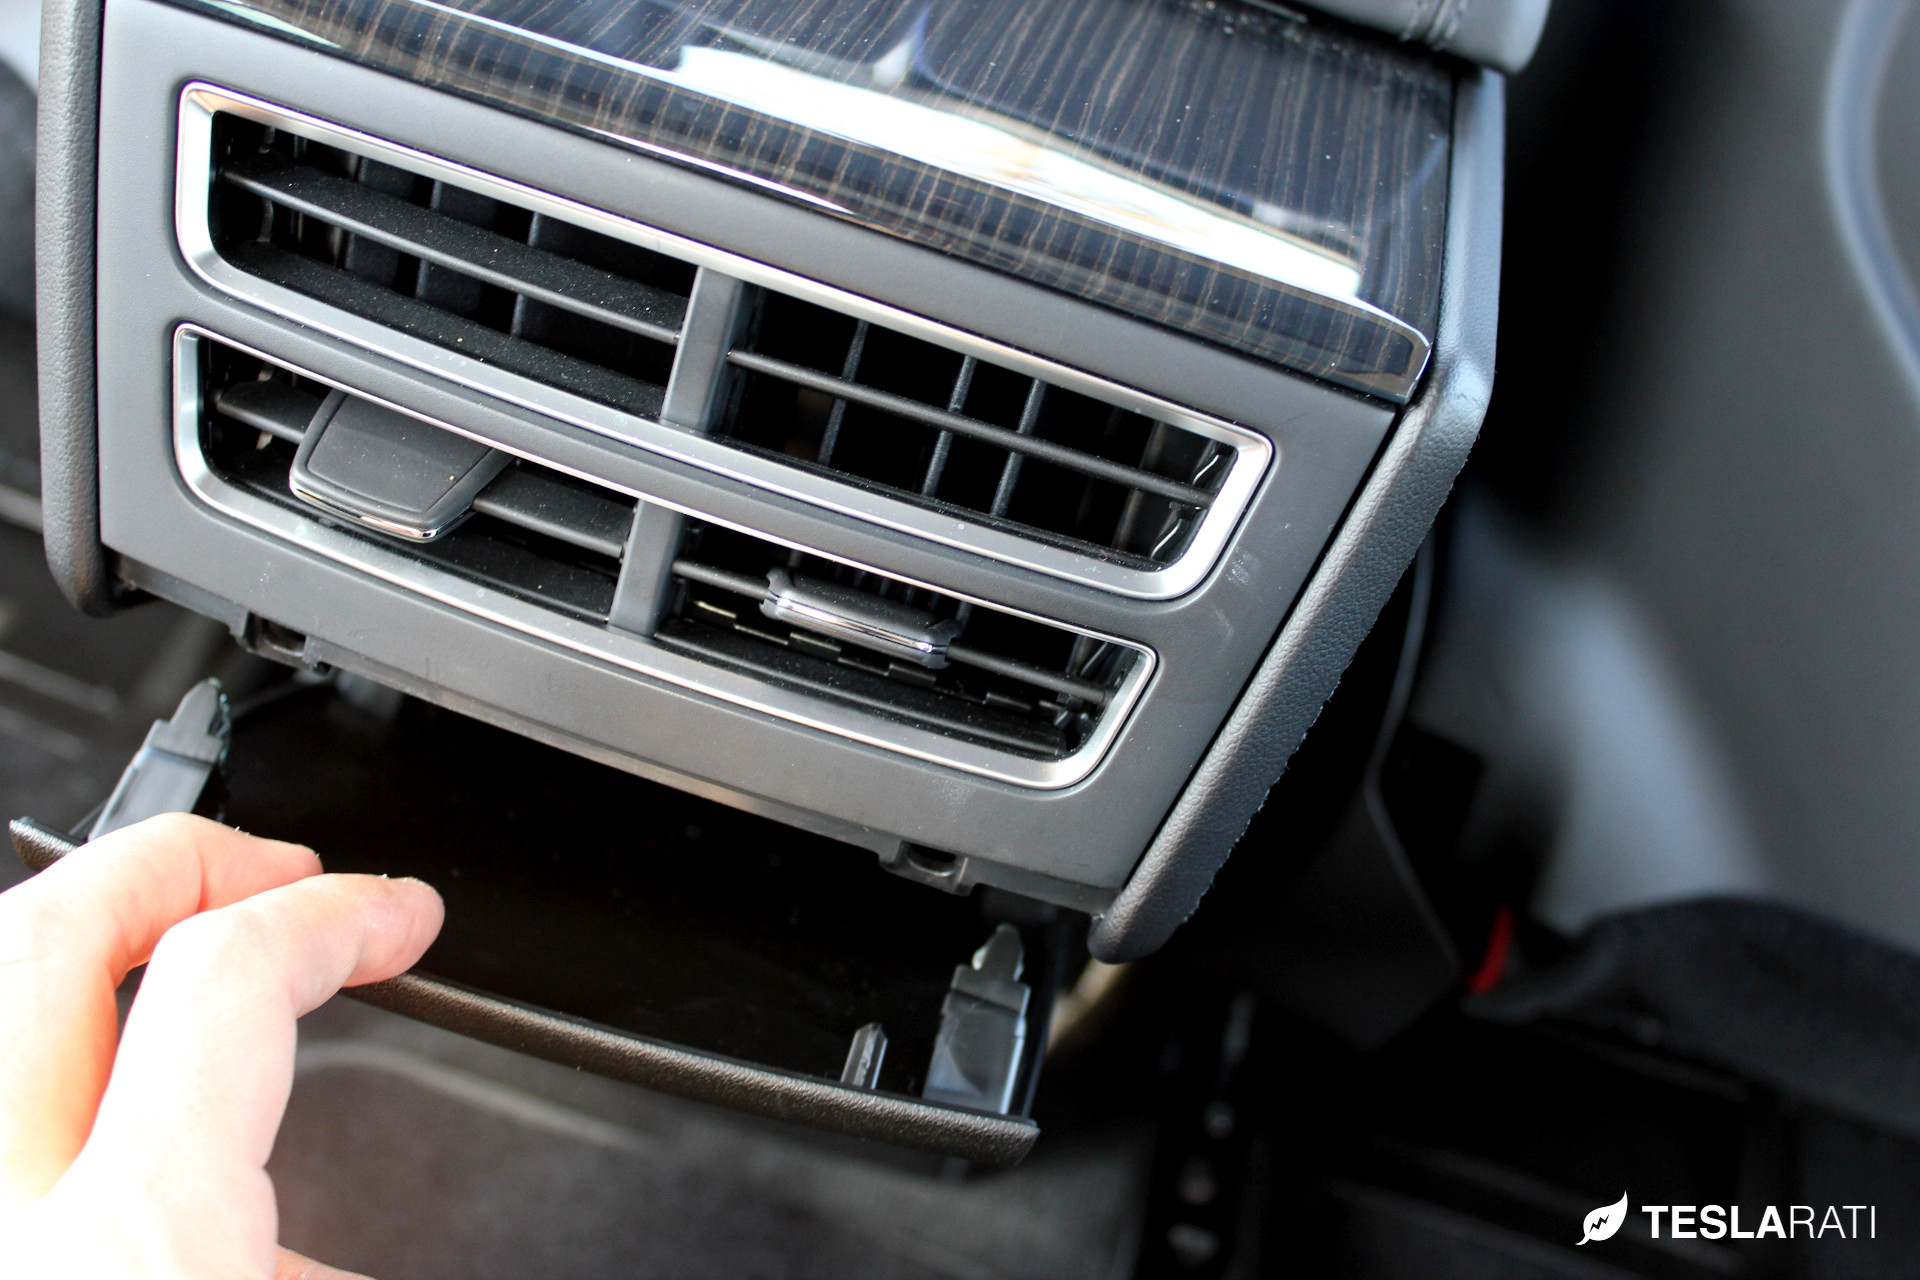
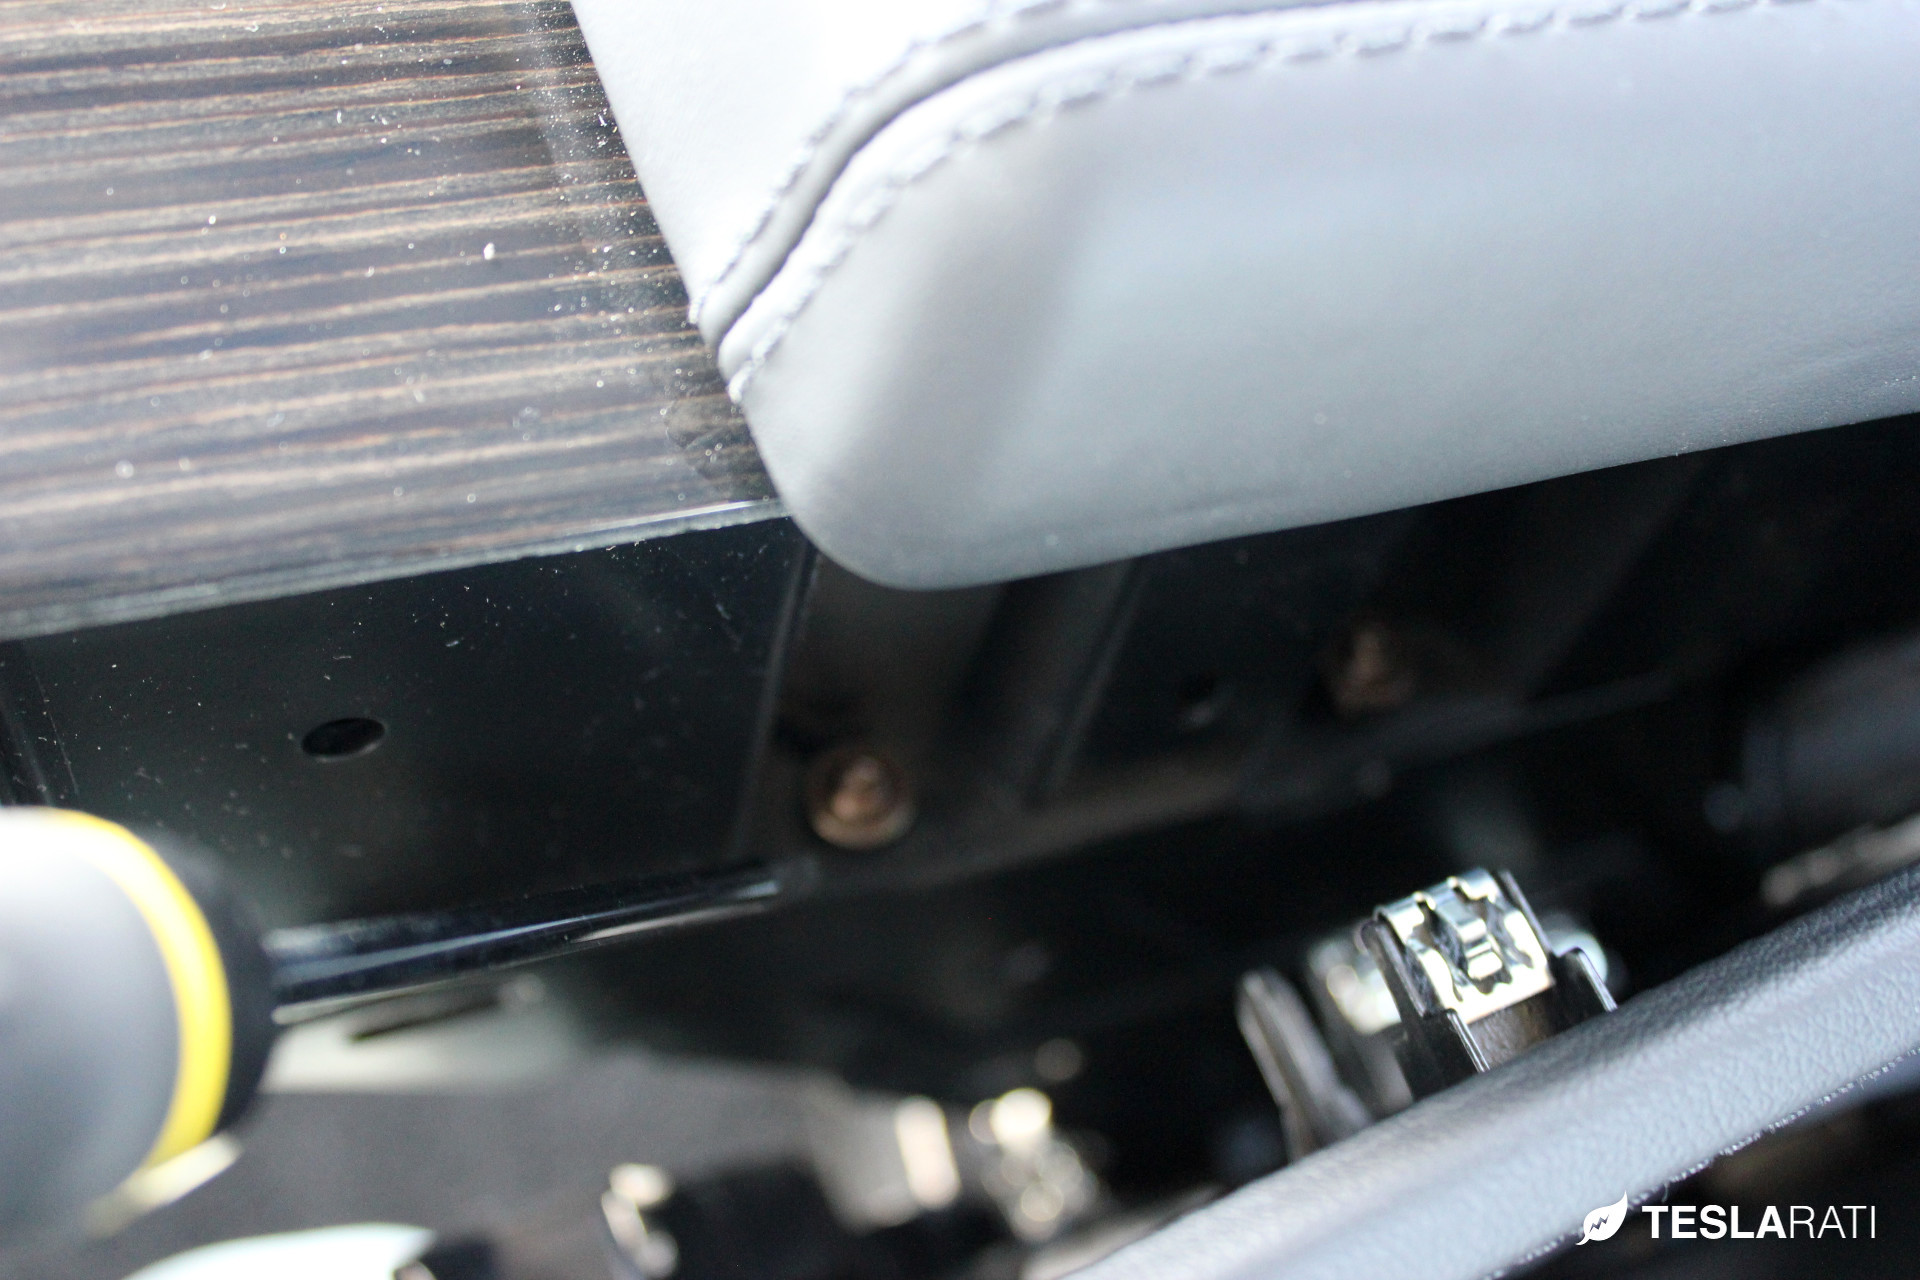
Once you have the back panel detached, use the same plastic putty knife and gently wedge open the central arm rest assembly’s side panels far enough to expose and comfortably access two midline screws on either side of the assembly. Pop off the side panel until there's a clear line of sight to the two T20 midline screws. Do not fully remove these side panels.
[box type="shadow"]Tip: The T20 screws will need to be accessed on an angle so be very careful not to strip the screws. Apply firm pressure when unscrewing.
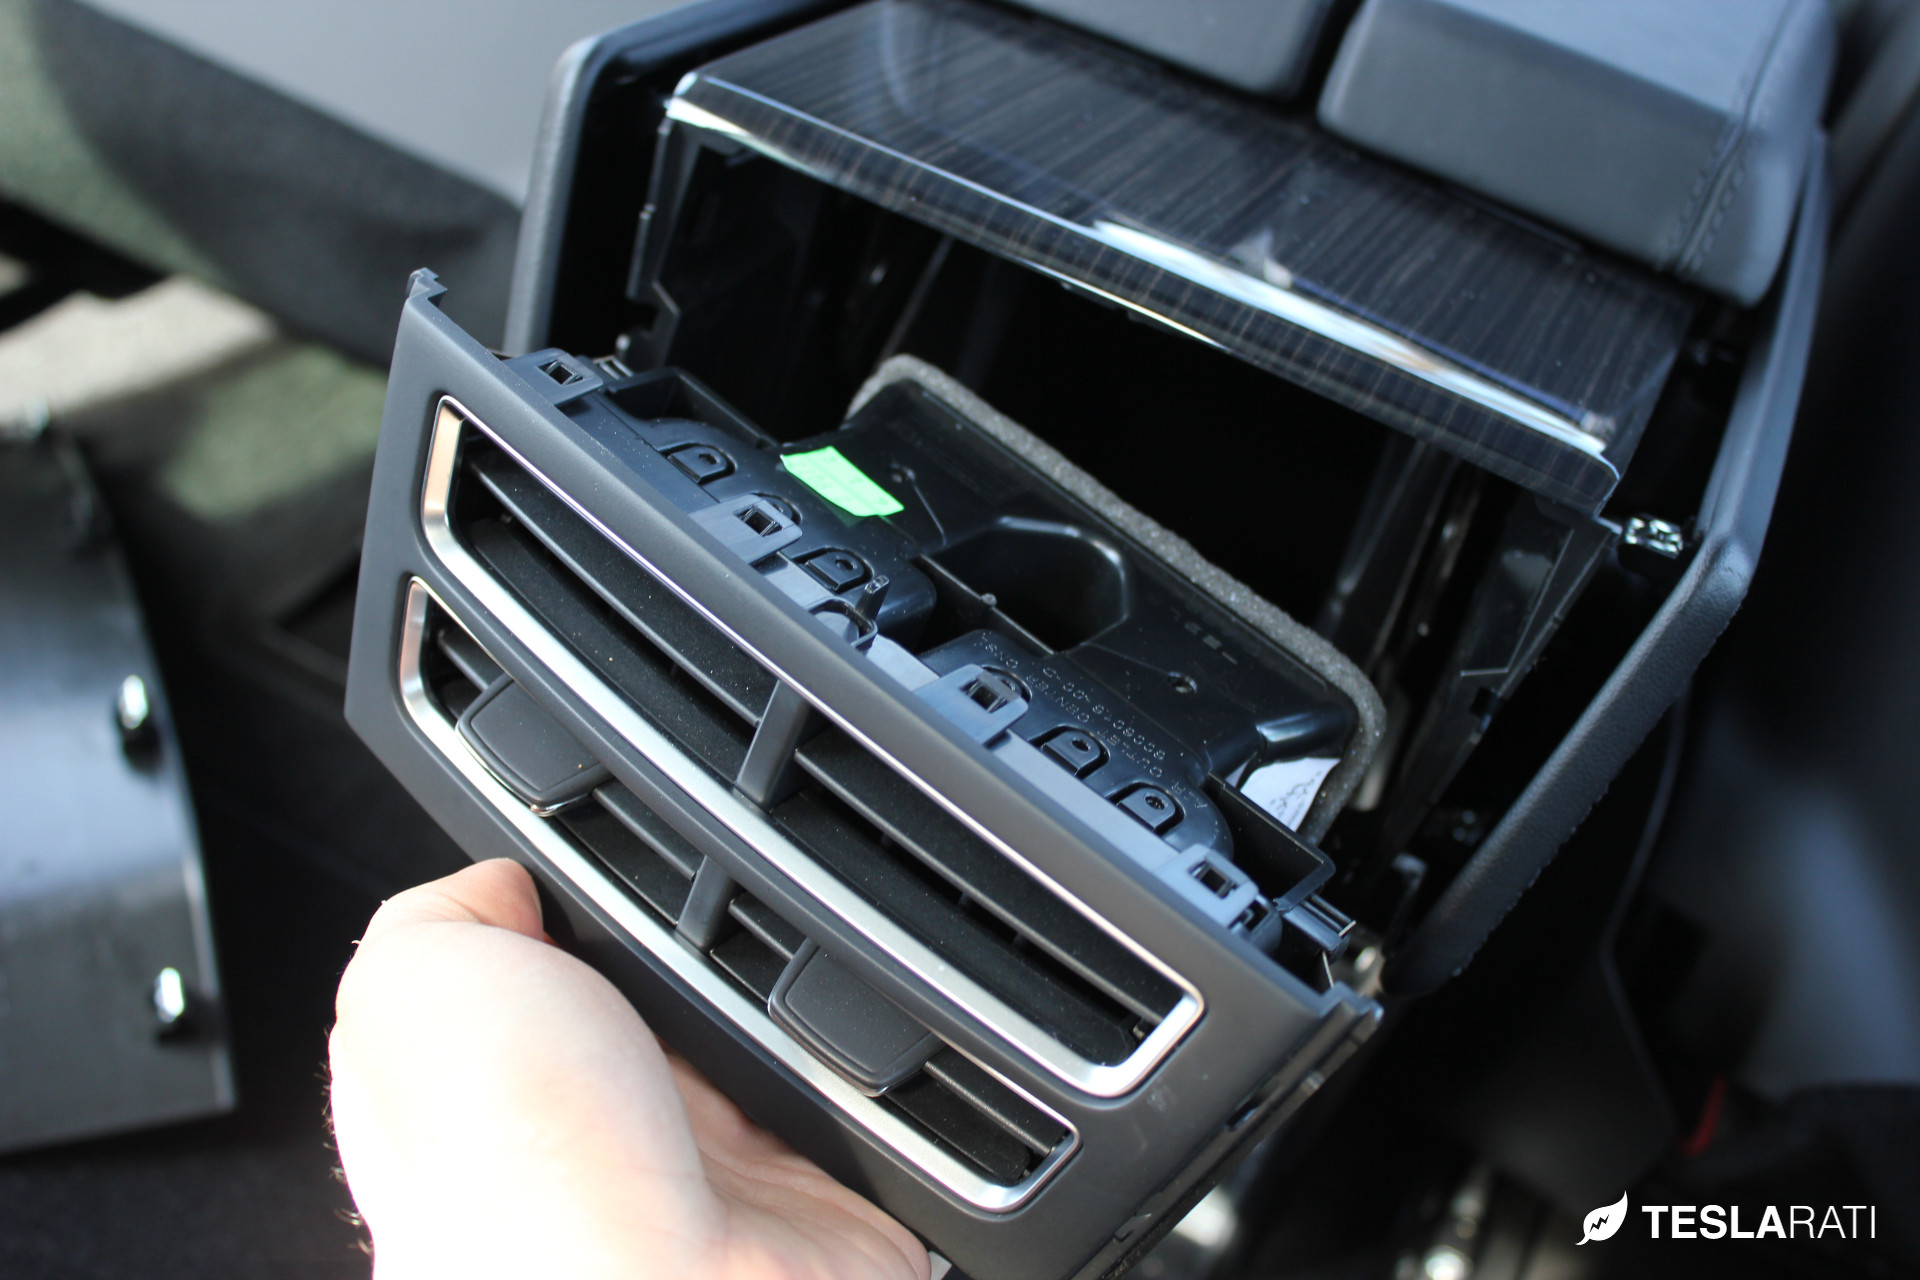
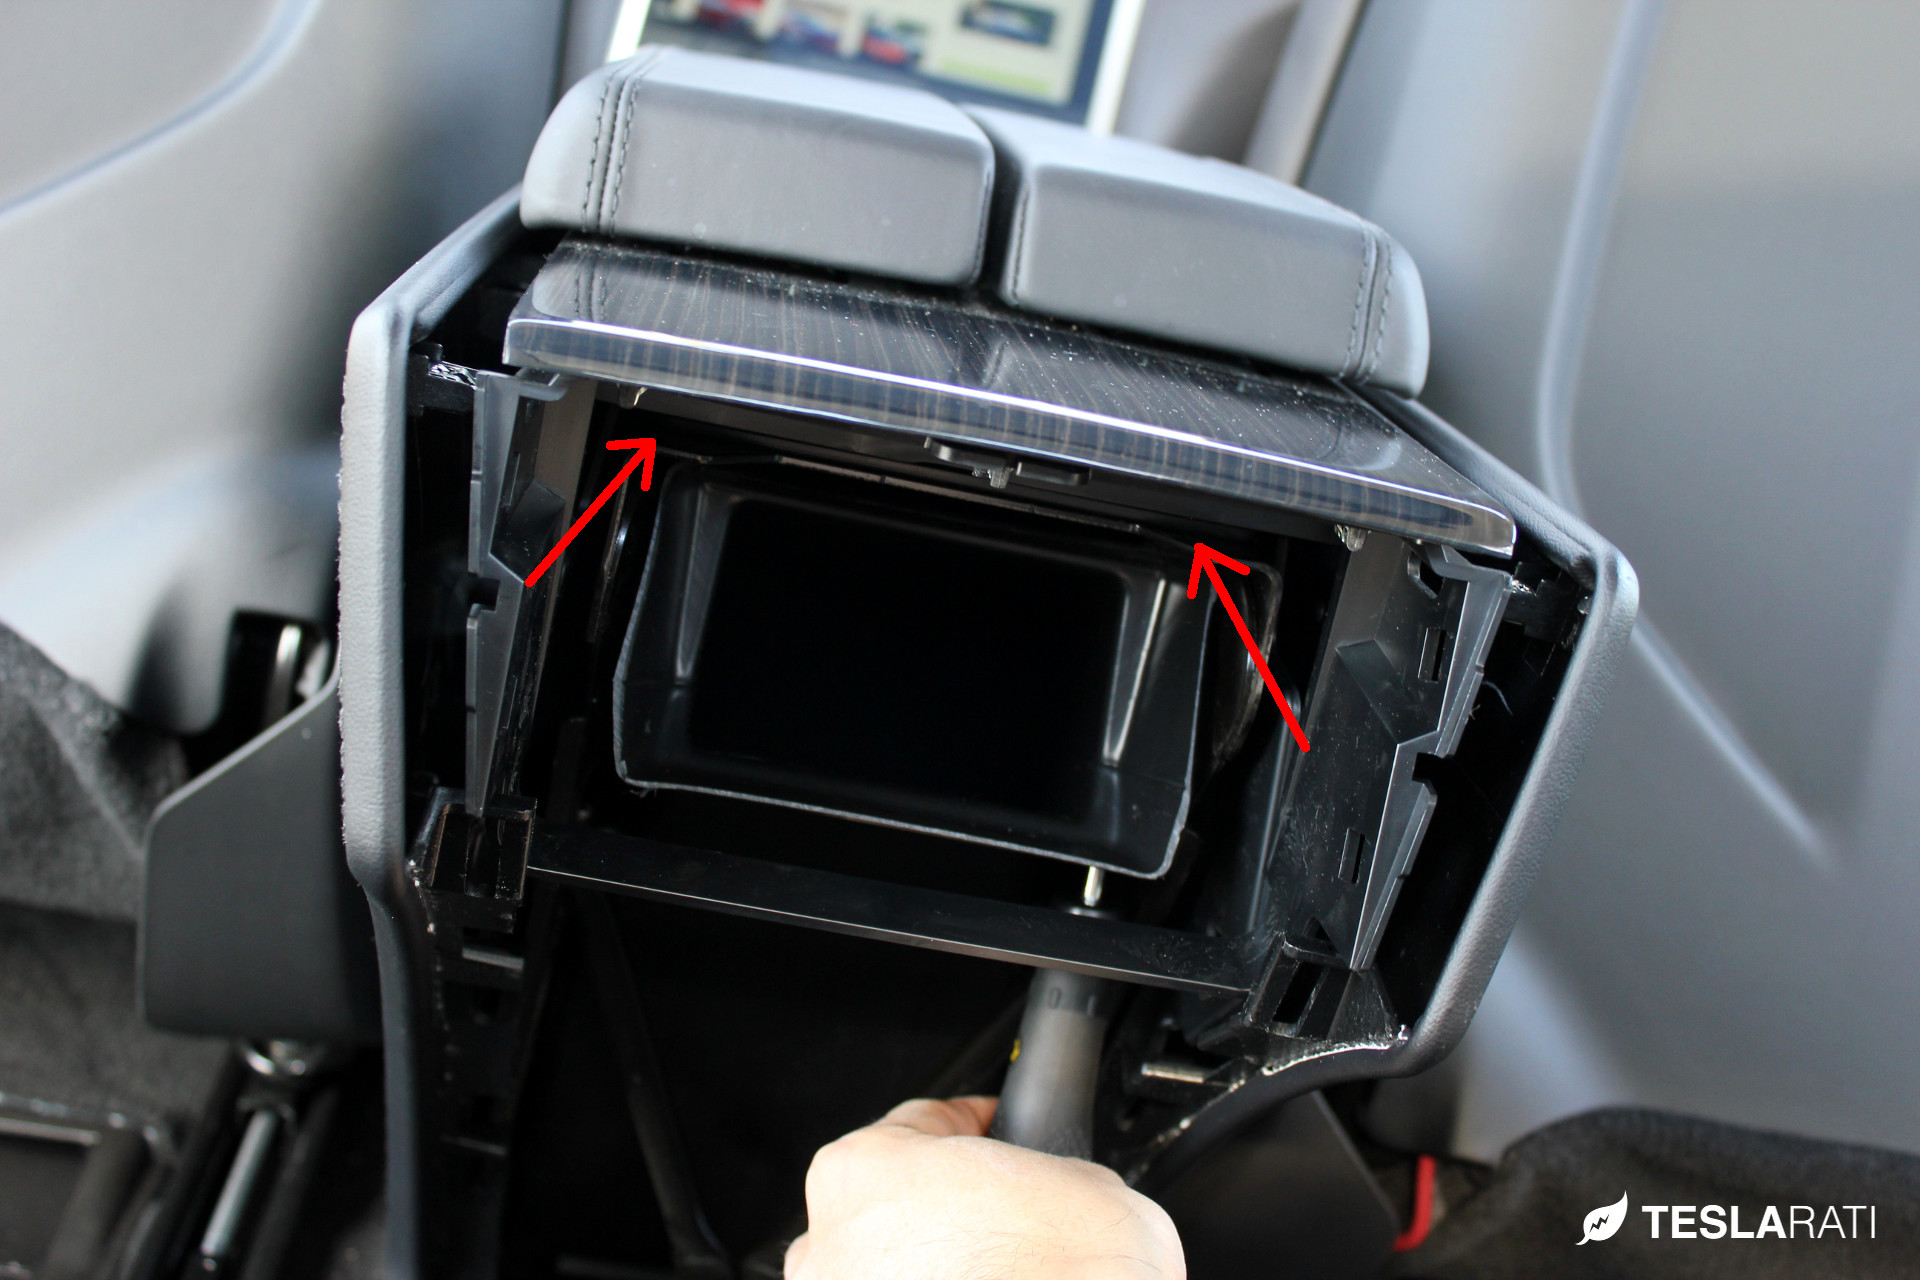
Once the screws are removed (be careful not to drop the screws into the assembly), the rear air conditioning vent assembly can be gently pulled out. A slight upward rotation as you pull may ease extraction.
Level of difficulty (1 easiest, 5 most difficult): 3
Once the back panel and rear air vent is removed, you'll need to locate and remove two T20 screws behind the flange of the air conditioning duct.
Editor's note: We were surprised to see that the entire core of the assembly was completely hollow!
Accessing these two screws will be the most difficult part of the entire installation because the screws are relatively hidden from view. The best way to access these is to lie down on the floor of the vehicle cabin while looking up towards the screws. You'll need to lie down in both directions: once with your head facing east and another time facing west.
Once you locate the screw, pull the inside of the flexible air conditioning duct to the side, as necessary, to provide greater access to the screws. Use both hands; with one hand blocking the screw from falling into the assembly while the other hand unscrews the T20 screw. Just before the screw is fully unthreaded, secure it between your fingertips so that it can be gently maneuvered out. Do not drop the screw into the assembly.
Level of difficulty (1 easiest, 5 most difficult): 5
[box type="shadow"]Tip: Reassembly will require just as much attention to detail.
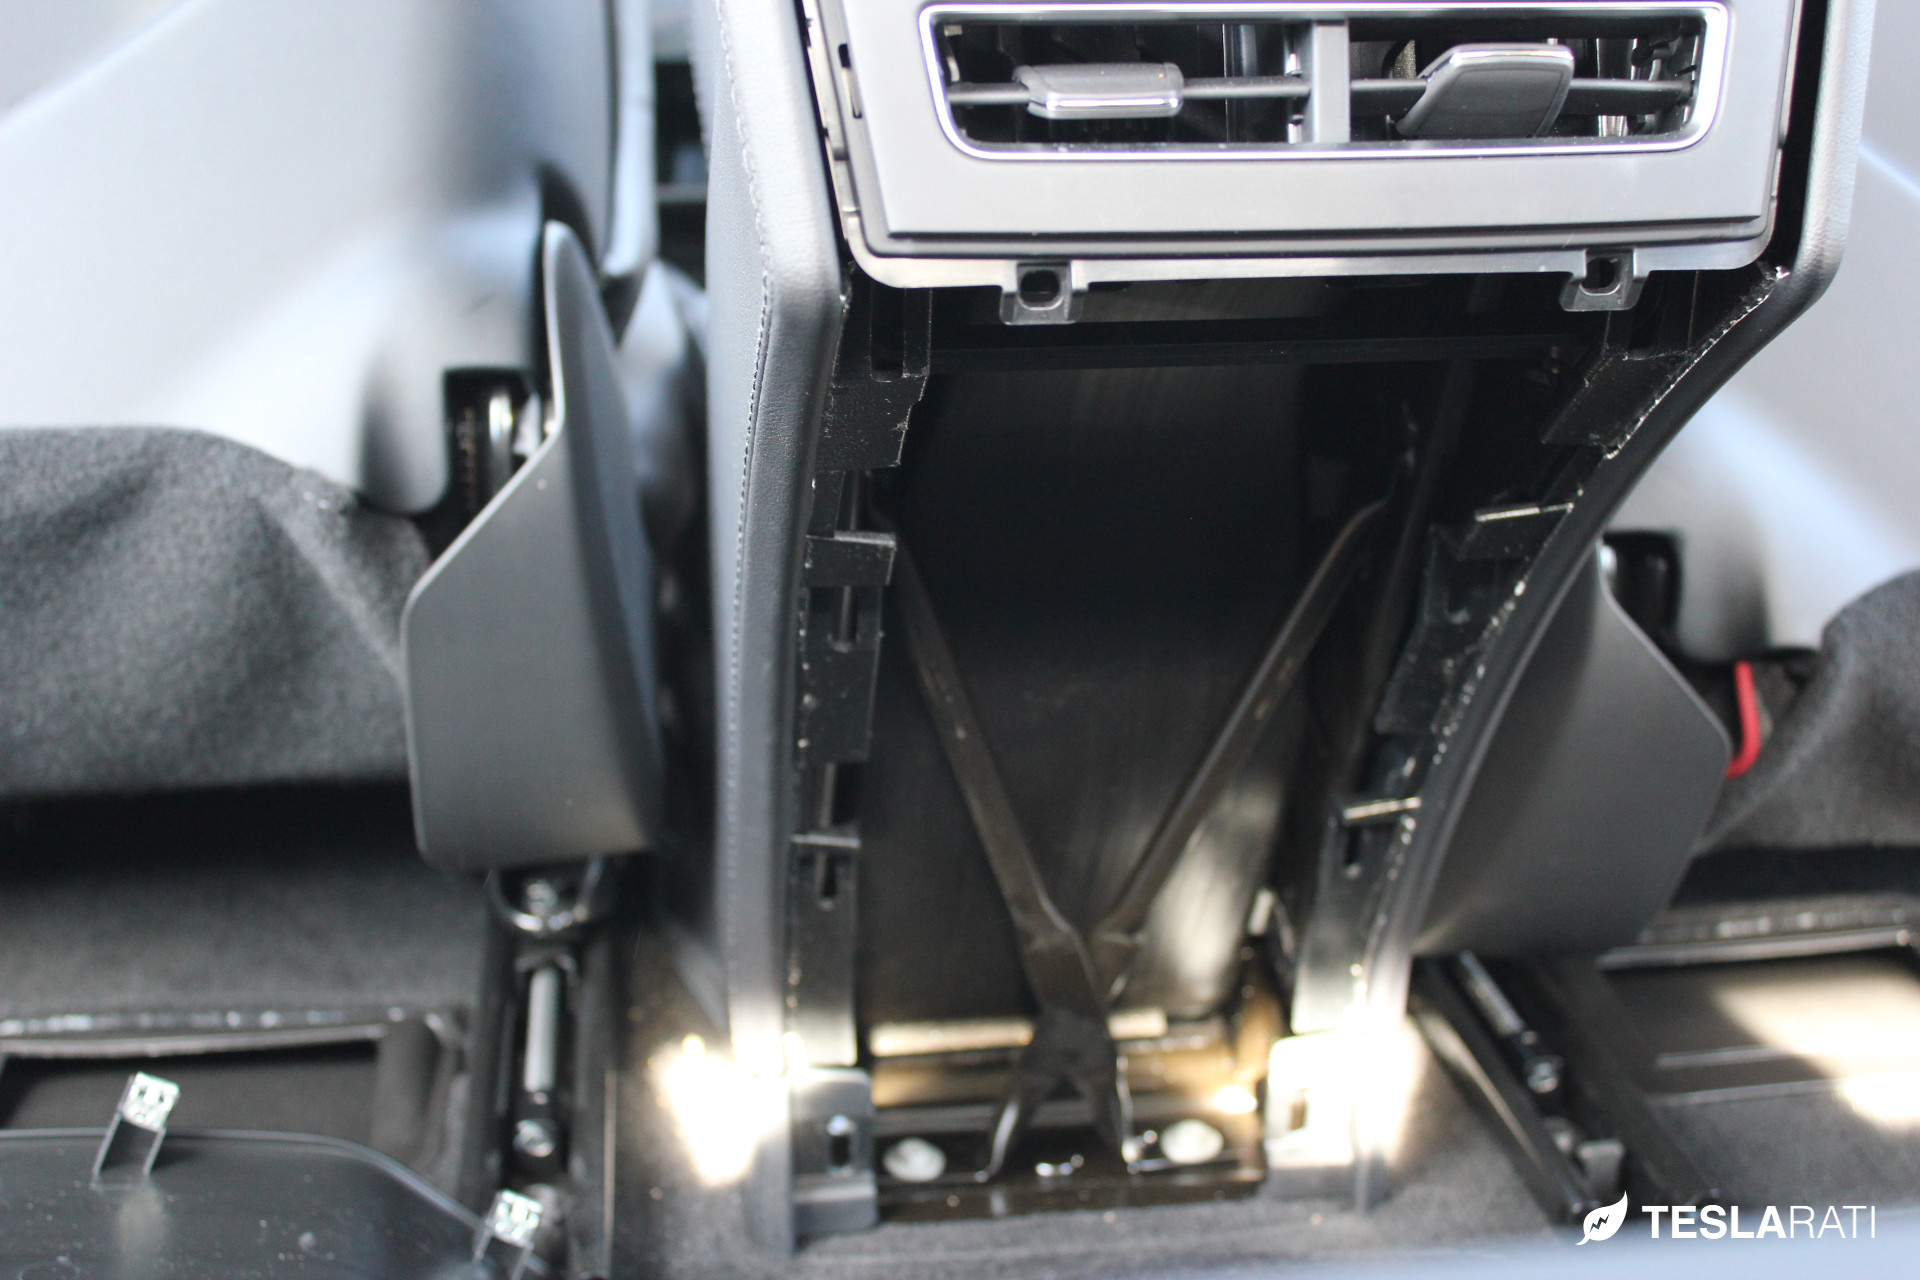
Remove the entire top portion of the central arm rest assembly by: (a) first lifting the rear of the assembly top; and (b) lifting entire assembly top simultaneously forward and upward until free of the lower portion of the central arm rest assembly.
[box type="shadow"]Tip: Thanks to a visitor submitted tip, be sure to gently pry the central arm rest assembly from the plastic front facing panel which should remain attached to the base.
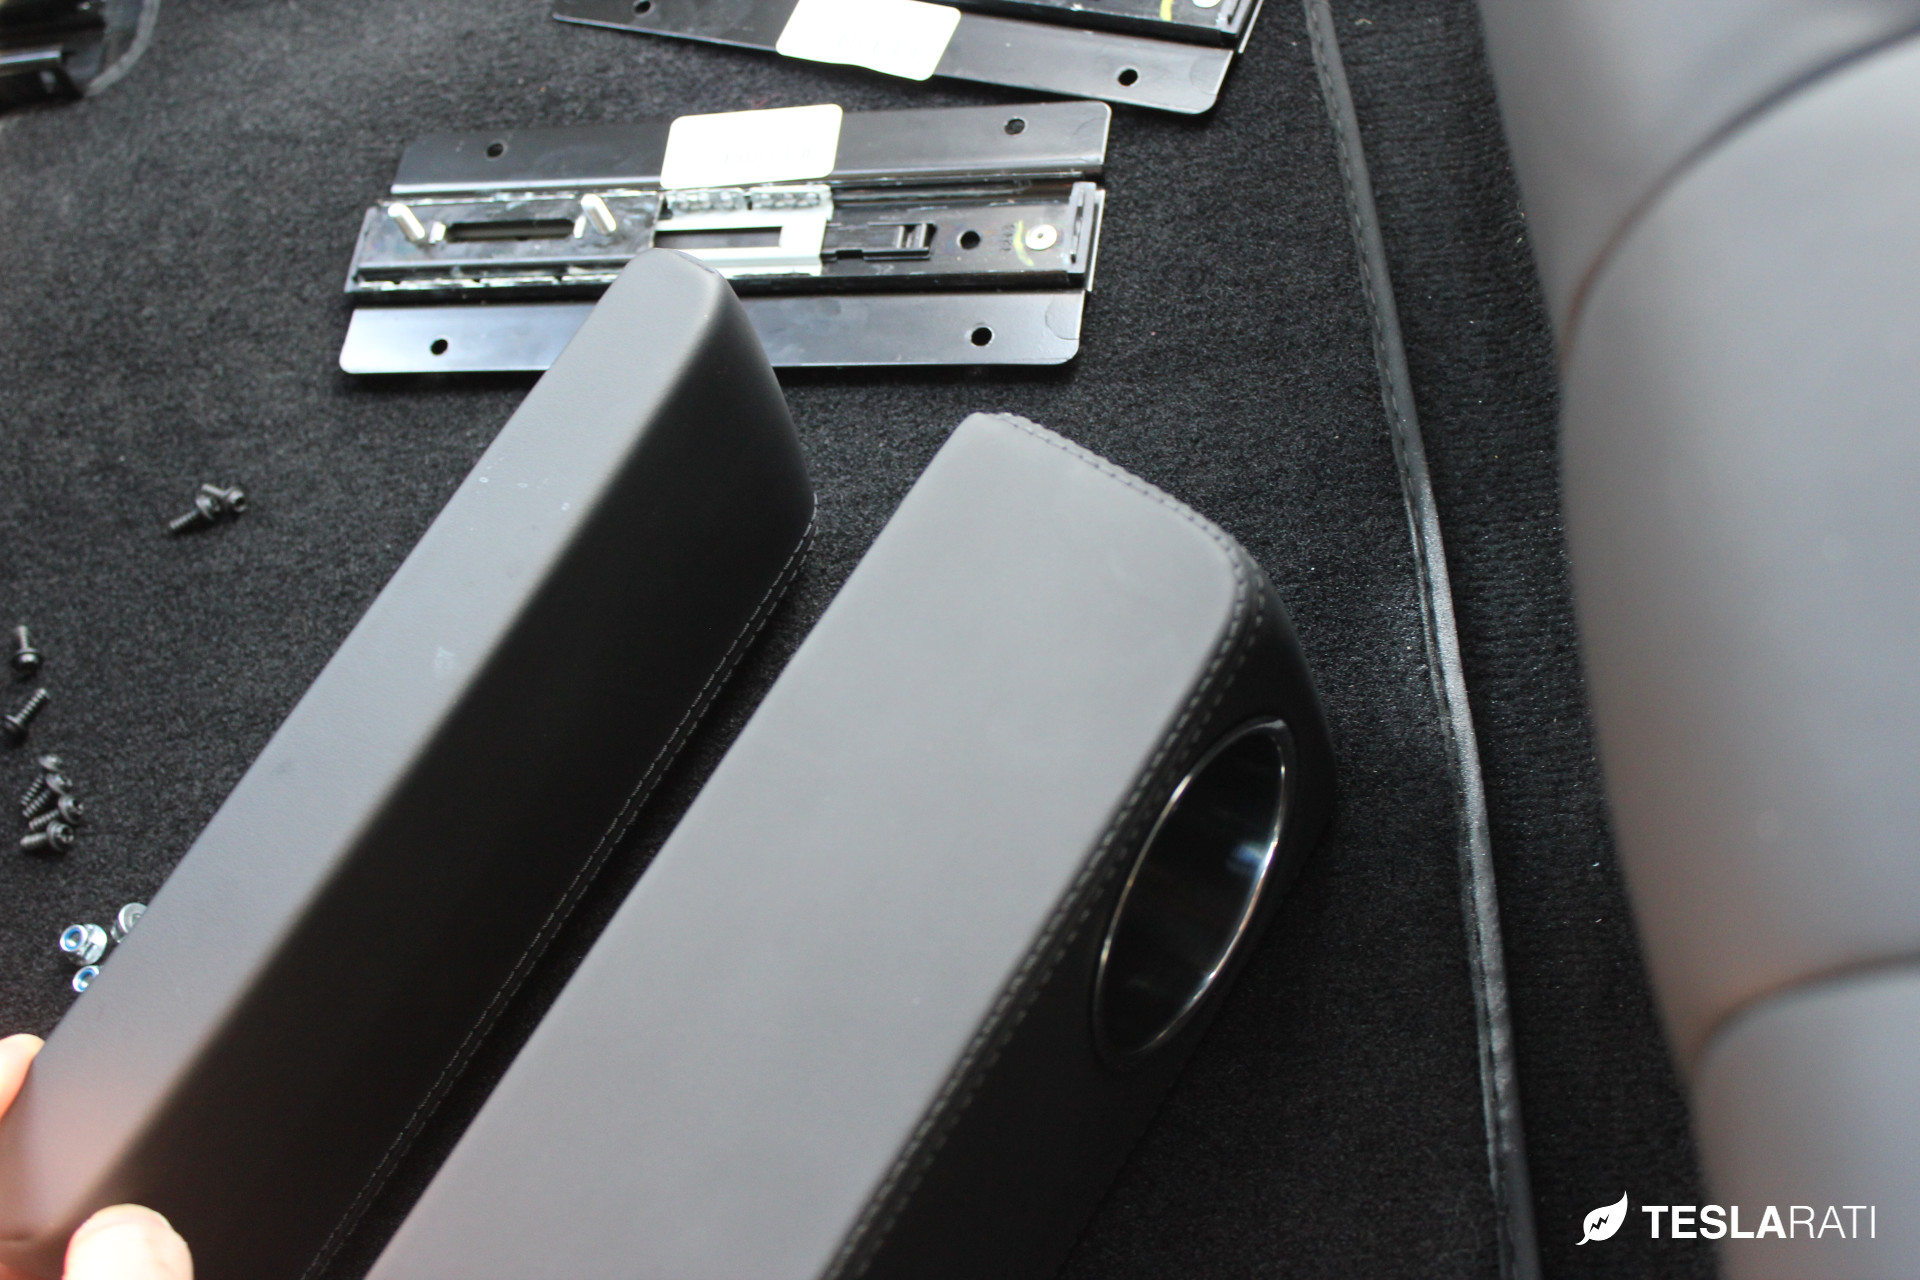
Place the armrest (cushion side down) onto the floor of the rear cabin, exposing the four nuts that hold the armrest cushions to the assembly.
Remove the four nuts using the 8mm nut driver. Lift the assembly away from the arm rests, exposing the slide mechanisms on the underside of the armrests. Using the T20 torx screwdriver, remove the screws that fasten the slide mechanism to the driver- side stock armrest.
Place the slide mechanism on the underside of the driver-side PARZ unit, lining up the slide mechanism holes with the holes in the underside of the PARZ unit. Attach the stock driver-side slide mechanism to the driver-side PARZ unit using the same screws.
Reverse all steps from above and re-assemble the entire center armrest assembly with PARZ. Installation is complete!
Level of difficulty (1 easiest, 5 most difficult): 2
[tabs slidertype="simple"] [tab]
Gently pry the central arm rest assembly from the plastic front facing panel before lifting and removing. Credit: Visitor submitted[/tab] [tab]
Top view with the armrest assembly removed[/tab] [tab]
Unscrew the four 8mm nuts from the bottom of the armrest assembly[/tab] [tab]
Remove armrest assembly from factory armrest cushions[/tab] [tab]
Unscrew T20 torx that secures the armrest cushions to the factory armrest sliders[/tab] [tab]
Replace the factory cushions with the new PARZ armrests and reattach to factory sliders[/tab] [/tabs]
Design, Specs, and Features
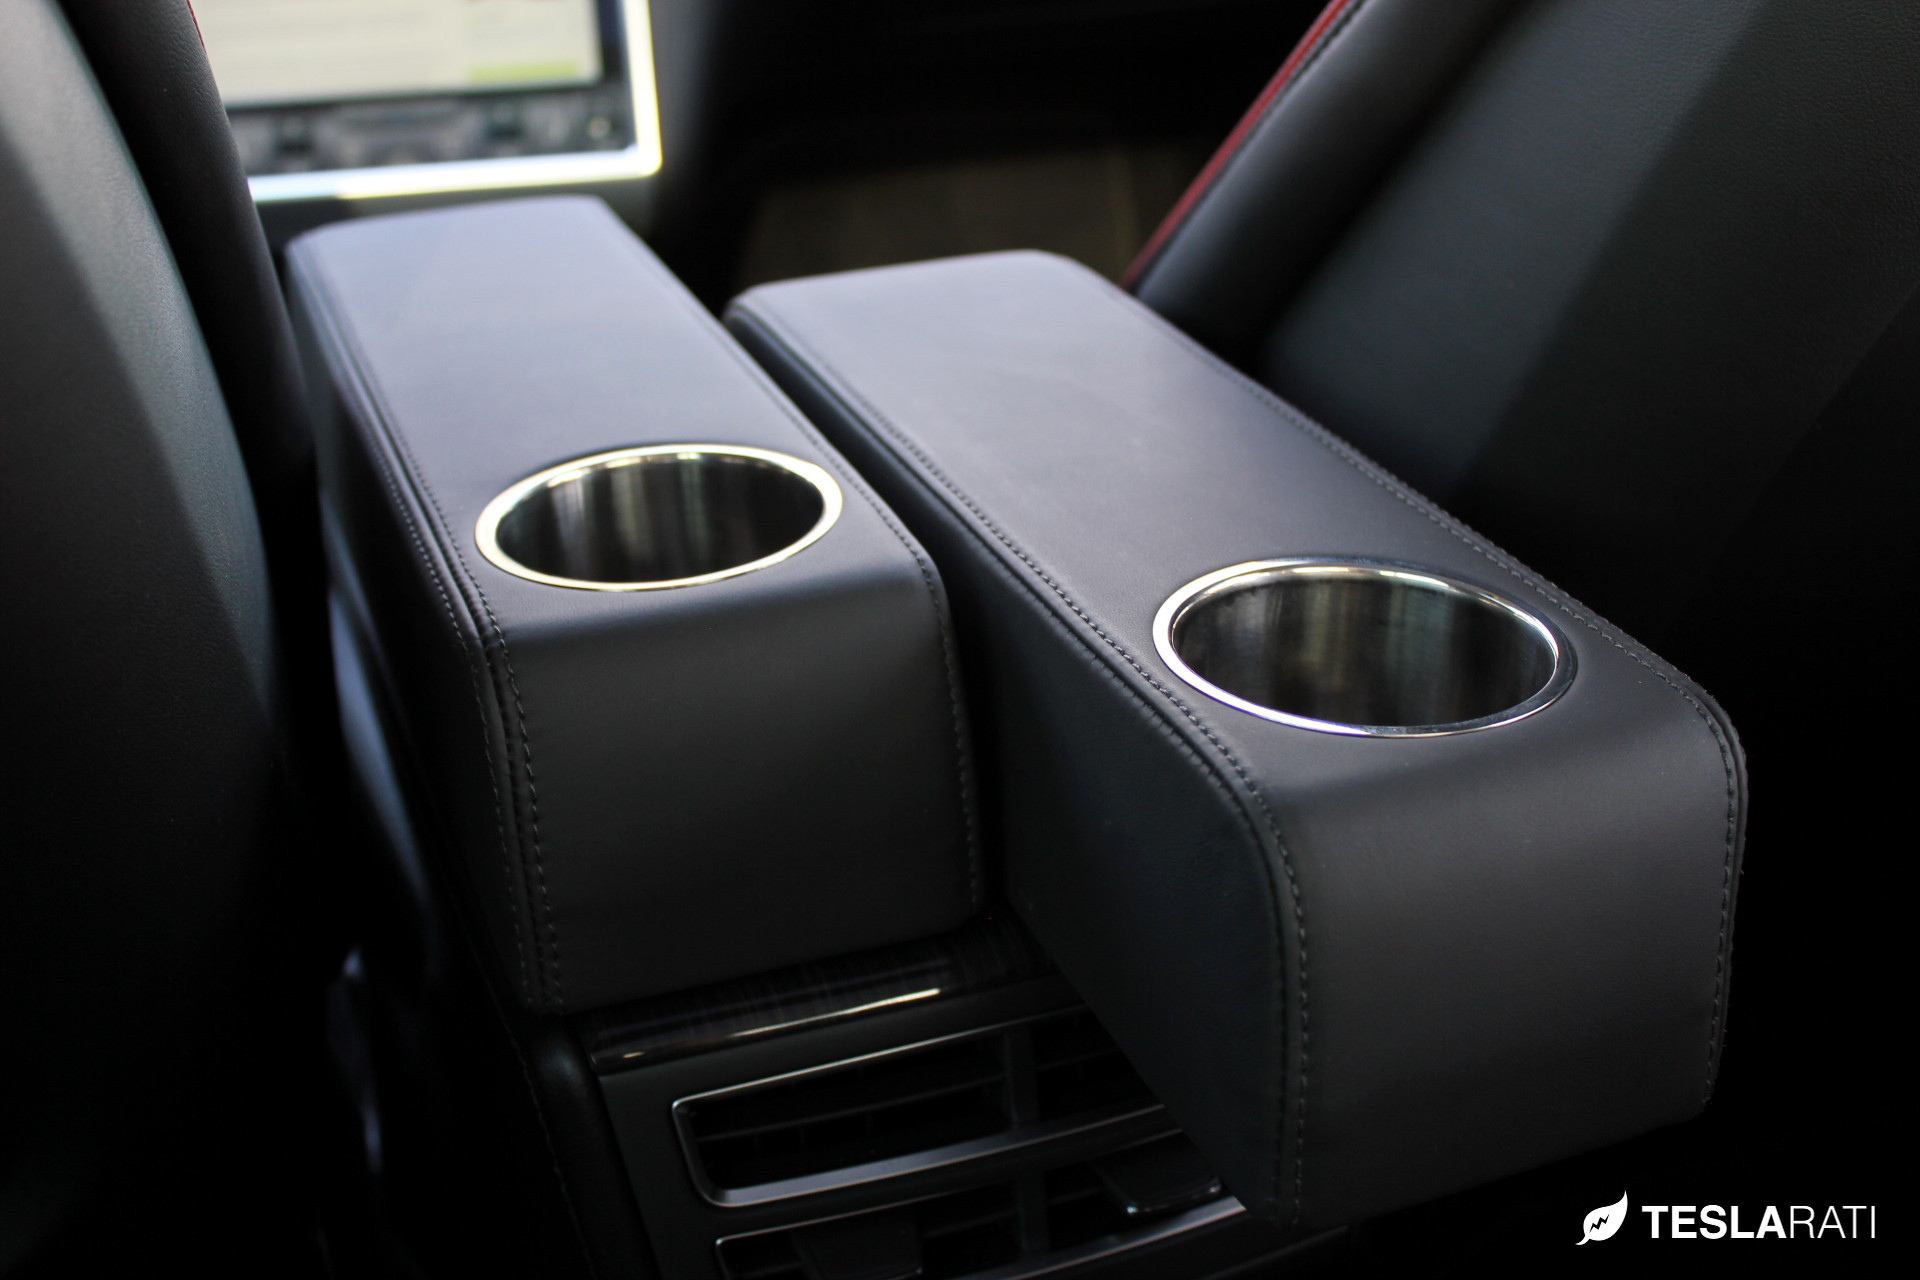
The PARZ is a true premium product as made evident by its extensive use of high-end calfskin leather and precision-molded base. We were pleasantly surprised to feel how heavy and solid the PARZ was. Each of the cup holders are machined from stainless steel and can be easily removed when needed. The cup holders are 2.75” in diameter and 2.5” deep which makes them perfect for any standard-sized coffee or canned beverage. Do we smell the potential for a future PARZ cup holder expansion accessory ala the EVannex X2?
The PARZ armrest cushions are notably taller than the factory foam armrests. Each unit measures 1 ¾” taller than the factory Model S arm rests which makes it much comfier than the factory armrest cushion, but at the same time requires a psychological adjustment period before the new height begins to feel natural.
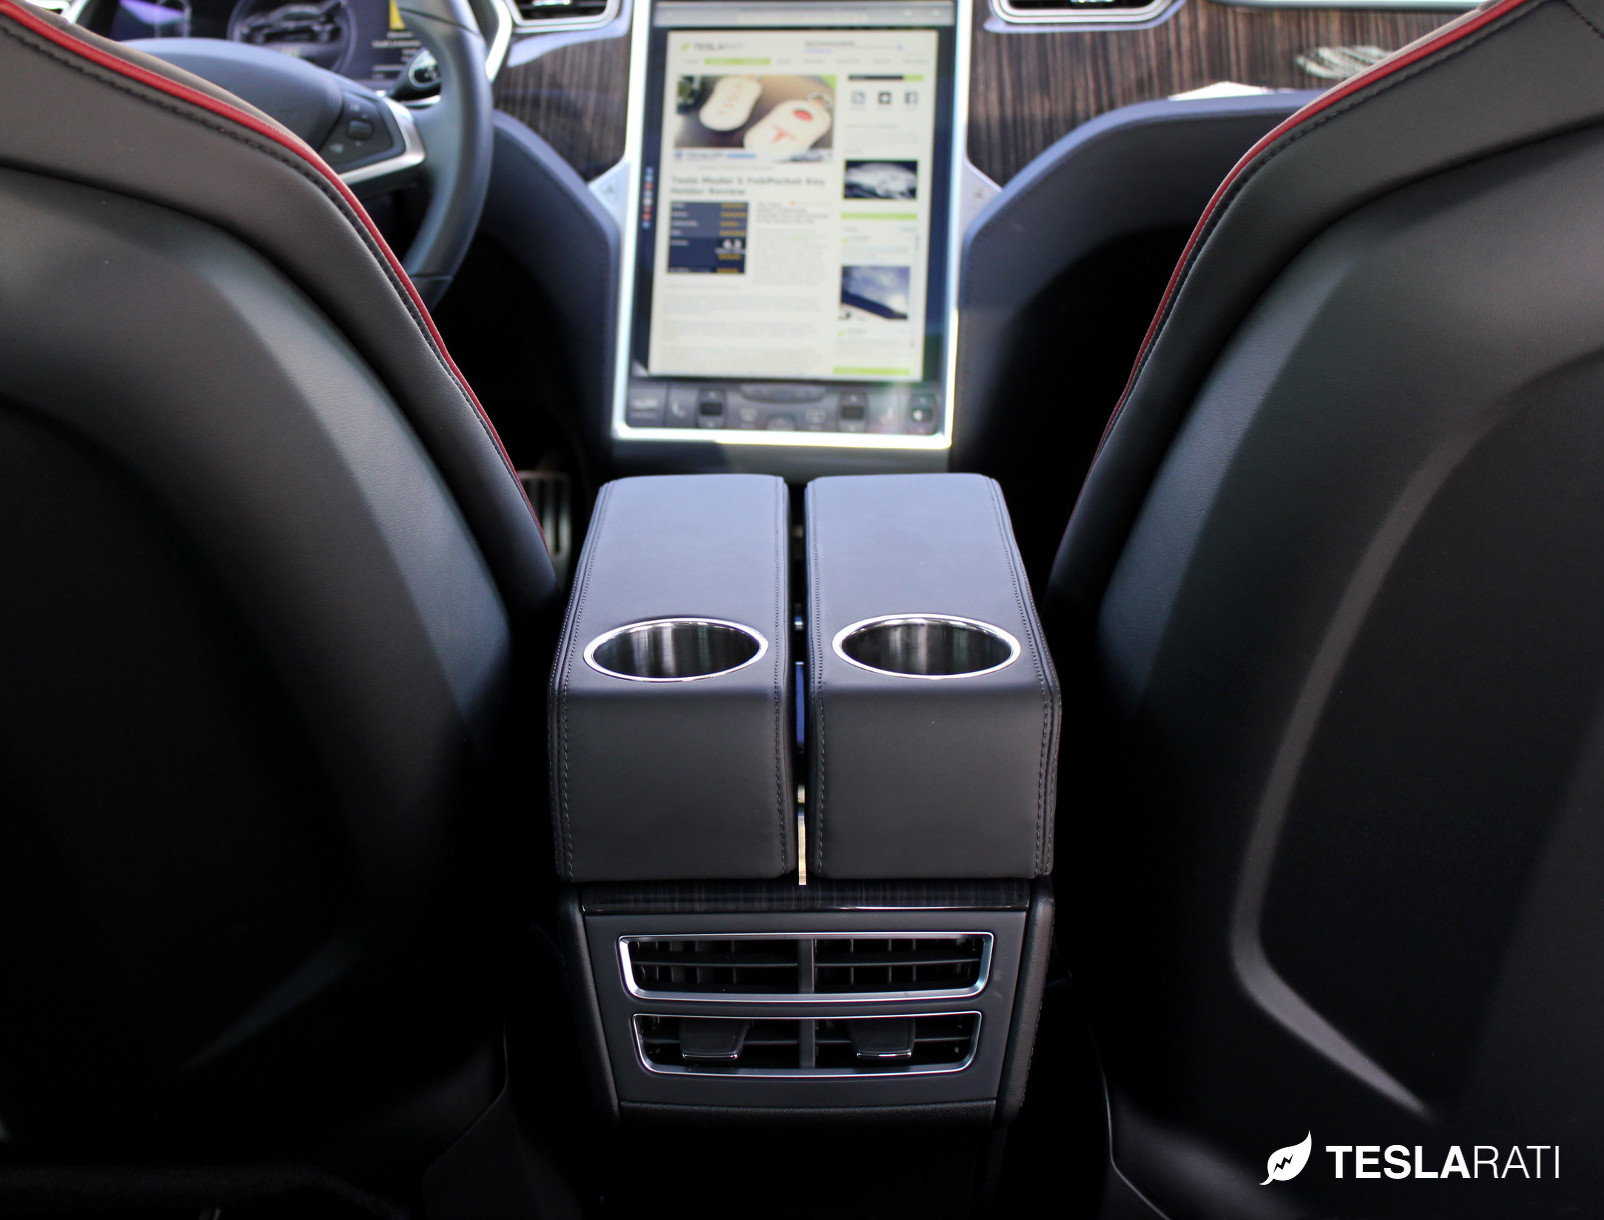
The PARZ maintains the full functionality of the factory arm rests by attaching directly to the original slider mechanism. One of the things we liked most about the PARZ armrest is the fact that the rear seat air vents are not blocked or hindered in any way. Once the armrest is extended, beverages are situated at a perfect arm's length away and will not interfere with vehicle entry and exit.
- Size: 14.5”L x 3.75”W x 3.25”H.
- Substructure: Each armrest unit is made from custom-molded, expanding, open cell, flexible 8lb., self-skinning foam mated to an ABS casting resin base.
[tabs slidertype="images"] [imagetab width="" height=""]http://www.teslarati.com/wp-content/uploads/2013/12/PARZ_Tesla_Rear_Seat_Cup_Holders_10.jpg[/imagetab] [imagetab width="" height=""]http://www.teslarati.com/wp-content/uploads/2013/12/PARZ_Tesla_Rear_Seat_Cup_Holders_9.jpg[/imagetab] [imagetab width="" height=""]http://www.teslarati.com/wp-content/uploads/2013/12/PARZ_Tesla_Rear_Seat_Cup_Holders_8.jpg[/imagetab] [imagetab width="" height=""]http://www.teslarati.com/wp-content/uploads/2013/12/PARZ_Tesla_Rear_Seat_Cup_Holders_3.jpg[/imagetab] [imagetab width="" height=""]http://www.teslarati.com/wp-content/uploads/2013/12/PARZ_Tesla_Rear_Seat_Cup_Holders_4.jpg[/imagetab] [/tabs]
Conclusion
The Premium Arm Rest Zarf* (PARZ) is one of the most unique and well-crafted Tesla aftermarket products we've seen to date. The armrest is solid and integrates seamlessly into the existing factory sliders. The design for the cup holder receptacle provides rear seat passengers a convenient way to secure their beverages without having to worry about accidental spillage - especially great for families with kids.
Installation can be a bit daunting to those that are less handy, but at the same time, it can also be a "fun-tastic" project for any do-it-yourselfer.
The PARZ comes in three colors that perfectly match the interior upholstery of the Model S. At a price of $665, some may argue that it's a bit steep, but we don't think that's a fair assessment until one actually sees and feels the product in person.
Learn more about the PARZ at EVannex.
Questions?
Leave us a question or comment below and we'll be sure to respond!