DIY
DIY Tesla Model S and X Ultra-Bright LED Interior Light Kit
The Model S has interior lights in most of the right places – puddle lights beneath the doors, foot well lighting, trunk and frunk lighting – but the problem lies in its inability to provide useable light. This is especially the case in the trunk area where its near impossible to see your belonging in the dark of night. I wouldn’t classify myself as being the most handy person, but when I came across a thread discussing an aftermarket Ultra-Bright LED interior lighting kit, I decided to flex my do-it-yourself muscles and give it a go.
Looking for Ultra-Bright LEDs on the Model X? See our review here.
My DIY skills mainly centers around anything that has a keyboard and monitor. Anything outside of that is a crap shoot. My wife measures my success by counting how many parts I damage when tackling a project, which may include body parts. There’s the “1 finger job” (1 damaged finger) all the way up to projects involving leg injuries. I’m just not that handy, though I must say that my Blackvue dashcam project came out pretty nicely.
This LED interior lighting kit was simple enough to make it the perfect DIY Tesla Model S project for me.
Ultra-Bright LED Interior Light Kit
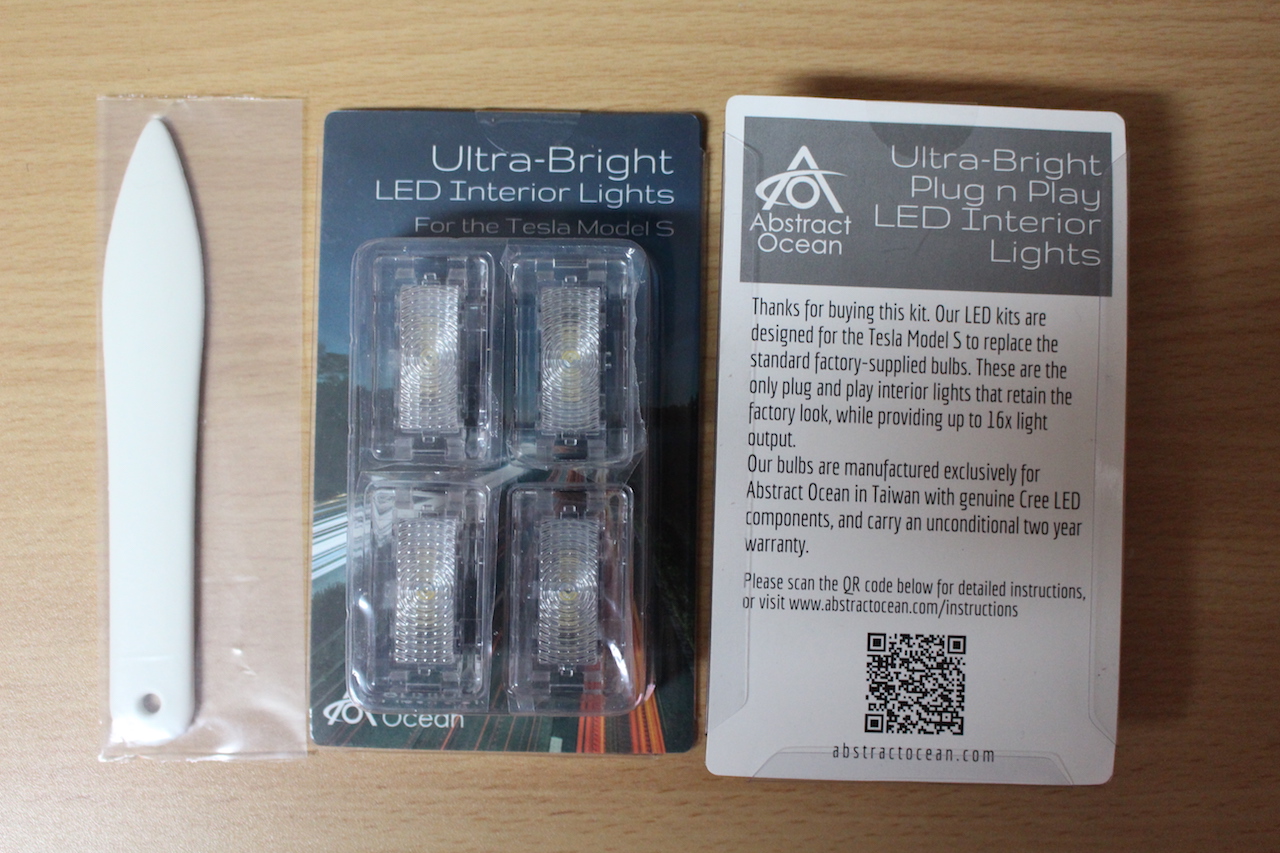
Abstract Ocean, best known for their “Fobpocket” key fob holders, also sells ultra-bright LED interior lights for the Model S and X. The light assemblies are drop in replacements for the Tesla OEM lights and sold in sets of 1, 4, 8 and 13. At $12.99 a bulb ($11.50 on Amazon Prime) it’s certainly not the cheapest but then again I don’t really have a frame of reference for what Ultra-Bright LED assemblies should cost.
Before you order the lights, check how many you will need. This depends on the age of your Model S and whether you have the premium interior lighting package or not. The red dots in the picture below (courtesy of Abstract Ocean) show the possible locations for interior lighting:
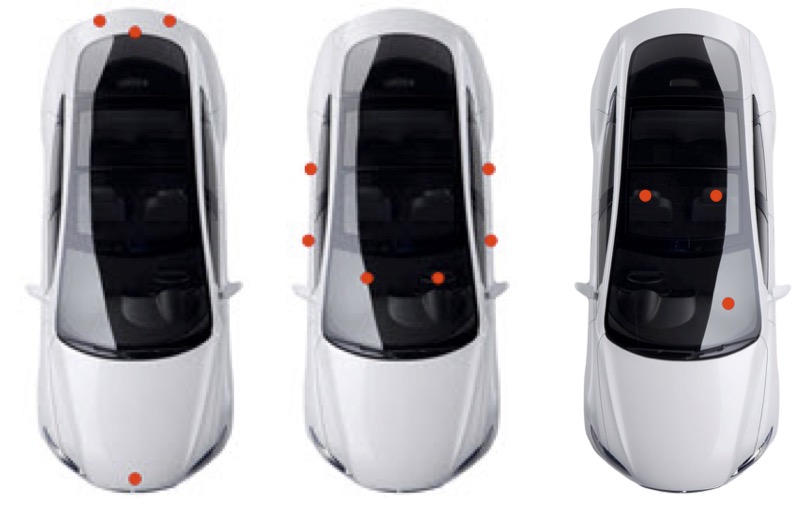
In some cases, even if you don’t have the premium interior lighting package and are missing some lights, you may be able to add additional lighting by following the excellent installation instructions outlined on Abstract Ocean’s site. On my Model S, I have the factory premium interior lighting package which has 13 light assemblies.
Each light is a direct replacement for the factory light in your Model S, not to mention they’re 16x brighter. Abstract Ocean has this to say about the brightness:
Bear in mind that perception of light is not on a linear scale, so although technically 16x brighter, the perceived reality will be less than that, as most of the interior surfaces tend to absorb light. The reality though, is that these make a dramatic difference to the lighting in your Model S
In addition to the lights, there’s one more item you’ll want to have handy and that is the spudger tool which will aid you in popping out the factory light assemblies.
Installation
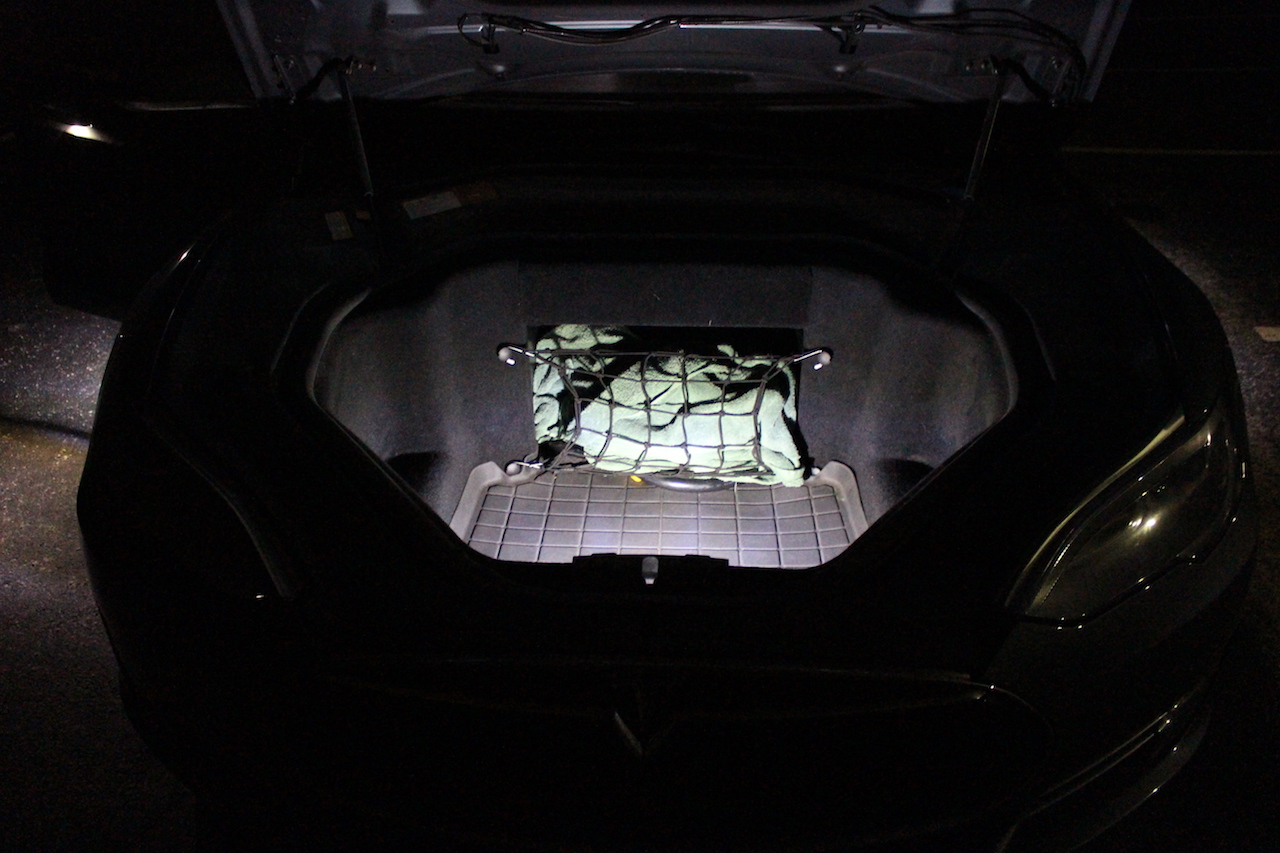
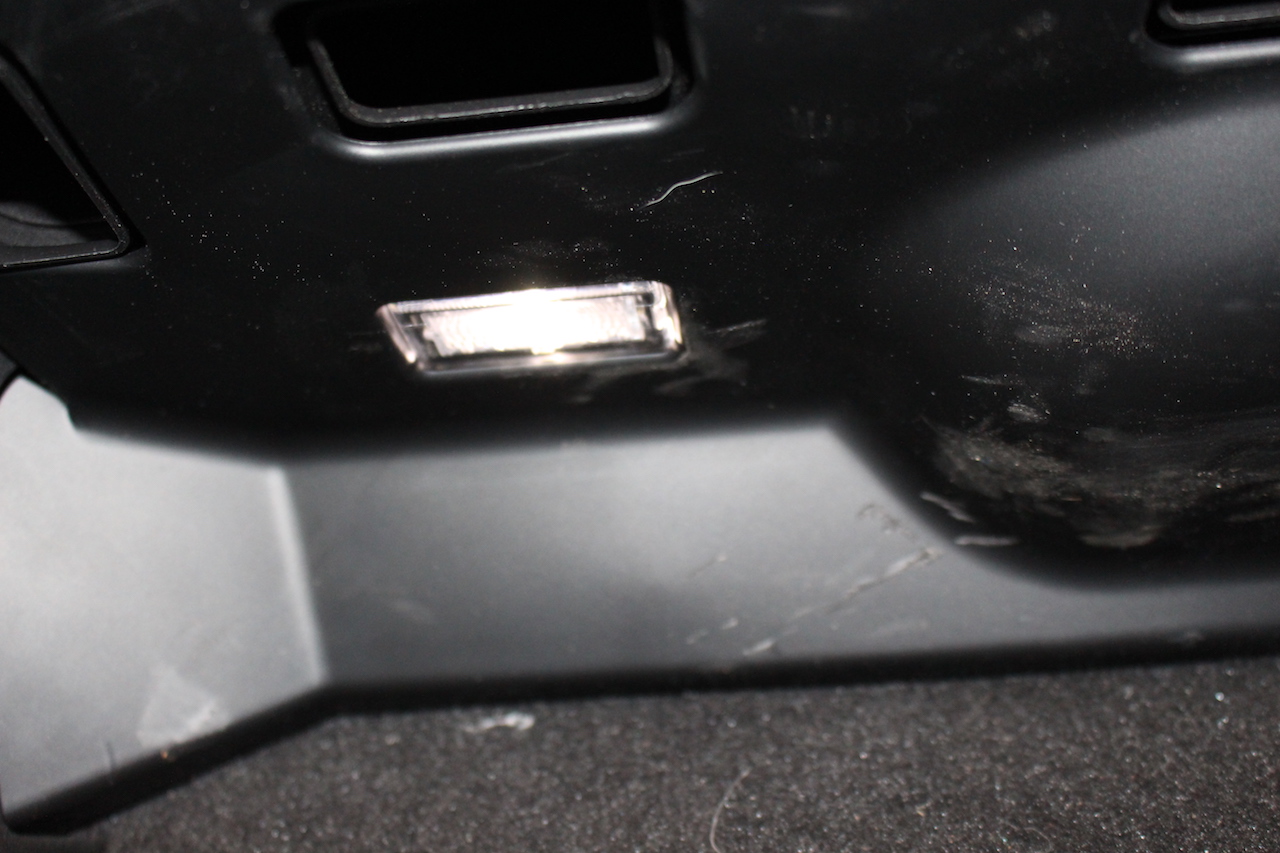
Trunk Ultra-Bright LED Lighting
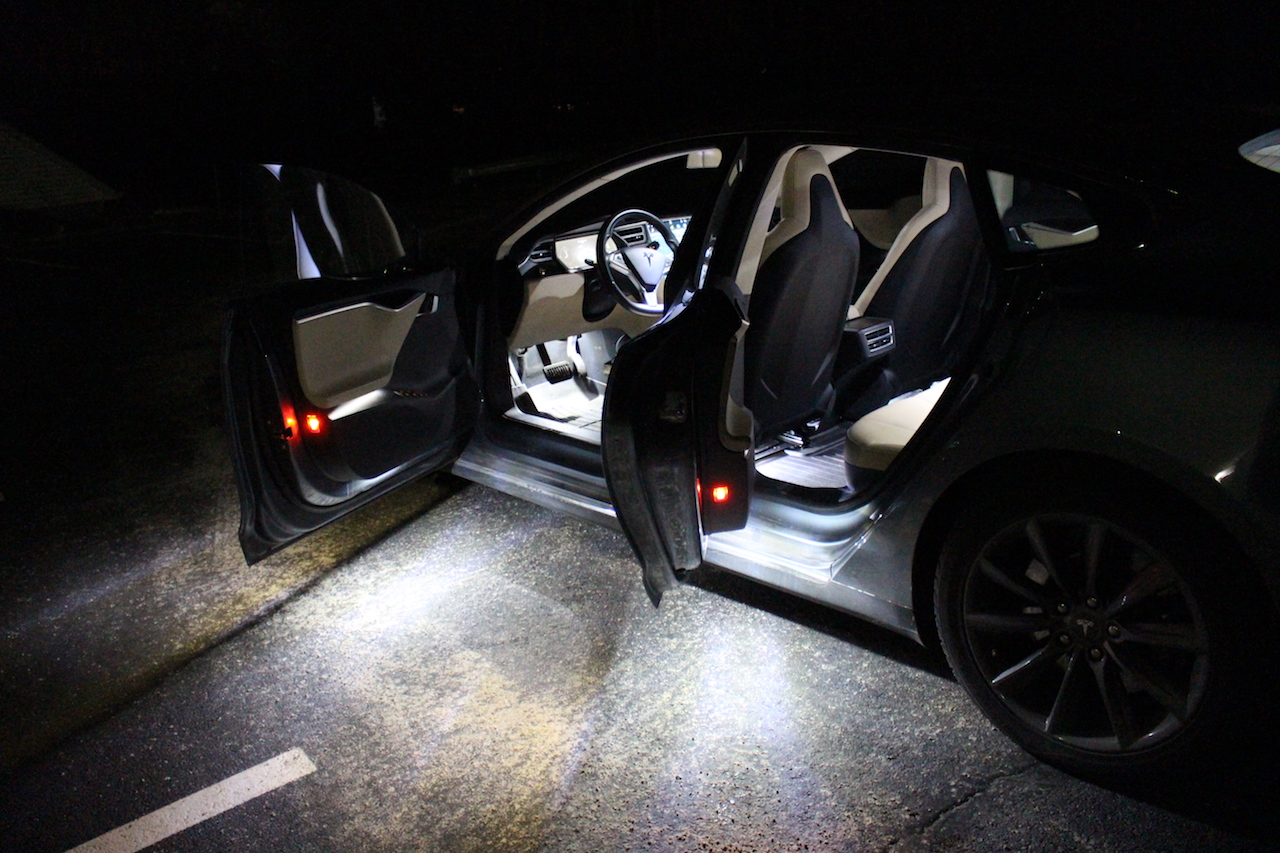
The Abstract Ocean installation instructions break down the installation into 5 parts in increasing levels of difficulty. I was short one bulb so I only did 4 parts but none of them were beyond my mediocre skill level. The first part of the instruction guides you though the installation of the trunk light. This is an excellent place to start as the lights in this location are the most accessible, and serves as a good place for practice. This is also where you’ll become familiar with prying the fixture out using the tip of the spudger tool.
The trunk lights are easier to remove since they’re pushed into the soft carpeted trunk linings versus being deeply recessed into hard plastic. I found that climbing into the trunk made for better access to the lights.
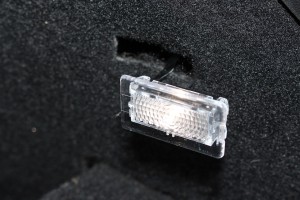
To remove a light, you pry from one side (try the other if one side seems too difficult) and then gently pop the light assembly out. Each light has a cable that clicks and latches into place on the light. Depress the latch and pull the cable off. Replace the factory light with the new LED assembly.
Once installed you will notice a drastic difference in illumination.

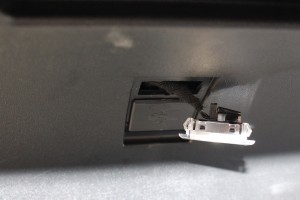
Installing the Frunk light
The front trunk (frunk) has just one interior light right at the front of the frunk making it slightly more difficult to access just because of the angle in which your body is positioned when facing the car. But once you get the spudger tool in place, popping the light out is fairly simple.
As an aside I’ve noticed that the inside of my frunk gets pretty dusty/dirty over time even though I rarely open it. I suspect it isn’t well sealed from the elements. I’ve never noticed it to be wet inside, but there is an accumulation of dust and dirt that I wouldn’t expect. I keep extension cables/adapters in there so its not a major concern but if you keep groceries or something else in there you may want to keep an eye on it and perhaps ask Tesla if its sealed correctly.
Anyhow, here’s the Ultra-Bright LED light installed in the frunk.
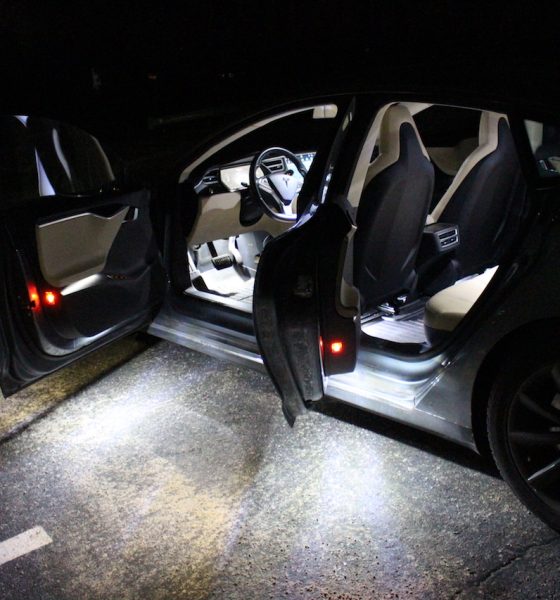
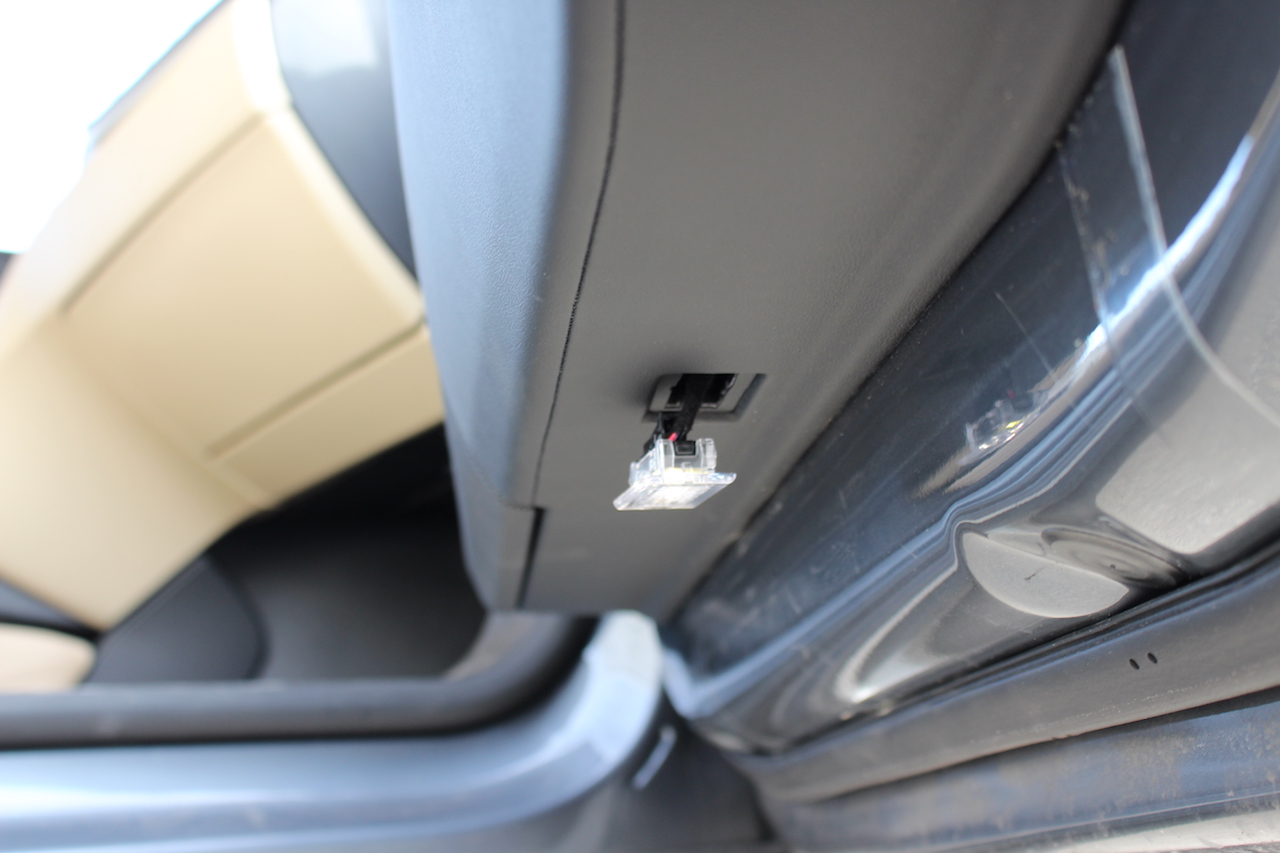
Installing Puddle lights
On the bottom of each of the four doors is what Tesla calls a “Puddle light” which helps illuminate/puddle the area where you step in and out of your vehicle. These puddle lights come with the optional Model S premium interior lighting upgrade.
Popping these lights out is simple, but once again getting to it is tricky since they’re mounted upside down beneath each door. I found that laying down on the floor while looking upwards was the best way to gain access. Having a blanket, towel or a nice clean garage floor to lay on would help.
Installing the foot well lights
Difficulty level 4 (still pretty simple) is upgrading the foot well lights. Again, this is all about gaining access and perfecting your angle of attack. The front passenger footwell light is just above the are where a passenger’s feet would be. I found this one hard just because I’m right handed and the light is on the left. The solution was to lay down on the floor mat and look upwards towards the light.
The driver’s side foot well light was easier as it was on my right side, but the trick with this one is maneuvering around the pedals. The light is right above the accelerator pedal so you have to reach in quite a ways. Get creative with your angles and you’ll be able to pop the light out with ease.
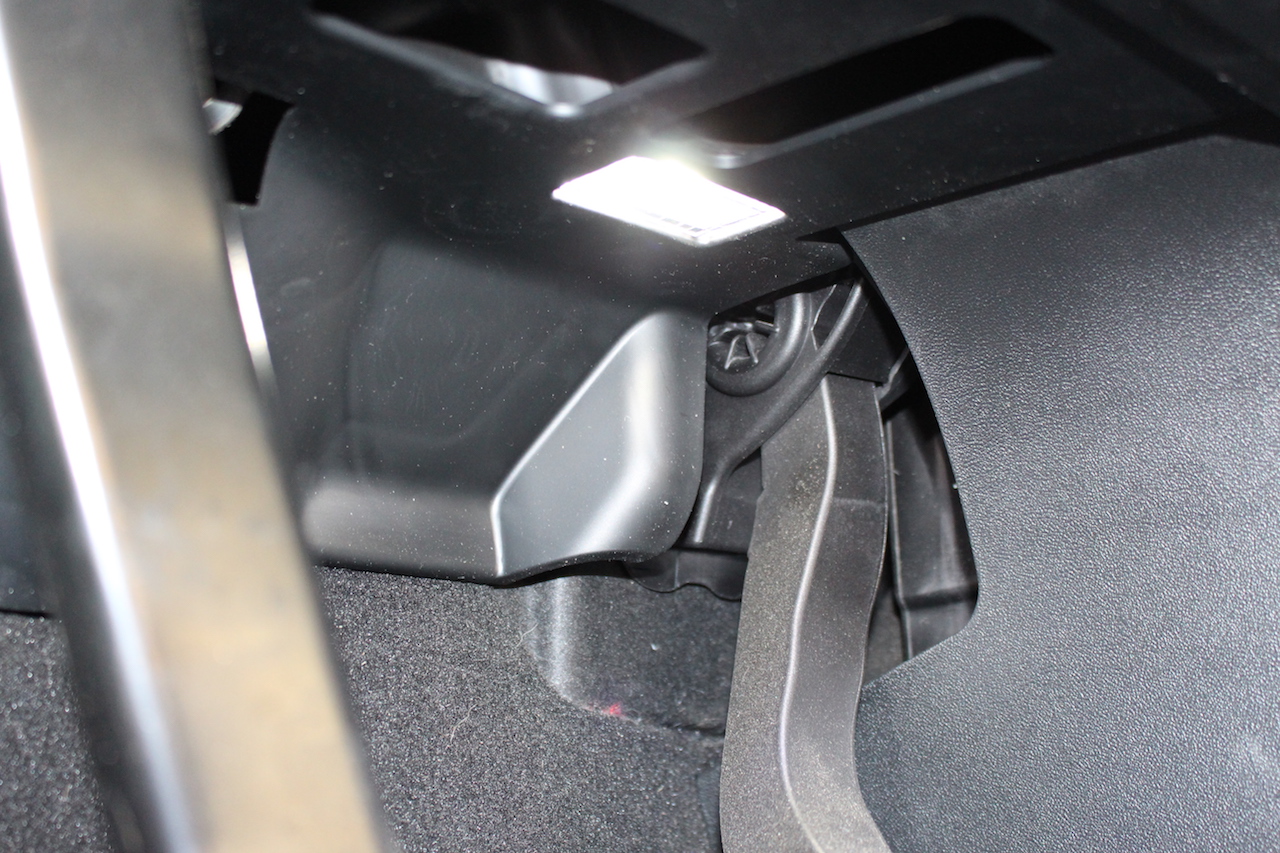
It turns out these front foot well lights were a warm up for the Boss part of level 4 — the rear footwell lights. These lights are attached to mountings that clip onto a horizontal bar located under the front seats. To access these you want to raise the rear of the front seats all the way up (but not move them forward).
Followed by carefully pulling each side of the light bracket towards you until it pops off the bar. Undo the cable and separate the light from its plastic mount.
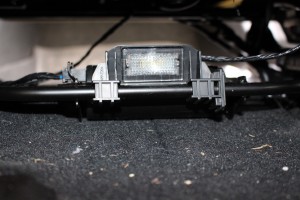
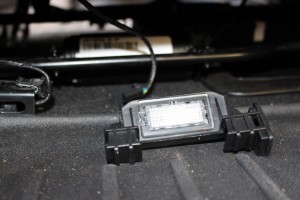
Getting the light out of the plastic mount without doing damage takes a bit of finesse but if I can do it then so can you. My suggestion is to wedge the tip of the spudger in and then slightly turn it until the edge of the light sticks out enough for you to grab and remove. Just be careful as its pretty easy to damage the plastic mount. Abstract Ocean sells spares which evidently can also be used to add rear footwell lighting to a Model S without the premium interior lighting package. Once you have the light out, popping the new one in is easy. Re-attach the cable and then press the clips back onto the bar.
The puddle and foot well lights together make for a huge difference.

Installing the Glove box light
I only had 12 bulbs so I didn’t get a chance to take on level 5. The instructions make it sound a bit more difficult than the others as the space is tight and access is limited, but I suspect it wouldn’t be too difficult if you play around with your angles.
Summary
The Abstract Ocean Ultra-Bright LED Interior Light Kit provides a simple and elegant way to improve the interior lighting in your Model S. The lights are direct replacements for the factory lights, and their excellent installation instructions provide you all the help you need to get the job done. Even for a non-handy but self made DIY’er like myself. The lights are also available on Amazon and eligible for free 1-2 day shipping if you have Amazon Prime.
In daylight the lights are noticeably brighter, At night they make the world of difference. It took me approximately 30 minutes to replace all 12 lights and that included the time it took for me to document this process by taking photos.
In the end it brings me great pleasure to say this was a zero finger job – no body parts were damaged during the making of this project (a minor miracle) and, perhaps more importantly, I didn’t do any damage to my Model S 🙂
I’d definitely recommend the lights. They’ve been selling like hot cakes across TMC so there may be a bit of a wait to get them. Well worth it in my opinion.
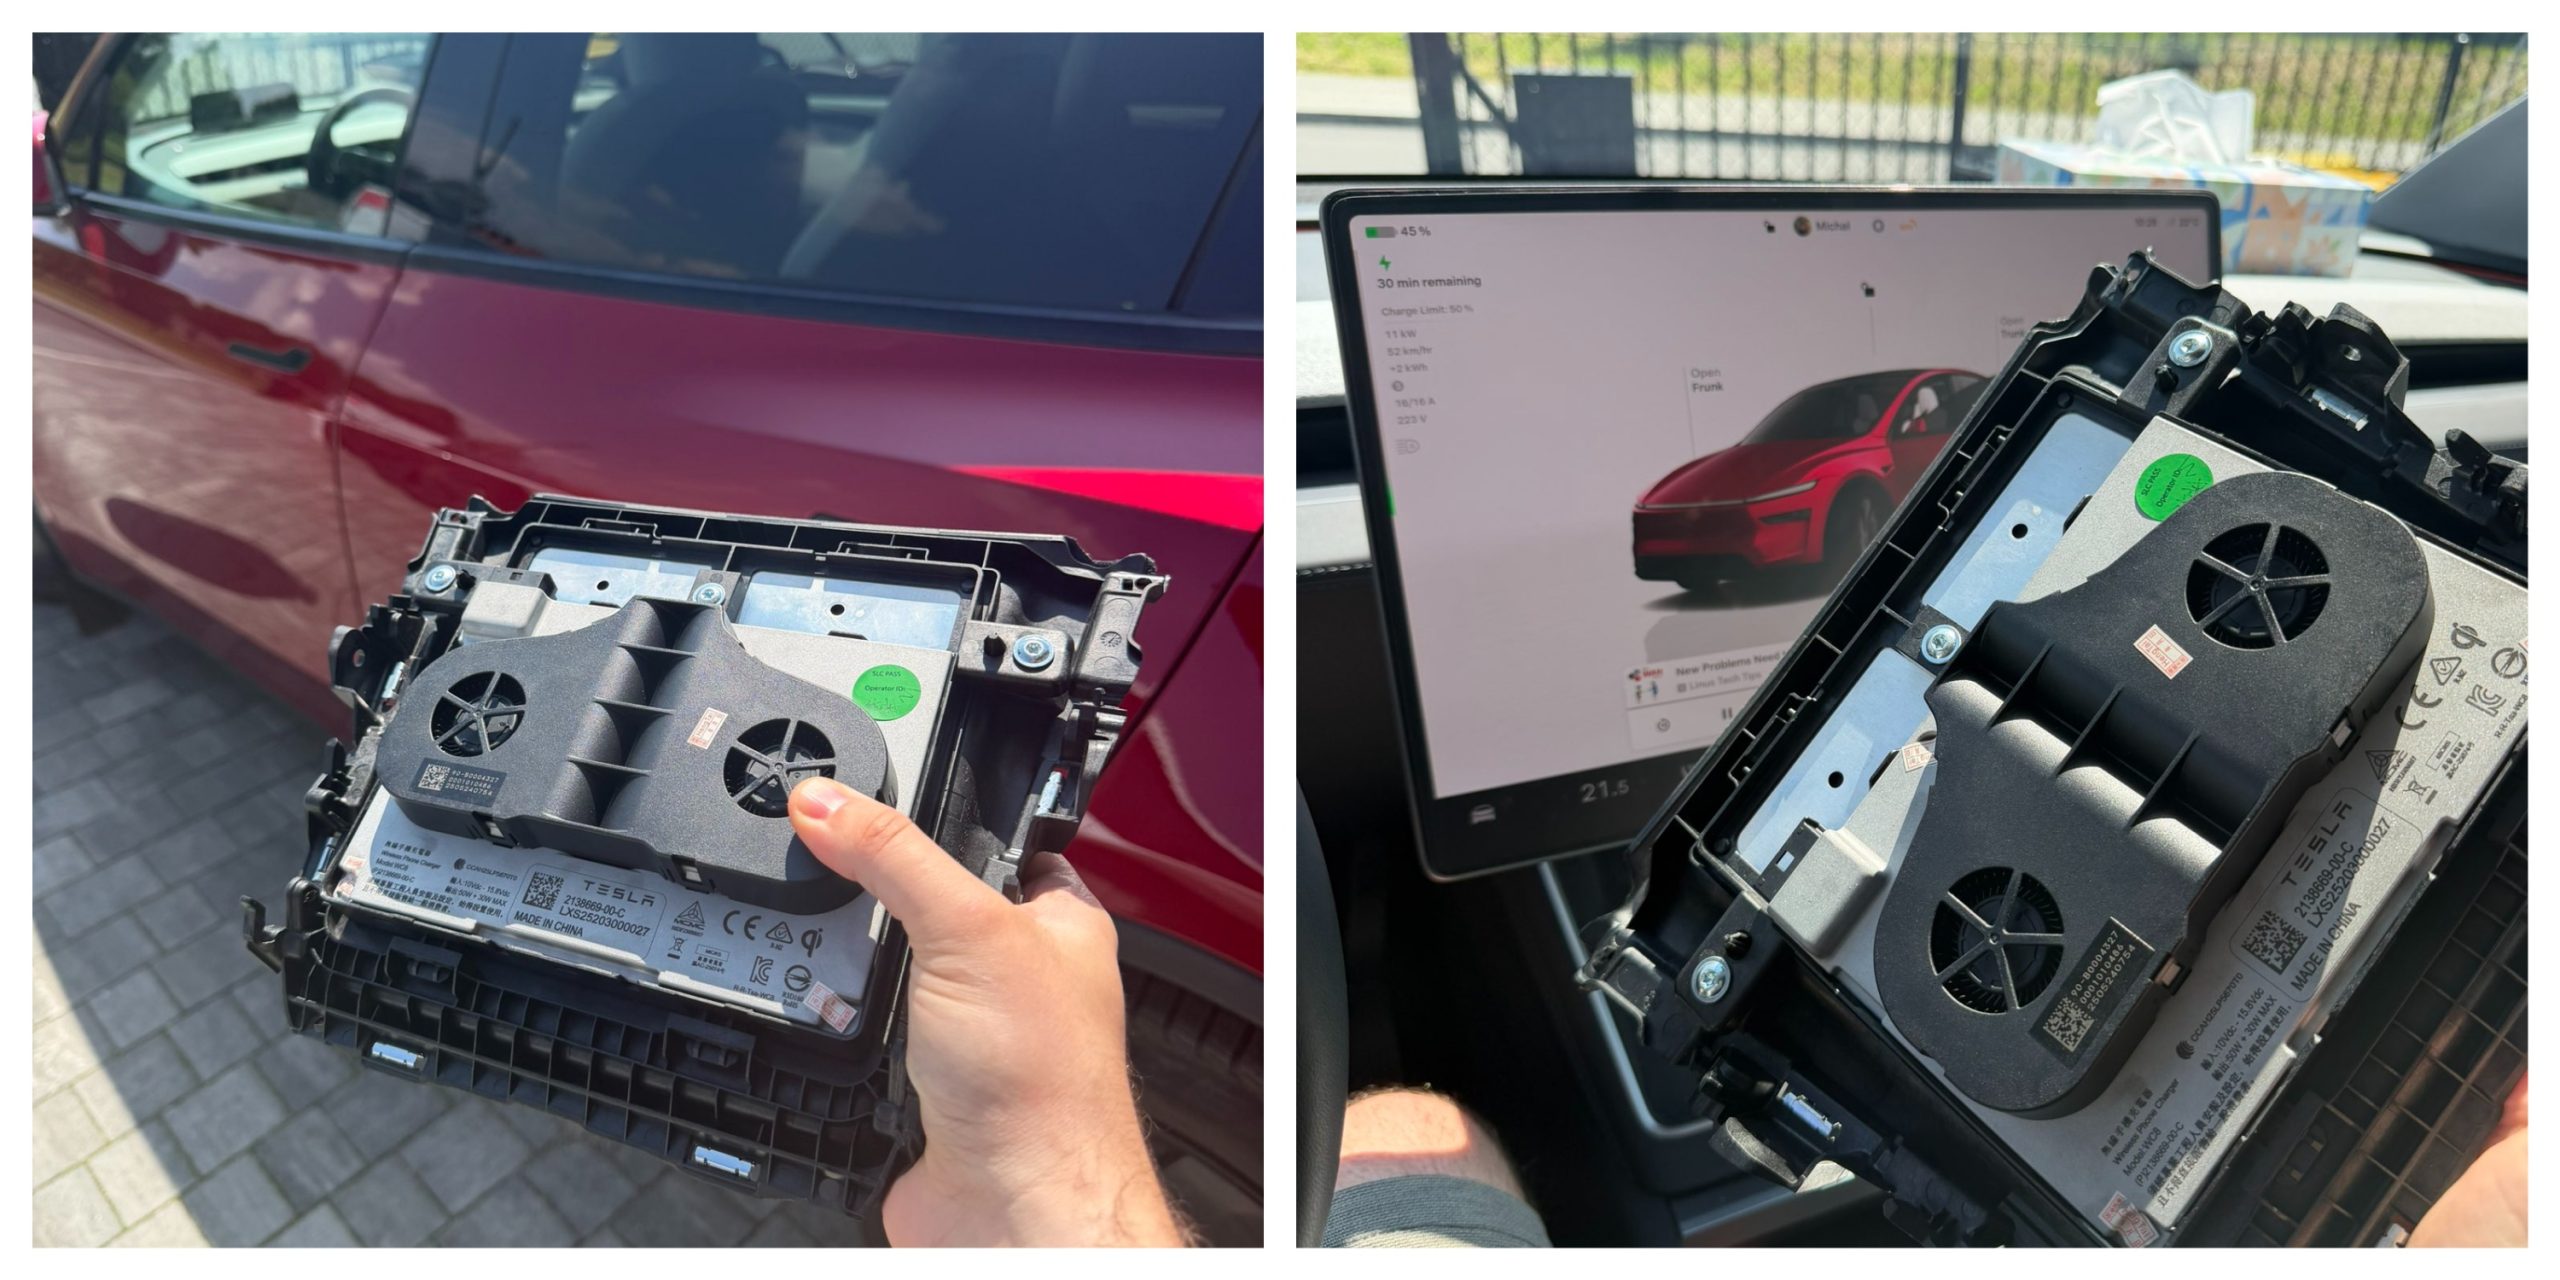
Tesla owners have long griped about the wireless phone charger in the Model Y and other vehicles. It often turns smartphones into miniature ovens rather than reliably topping them up.
Software engineer and Model Y owner Michał Gapiński tackled this issue head-on with a clever DIY upgrade, swapping the cooled wireless charger pad from the China-made Model YL in for the one that came standard in his vehicle.
There are several key differences between the U.S.-built Model Y’s wireless charging pad and the one that Tesla has been installing in the Model YL. The one installed in U.S.-built vehicles lacks active cooling and relies on basic heat dissipation, leading to rapid temperature buildup during charging. In contrast, the Model YL integrates a small fan for active cooling.
Will it fit? Fingers crossed, I want a first YL charger deployed in the regular juniper pic.twitter.com/wWDqSNFVkW
— Michał Gapiński (@mikegapinski) June 2, 2026
This design maintains lower temperatures even in warm ambient conditions, though it does not support faster Qi2 charging on iPhones. The connector matches exactly, making physical swaps feasible on compatible consoles, but coding is required to enable full functionality.
Owners in the U.S. have complained about the wireless charging pad, with many reporting that overheating is fairly common. Within 20 or 30 minutes of placing a phone on the wireless charging pad, many have reported overheating messages on their phones, which halt charging and essentially turn the pad into a fancy place to rest your phone.
Many owners have opted to simply plug their phones into a charging cord. Tesla has acknowledged the problem by releasing several solutions for owners, including a relatively new feature that allows you to simply turn off the charging and simply act as a holder for your phone while driving.
Gapiński said that he sourced the cooled pad affordably from China, and it cost under $200 for the part.
He removed the existing console charger, swapped in the new unit, confirming a perfect connector fit, and handled the trim differences. Since the parameter isn’t fully secured, he enabled it through custom coding outside official Toolbox.
Connector is identical, she fits, now time to code it. https://t.co/Y9idgDrpCq pic.twitter.com/uwwgq6blg7
— Michał Gapiński (@mikegapinski) June 2, 2026
The fan activates quietly, blending with AC and seat cooling. He reported the installation was effective and the wireless charging pad worked perfectly; it even kept the phone cool as it stayed at just 86 degrees Fahrenheit. Many times, the wireless charging pad will bring the phone’s temperature well above 100 degrees, sometimes even being relatively hot to the touch.
The retrofit worked, no issues. First Model Y with a cooled wireless charger! No QI2/faster charging on the iPhone but it does not boil the phone even when it is 30 degrees outside.
The fan kicks in, it is not audible especially with the air conditioning and seat cooling. The… https://t.co/JOyR8Tb1Yo pic.twitter.com/kJcYhQIlYq
— Michał Gapiński (@mikegapinski) June 2, 2026
This retrofit highlighted an elegant, owner-driven solution to a factory shortcoming. It is expected that Tesla will begin installing the cooled charging pads into new cars in the U.S. soon, and hopefully, it will offer some sort of retrofit service or kit to owners here who want to use the charging pad effectively.
For those who love to tinker, it’s an accessible upgrade, proving that innovation thrives beyond the production line.
Back in 2019, YouTuber Simone Giertz, the self-proclaimed “Queen of Sh*tty Robots,” created a one-off Tesla Model 3 build that took the automotive world by storm. Fondly dubbed as “Truckla,” Giertz noted that the vehicle was actually her dream car — as crazy as that may sound.
Now almost four years later, the YouTuber posted an update on Truckla. And just like every other big project that one probably started, Giertz stated that she actually stopped working on Truckla when the vehicle was about 80% complete. The car is driving though, but a lot of stuff was not really working very well.
Thus, for her Truckla update, Giertz shared how most of her Model 3 pickup truck conversion was essentially completed. Truckla got a lot of detailing done, she got a slight lift, and she now has a functional tailgate. One has to admit, Truckla’s tailgate is pretty darn cool.
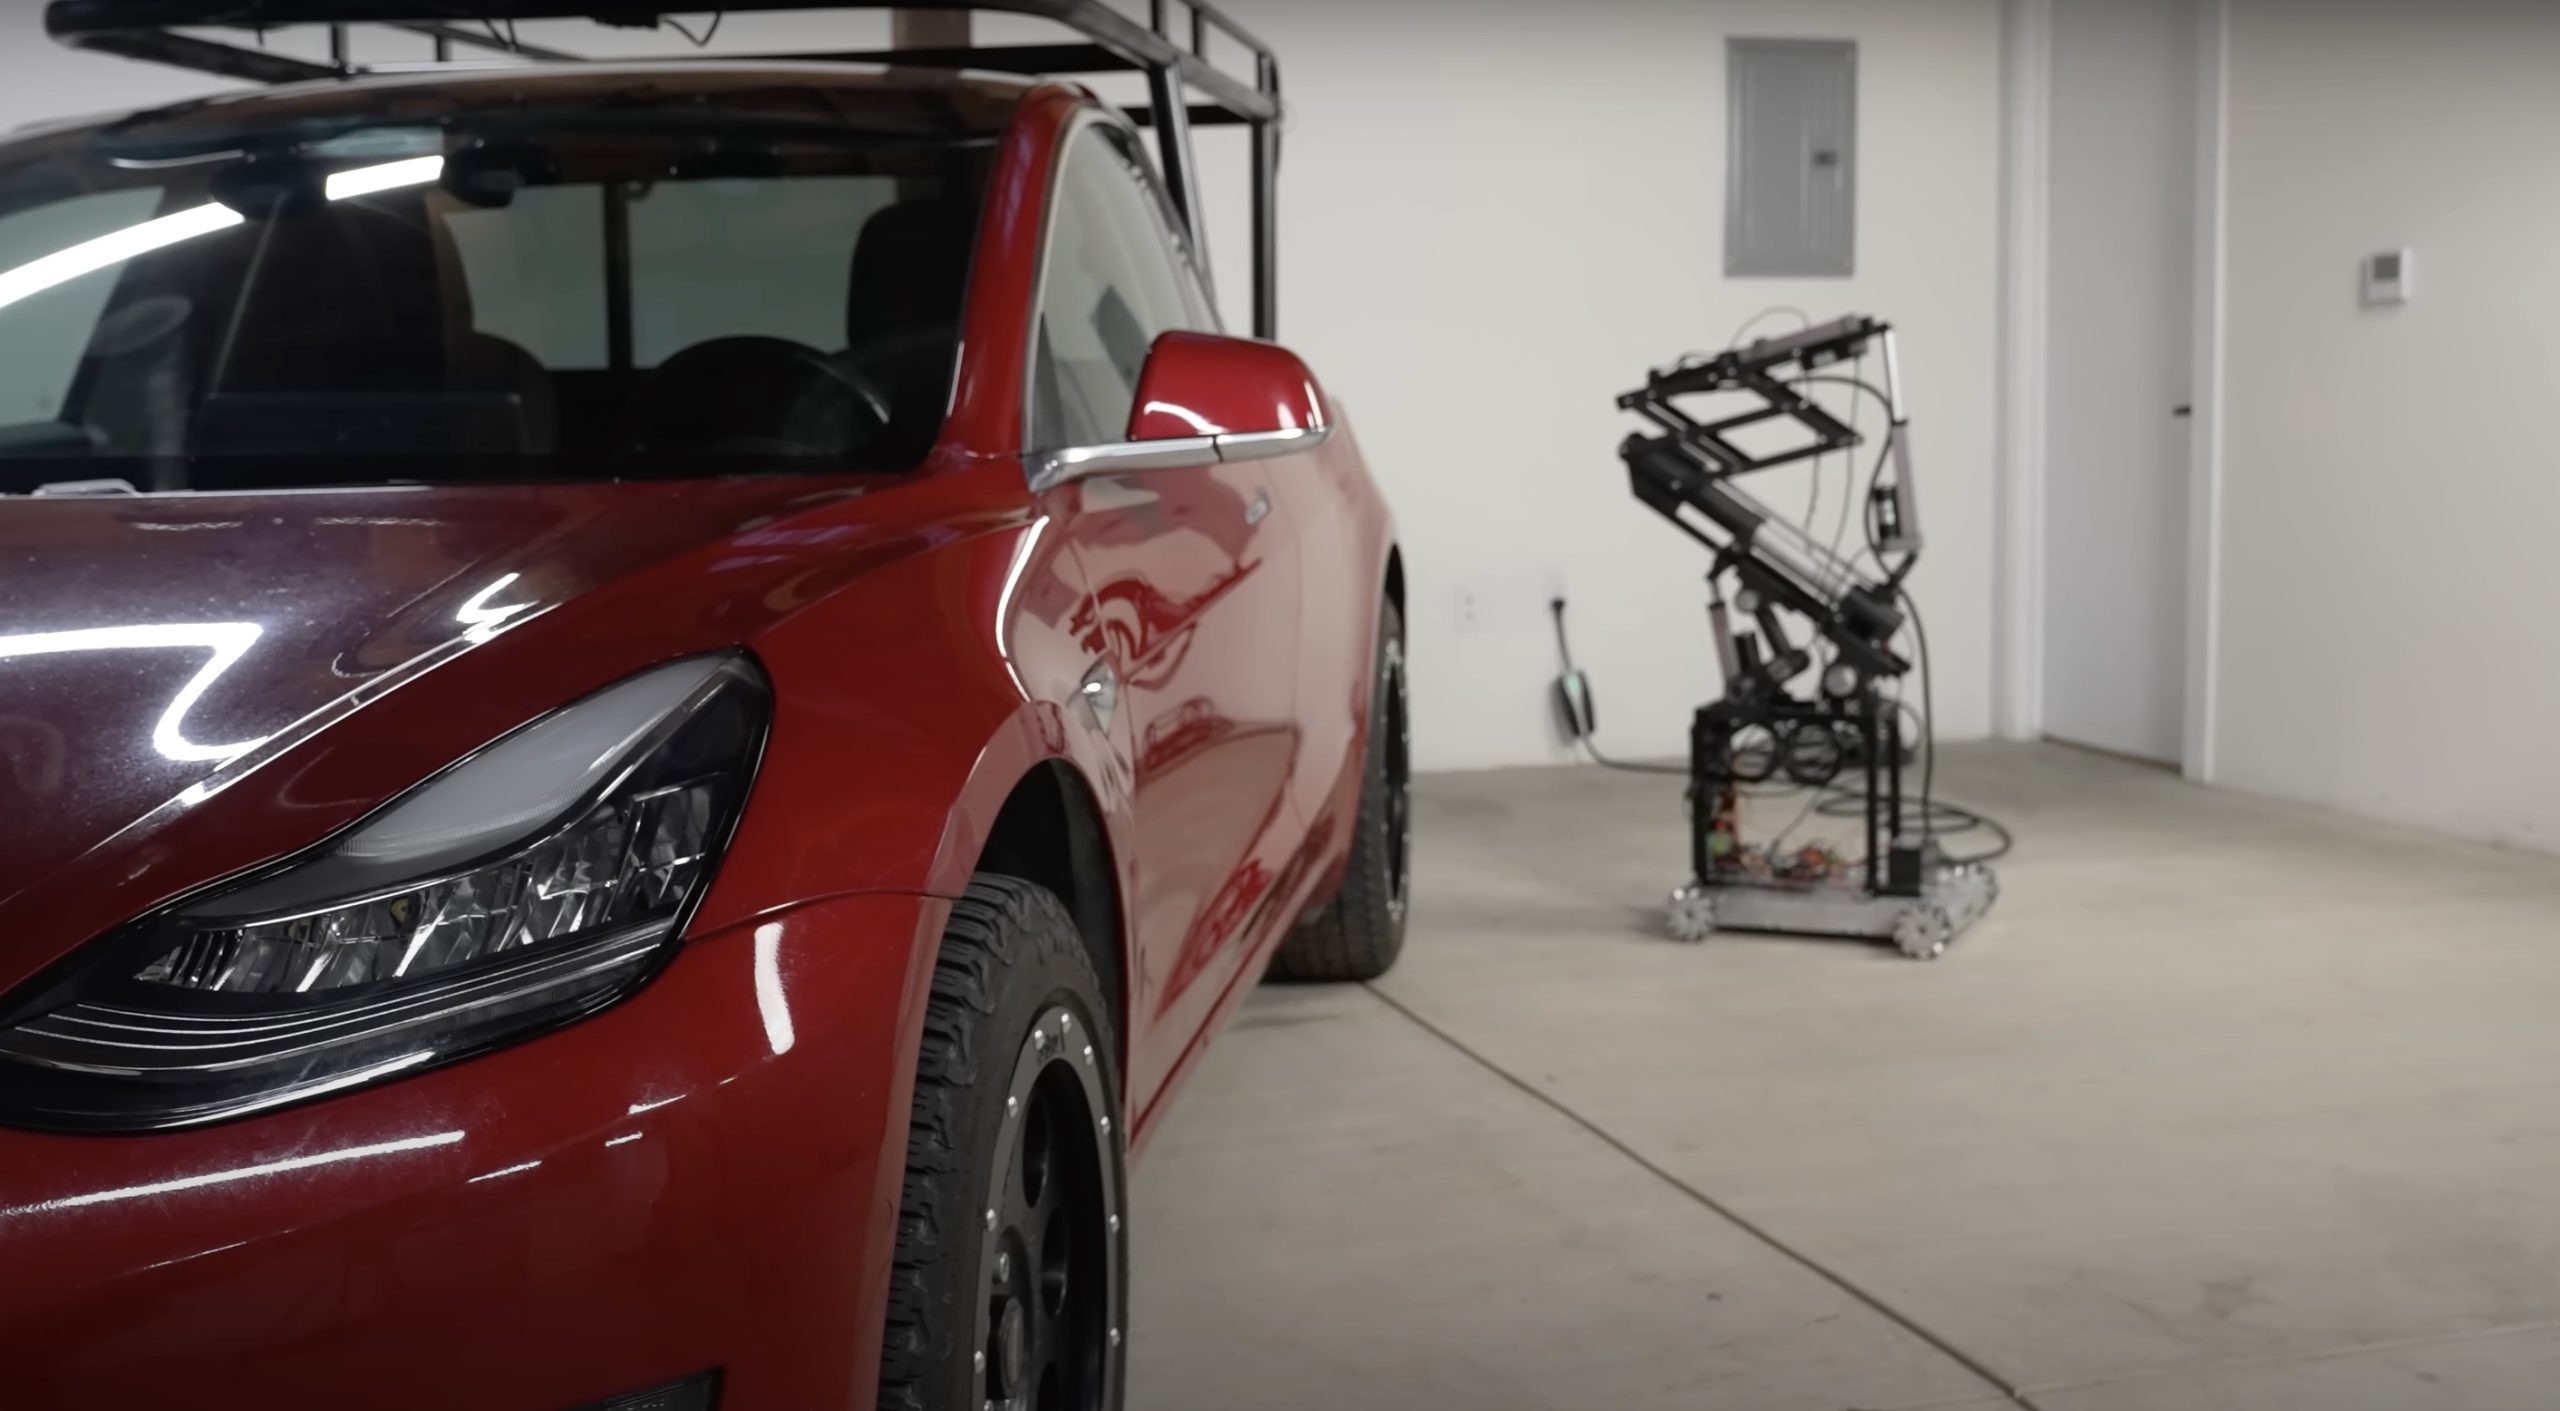
The “Queen of Sh*tty Robots” also opted to give Truckla a friend in the form of an automatic robot charger. Unlike Tesla’s rather interesting snake charger from years past, Truckla’s charger would come in the form of a rover, thanks to her friends at robotics platform Viam. Giertz aptly named Truckla’s robot charger friend “Chargela,” which is an appropriate name for such an invention.
Also true to form for Giertz, Chargela’s first encounter with Truckla was just a tiny bit awkward. One could say that Chargela may have just been a little bit nervous on his first try without human hands helping him. Most importantly, the system did work, so Giertz would likely keep using Chargela for her Model 3 pickup.
Teslas are very tech-heavy vehicles, so projects like Giertz’s Truckla are always remarkable. The fact that the Model 3 works perfectly fine despite having a good chunk of it cut off and turned into a pickup truck bed is mighty impressive any way one looks at it. Overall, Truckla will always be one of the coolest Tesla DIY projects to date, so any updates about the vehicle are always appreciated.
Truckla’s nearly four-year update can be viewed below.
Don’t hesitate to contact us with news tips. Just send a message to simon@teslarati.com to give us a heads up.
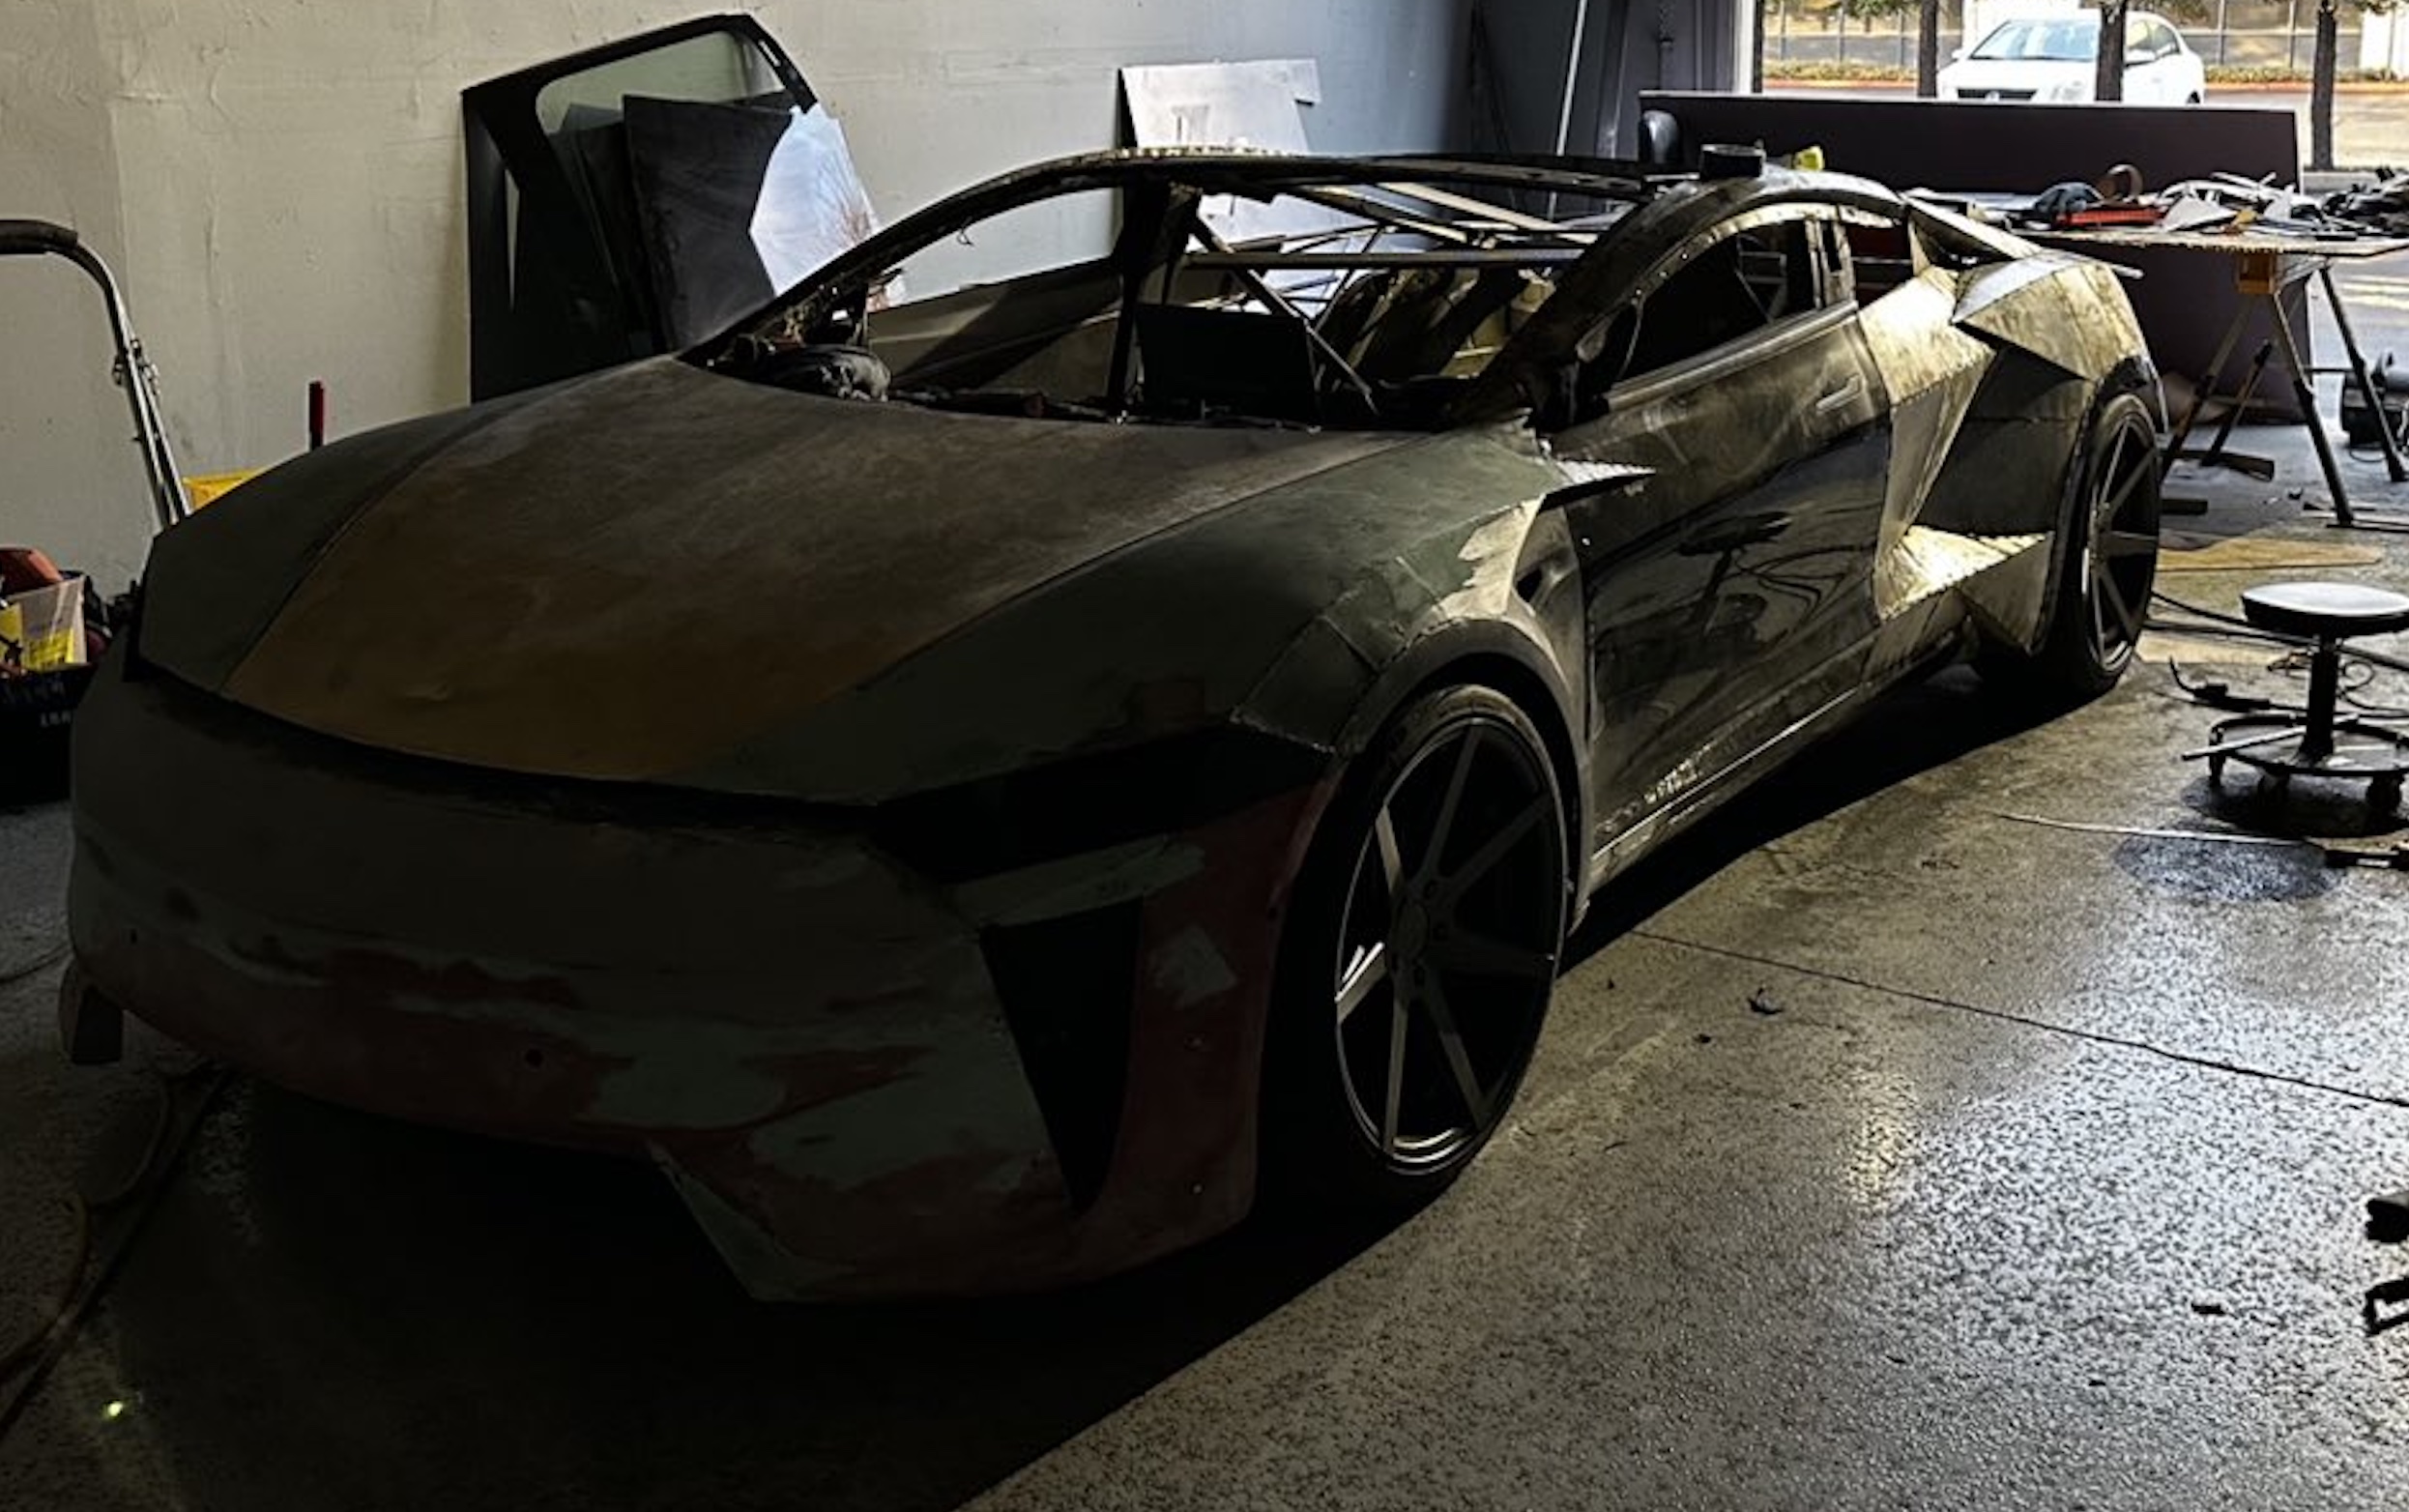
A Tesla owner is taking his hobby and love for electric vehicles to new levels by creating what could only be described as one of the coolest EV-related DIY projects to date. The idea for the project is simple: what happens when you cross a supercar with the Cybertruck? You end up with a two-seater CyberRoadster.
Tesla owner David Andreyev, who goes by the username @Cyber_Hooligan_ on Twitter, has spent the last few months creating a Cybertruck-inspired version of the next-generation Roadster made from a salvaged Model 3 Performance. Starting with a Model 3 Performance is an inspired choice, considering that it is Tesla’s first vehicle that has a dedicated Track Mode.
A look at Andreyev’s YouTube channel, which can be accessed here, shows the meticulous build that the Tesla owner has implemented on the project car. What’s particularly cool about the CyberRoadster is the fact that it’s being built with parts that are also from other Tesla vehicles, like its front bumper that came from a new Model S. Recent videos suggest that the project car’s rear bumper will be from a new Model S as well.
The journey is long for Andreyev, so the completion of the CyberRoadster will likely take some more time. Despite this, seeing the Tesla owner’s DIY journey on such an epic build is more than satisfying. And considering that the CyberRoadster is evidently a labor of love from the Tesla owner, the final results would likely be extremely worth it.
There’s a lot of crazy Tesla modifications that have been done as of late. But some, as it is with a lot of things on the internet these days, have become more silly gimmicks than serious automotive projects. Fortunately, car enthusiasts like Andreyev, who just happen to also love electric vehicles, are taking it upon themselves to create one-of-a-kind EVs that would surely capture the attention of anyone on the road.
Check out the latest video in the CyberRoadster’s creation below.
Don’t hesitate to contact us with news tips. Just send a message to simon@teslarati.com to give us a heads up.

Tesla enters two new markets on two different continents in one week

SpaceX announces new Starship 13 test flight target date


