DIY
Removable Tesla Model S Front License Plate Bracket Review
Torklift Central’s removable Tesla Model S front license plate bracket brings the best of both worlds – The Law but with a rebel twist.
Torklift Central of Kent, WA has devised a way for Model S owners to mount their front license plates without having to undergo the rudimentary factory process of drilling permanent holes into the Tesla nose cone. Drilling into your brand new Tesla Model S is not only an unnerving experience, but it could potentially reduce the resale value of the car. In comes “The Law” – a full stainless steel (powder coated in black), multi-piece front license plate bracket that’s easy to install yet fully removable when desired. The stainless steel material provides a rust and corrosion free guarantee along with a Lifetime Warranty.
The Law – Tesla Model S Removable Front License Plate Bracket
The product comes packaged within a traditional shipping box. No frills or fancy marketing materials needed here. Just give me the stuff!
- Instruction Sheets
- 1 x Base Plate (hooks onto the factory lower mesh grill)
- 1 x Base Plate Front Plate (secures base plate onto the lower mesh grill)
- 1 x License Plate Bracket (removable when license plate not needed)
- 1/4 x 1 Hex Bolt (qty 2)
- 1/4 x 1/2 Hex Bolt (qty 4)
- 1/4 Flat Washers (qty 2)


Installation
It’s a good idea to pre-assemble all the pieces and envision how the bracket will be secured prior to installation. Disassemble and locate the “L” shaped base plate. The side with the welded nuts will be pushed (requires gentle force) through the 2nd to top row of the honeycomb lower front grill. The 2nd row position is extremely important here since we’re working within pretty tight tolerances. One row too high or too low will cause the base plate to potentially scrape against the body during installation.
Tip: Place a Microfiber Cloth between the base plate and the Model S body to prevent any accidental scratches from occurring.


Push the “L” shaped base plate through the 2nd row position into the lower front grill and secure it with the base plate front plate (long flat piece). Feed the two 1/4 x 1 hex bolts through the base front plate and hand tighten until the front plate is loosely attached to the base plate.
Continue to ratchet down the front plate until it’s securely fastened. The honeycomb grill will now be sandwiched between the front plate and “L” shaped base plate.
Tip: There was a minimal amount of clearance between our ratchet and the front bumper so we once again used a Microfiber Cloth as a way to prevent scratching.


Take the front license plate bracket, and place it on top of the base plate. The welded nuts on the front license plate bracket should be facing upwards at this point. Hand tighten the two 1/4 x 1/2 bolts and continue to tighten until the two plates are securely joined.
Tip: There won’t be any room for a socket so be sure to have a 1/4″ wrench handy. A ratcheting wrench will come in super handy – something every true DIY’er should own.


Installed
Torklift claims a 5-minute installation time that we think is certainly possible if you have a good grasp of how all the pieces fit together. However for novices like us, installation took approximately 30 minutes with a majority of that time spent on processing the instructions, pre-assembling and trying to be extra cautious on a car we don’t own.
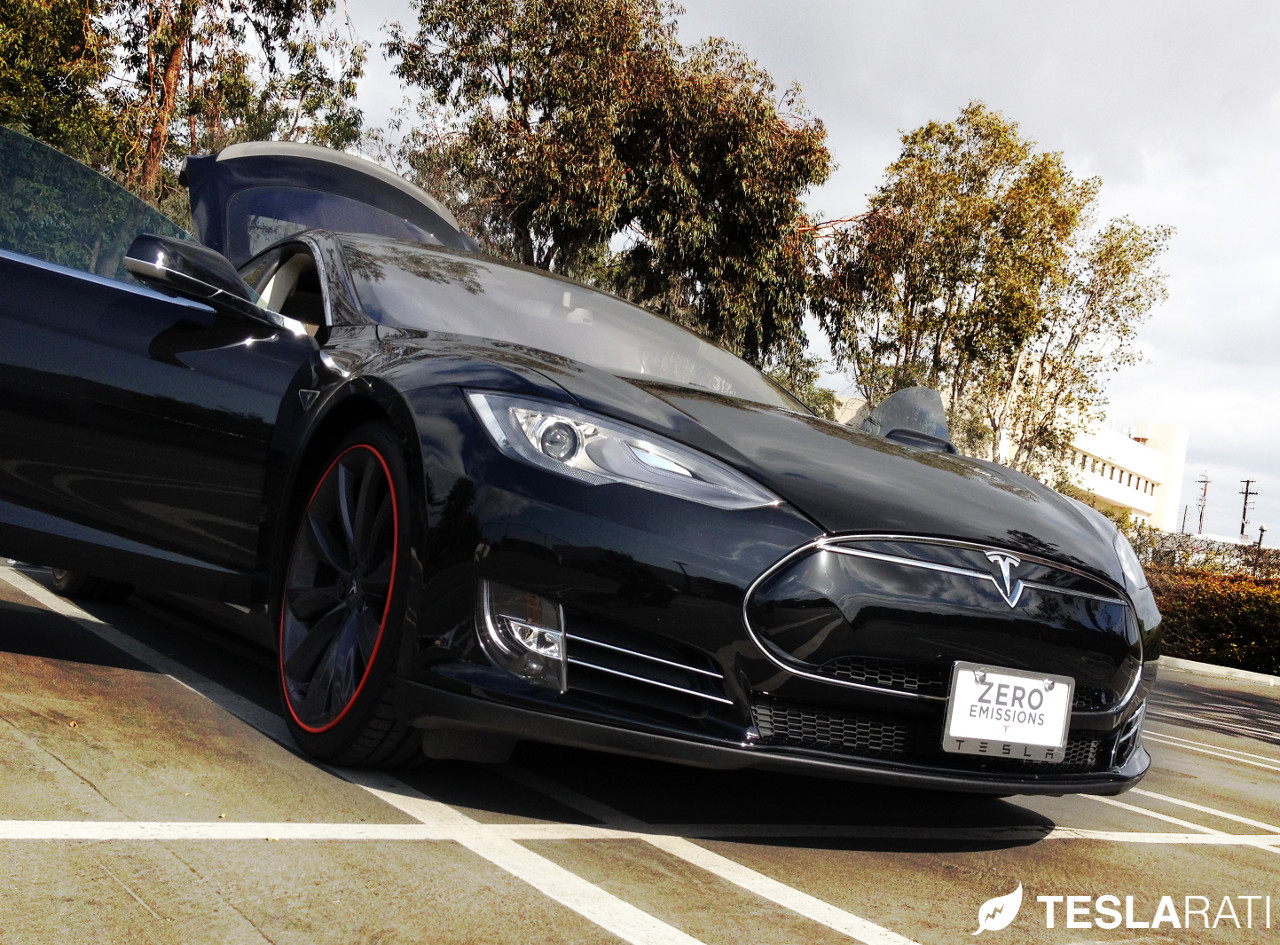
Here are some pictures of Torklift Central’s – The Law fully installed on the Teslarati Tesla Model S. What we really liked about this piece, aside from the fact that it requires no drilling and is 100% removable, is the mounting position. It sits low enough so that it doesn’t detract from the elegance of the car.
We chose to mount our license plate assembly dead center, however one could have easily mounted it to the left or right of the centerline if that’s the look they’re going for. There’s no horizontal restriction on where the assembly can be placed, provided the base plate is inserted into the 2nd row of the lower honeycomb grill.


Conclusion
Designed specifically for the Tesla Model S, “The Law” – Removable Font License Plate Bracket is a precision crafted bolt on application that’s weather resistant, easy to install, requires no drilling, and 100% removable. Although the license plate bracket is fully removable, we felt that the removal process could have been a bit easier through a “quick release” mechanism. As it stands now, removing the license plate from the base plate requires having a wrench in hand.
The components are manufactured in stainless steel and finished off with a sleek powder coat in black. We feel that the use of stainless black oxide bolts would have been a better aesthetic complement than the bolts provided, but that’s really a minor detail that doesn’t take away from the beautiful craftsmanship of the product.
Torklift’s engineers did an excellent job fabricating each precision piece. At just $104.95, half the price of a missing-license-plate violation, “The Law” is truly a bargain for those looking to have a non-invasive front license plate bracket that’s fully removable, and comes with a Lifetime Warranty.
WHERE TO BUY
Visit Torklift Central
[tabs slidertype=”images”] [imagetab width=”” height=”” alt=”Removable Tesla Model S Front License Plate Bracket”]http://www.teslarati.com/wp-content/uploads/2013/11/Torklift-Front-Plate-Installed.jpg[/imagetab] [imagetab width=”” height=”” alt=”Removable Tesla Model S Front License Plate Bracket”]http://www.teslarati.com/wp-content/uploads/2013/11/Torklift-Font-Plate-Bracket-Assembled.jpg[/imagetab] [imagetab width=”” height=”” alt=”Removable Tesla Model S Front License Plate Bracket”]http://www.teslarati.com/wp-content/uploads/2013/11/Torklift-Font-Plate-Bracket-Bolts.jpg[/imagetab] [imagetab width=”” height=”” alt=”Removable Tesla Model S Front License Plate Bracket”]http://www.teslarati.com/wp-content/uploads/2013/11/Torklift-Font-Plate-Assembled.jpg[/imagetab] [/tabs]
[box type=”bio”]For those looking for other creative ways to install the front license bracket, look here.

Tesla owners have long griped about the wireless phone charger in the Model Y and other vehicles. It often turns smartphones into miniature ovens rather than reliably topping them up.
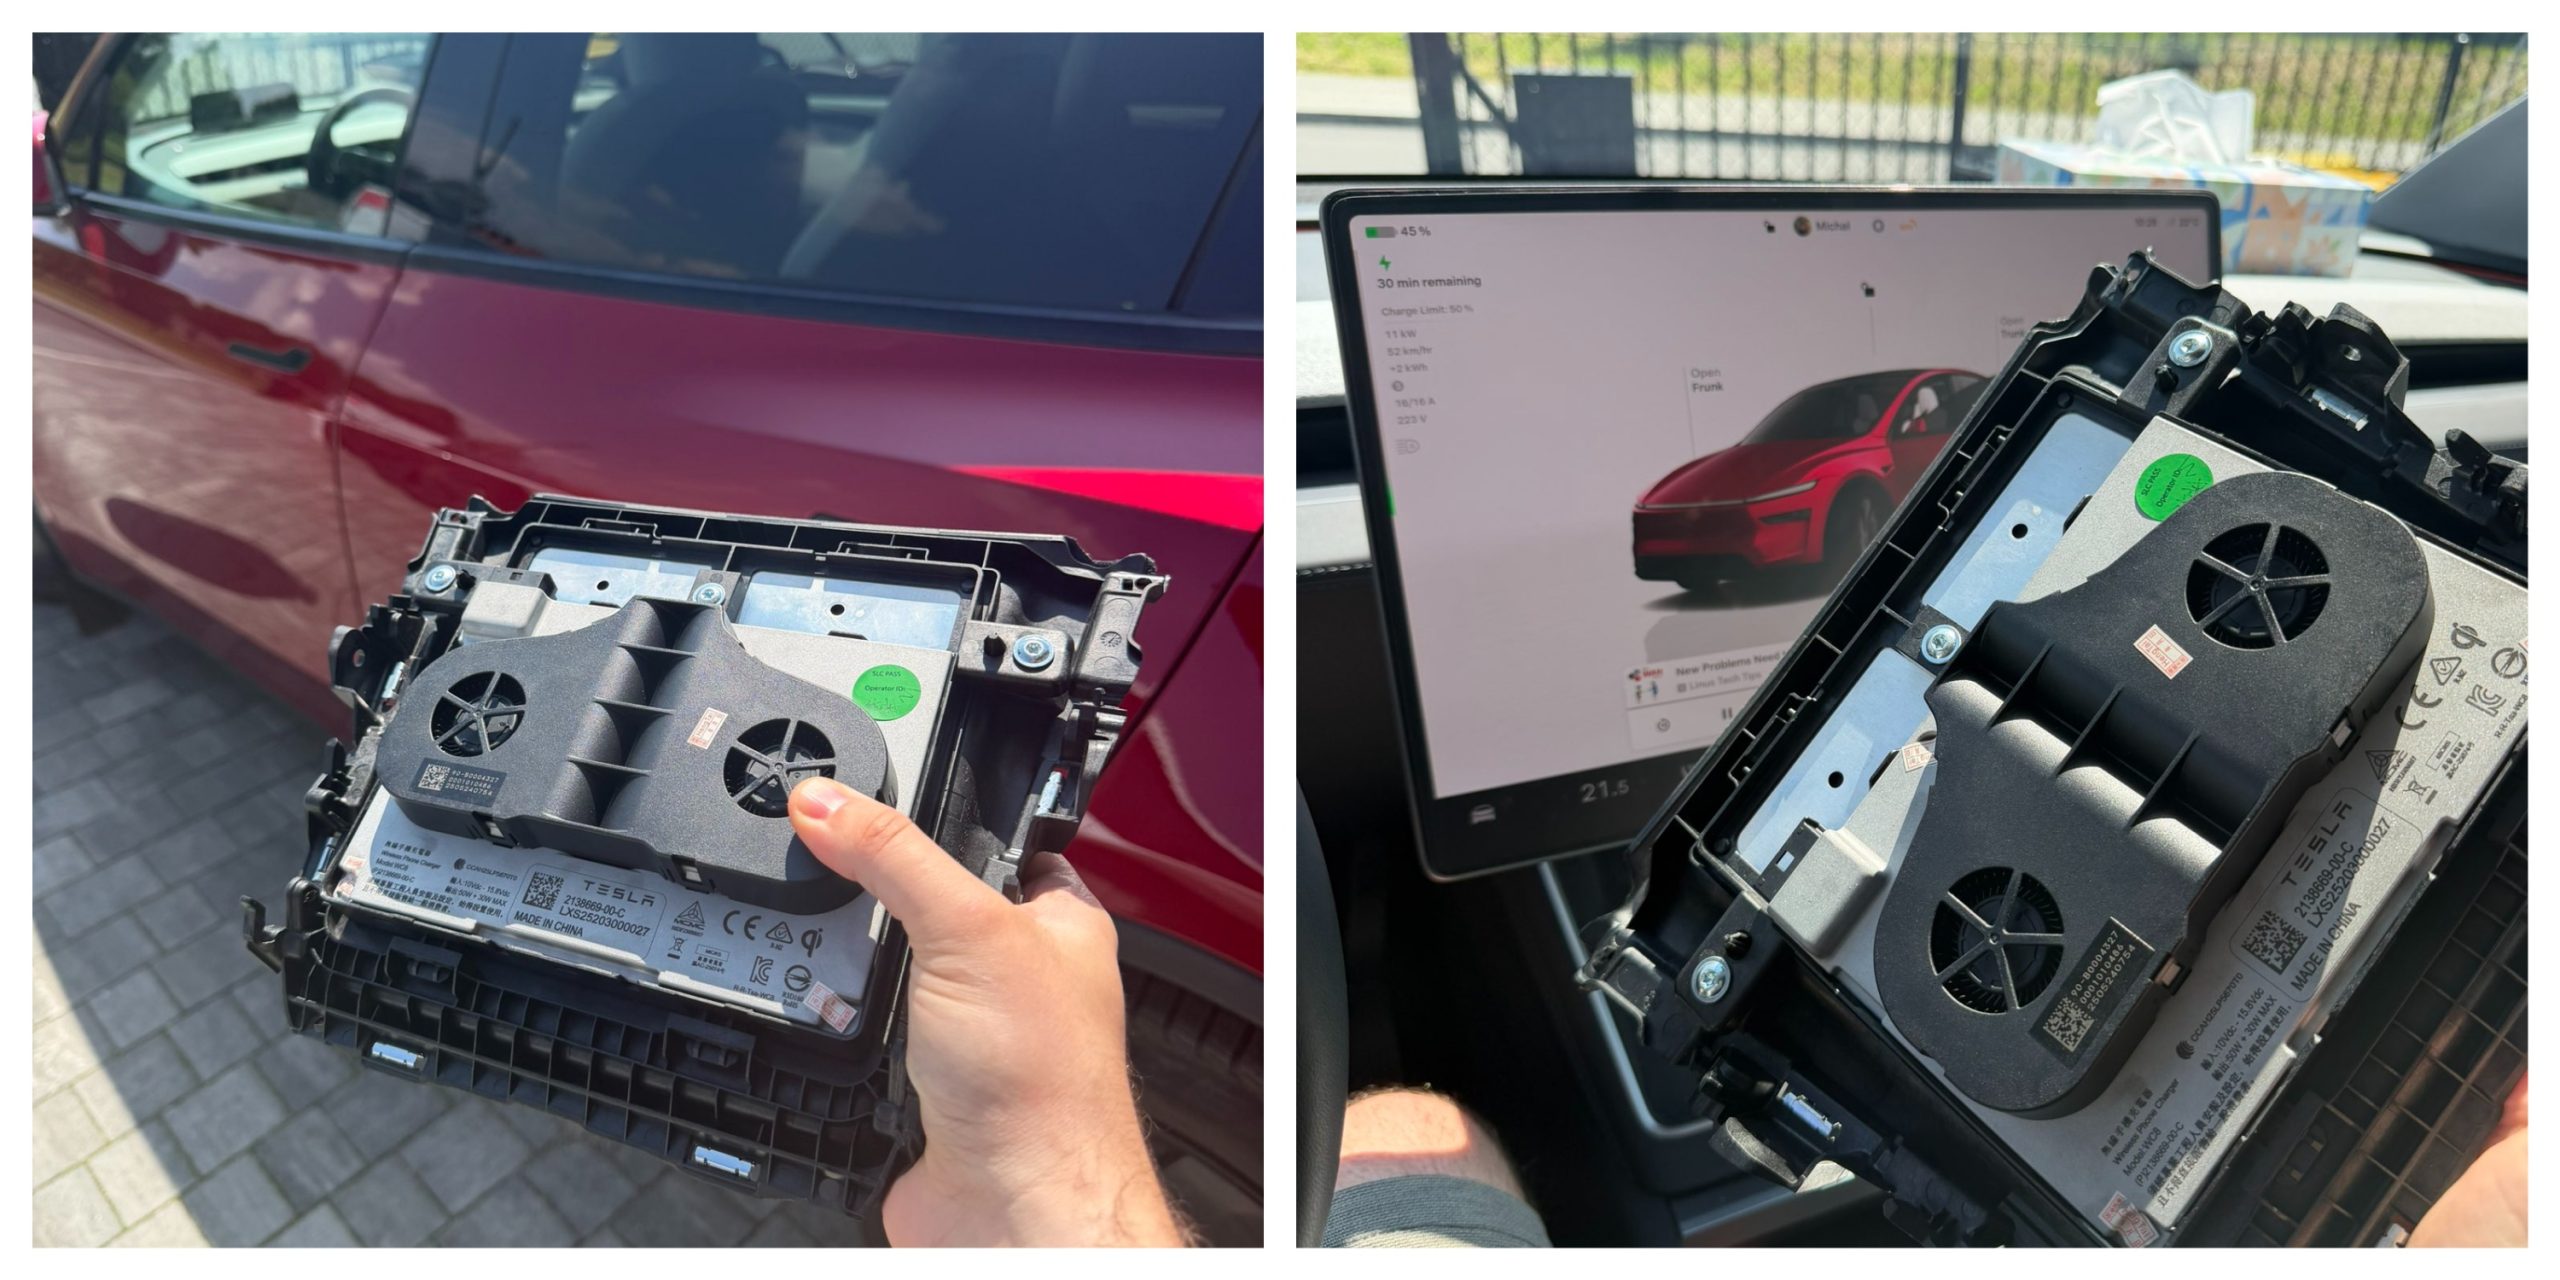
Software engineer and Model Y owner Michał Gapiński tackled this issue head-on with a clever DIY upgrade, swapping the cooled wireless charger pad from the China-made Model YL in for the one that came standard in his vehicle.
There are several key differences between the U.S.-built Model Y’s wireless charging pad and the one that Tesla has been installing in the Model YL. The one installed in U.S.-built vehicles lacks active cooling and relies on basic heat dissipation, leading to rapid temperature buildup during charging. In contrast, the Model YL integrates a small fan for active cooling.
Will it fit? Fingers crossed, I want a first YL charger deployed in the regular juniper pic.twitter.com/wWDqSNFVkW
— Michał Gapiński (@mikegapinski) June 2, 2026
This design maintains lower temperatures even in warm ambient conditions, though it does not support faster Qi2 charging on iPhones. The connector matches exactly, making physical swaps feasible on compatible consoles, but coding is required to enable full functionality.
Owners in the U.S. have complained about the wireless charging pad, with many reporting that overheating is fairly common. Within 20 or 30 minutes of placing a phone on the wireless charging pad, many have reported overheating messages on their phones, which halt charging and essentially turn the pad into a fancy place to rest your phone.
Many owners have opted to simply plug their phones into a charging cord. Tesla has acknowledged the problem by releasing several solutions for owners, including a relatively new feature that allows you to simply turn off the charging and simply act as a holder for your phone while driving.
Gapiński said that he sourced the cooled pad affordably from China, and it cost under $200 for the part.
He removed the existing console charger, swapped in the new unit, confirming a perfect connector fit, and handled the trim differences. Since the parameter isn’t fully secured, he enabled it through custom coding outside official Toolbox.
Connector is identical, she fits, now time to code it. https://t.co/Y9idgDrpCq pic.twitter.com/uwwgq6blg7
— Michał Gapiński (@mikegapinski) June 2, 2026
The fan activates quietly, blending with AC and seat cooling. He reported the installation was effective and the wireless charging pad worked perfectly; it even kept the phone cool as it stayed at just 86 degrees Fahrenheit. Many times, the wireless charging pad will bring the phone’s temperature well above 100 degrees, sometimes even being relatively hot to the touch.
The retrofit worked, no issues. First Model Y with a cooled wireless charger! No QI2/faster charging on the iPhone but it does not boil the phone even when it is 30 degrees outside.
The fan kicks in, it is not audible especially with the air conditioning and seat cooling. The… https://t.co/JOyR8Tb1Yo pic.twitter.com/kJcYhQIlYq
— Michał Gapiński (@mikegapinski) June 2, 2026
This retrofit highlighted an elegant, owner-driven solution to a factory shortcoming. It is expected that Tesla will begin installing the cooled charging pads into new cars in the U.S. soon, and hopefully, it will offer some sort of retrofit service or kit to owners here who want to use the charging pad effectively.
For those who love to tinker, it’s an accessible upgrade, proving that innovation thrives beyond the production line.
Back in 2019, YouTuber Simone Giertz, the self-proclaimed “Queen of Sh*tty Robots,” created a one-off Tesla Model 3 build that took the automotive world by storm. Fondly dubbed as “Truckla,” Giertz noted that the vehicle was actually her dream car — as crazy as that may sound.
Now almost four years later, the YouTuber posted an update on Truckla. And just like every other big project that one probably started, Giertz stated that she actually stopped working on Truckla when the vehicle was about 80% complete. The car is driving though, but a lot of stuff was not really working very well.
Thus, for her Truckla update, Giertz shared how most of her Model 3 pickup truck conversion was essentially completed. Truckla got a lot of detailing done, she got a slight lift, and she now has a functional tailgate. One has to admit, Truckla’s tailgate is pretty darn cool.
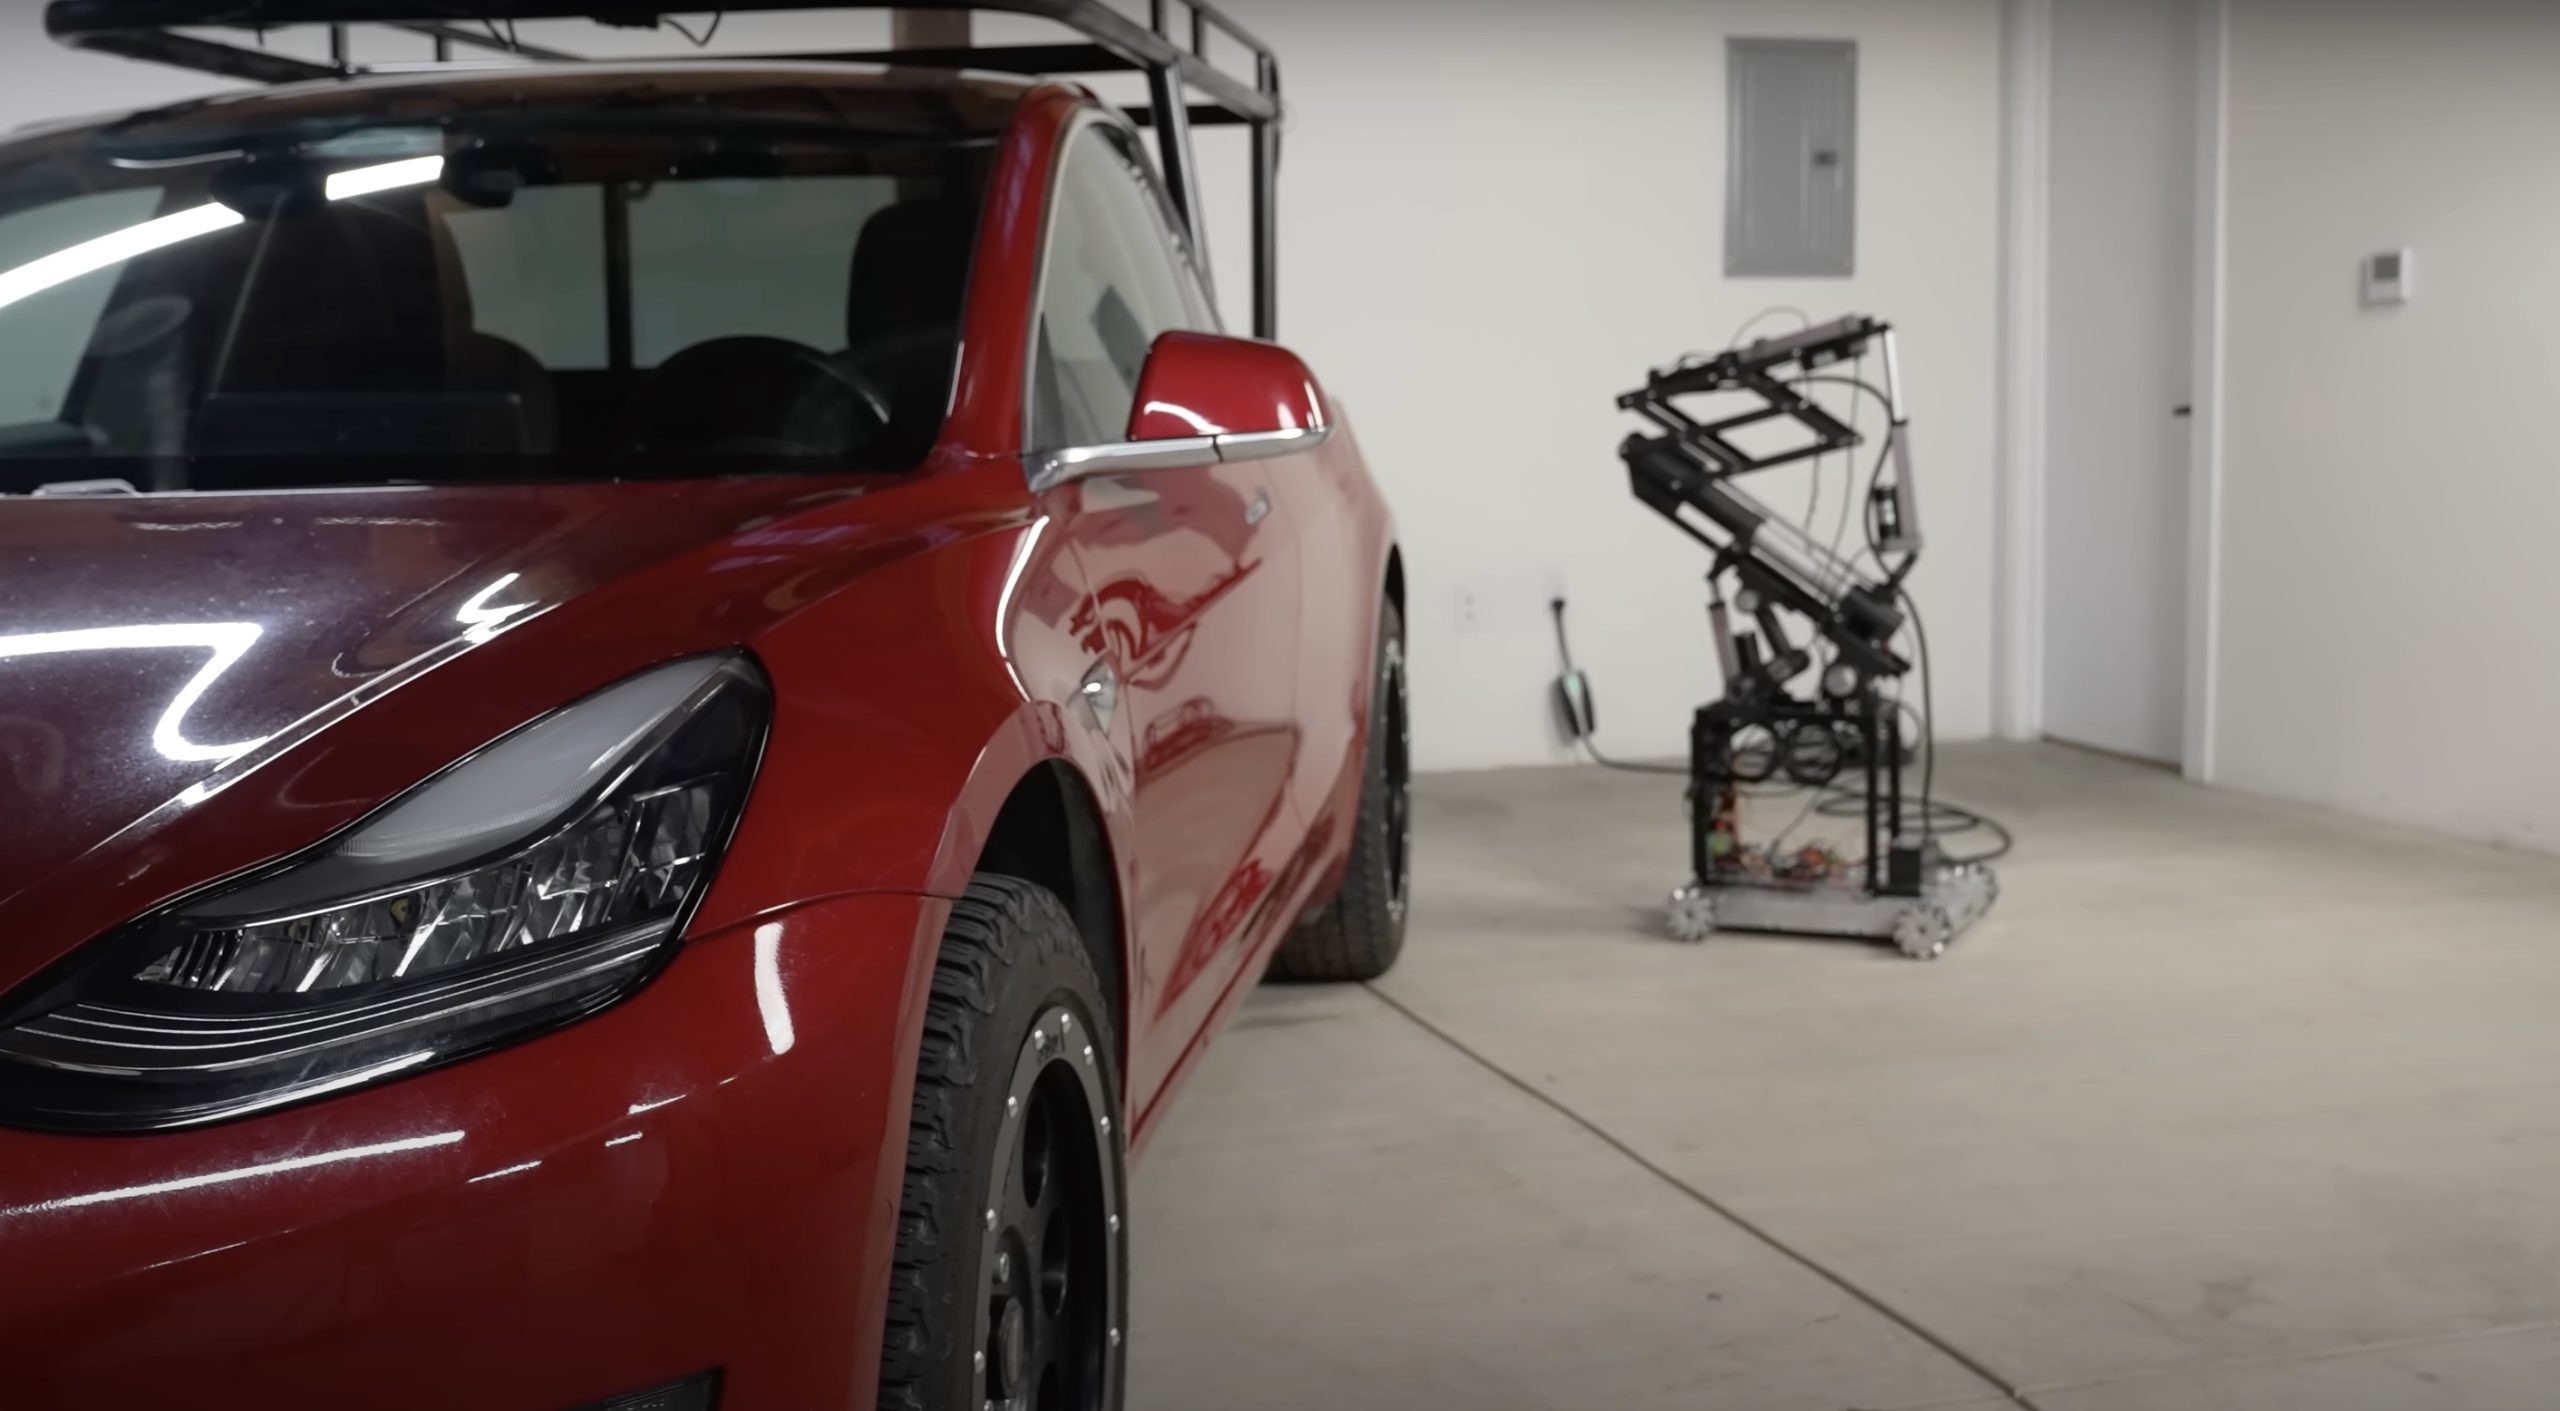
The “Queen of Sh*tty Robots” also opted to give Truckla a friend in the form of an automatic robot charger. Unlike Tesla’s rather interesting snake charger from years past, Truckla’s charger would come in the form of a rover, thanks to her friends at robotics platform Viam. Giertz aptly named Truckla’s robot charger friend “Chargela,” which is an appropriate name for such an invention.
Also true to form for Giertz, Chargela’s first encounter with Truckla was just a tiny bit awkward. One could say that Chargela may have just been a little bit nervous on his first try without human hands helping him. Most importantly, the system did work, so Giertz would likely keep using Chargela for her Model 3 pickup.
Teslas are very tech-heavy vehicles, so projects like Giertz’s Truckla are always remarkable. The fact that the Model 3 works perfectly fine despite having a good chunk of it cut off and turned into a pickup truck bed is mighty impressive any way one looks at it. Overall, Truckla will always be one of the coolest Tesla DIY projects to date, so any updates about the vehicle are always appreciated.
Truckla’s nearly four-year update can be viewed below.
Don’t hesitate to contact us with news tips. Just send a message to simon@teslarati.com to give us a heads up.
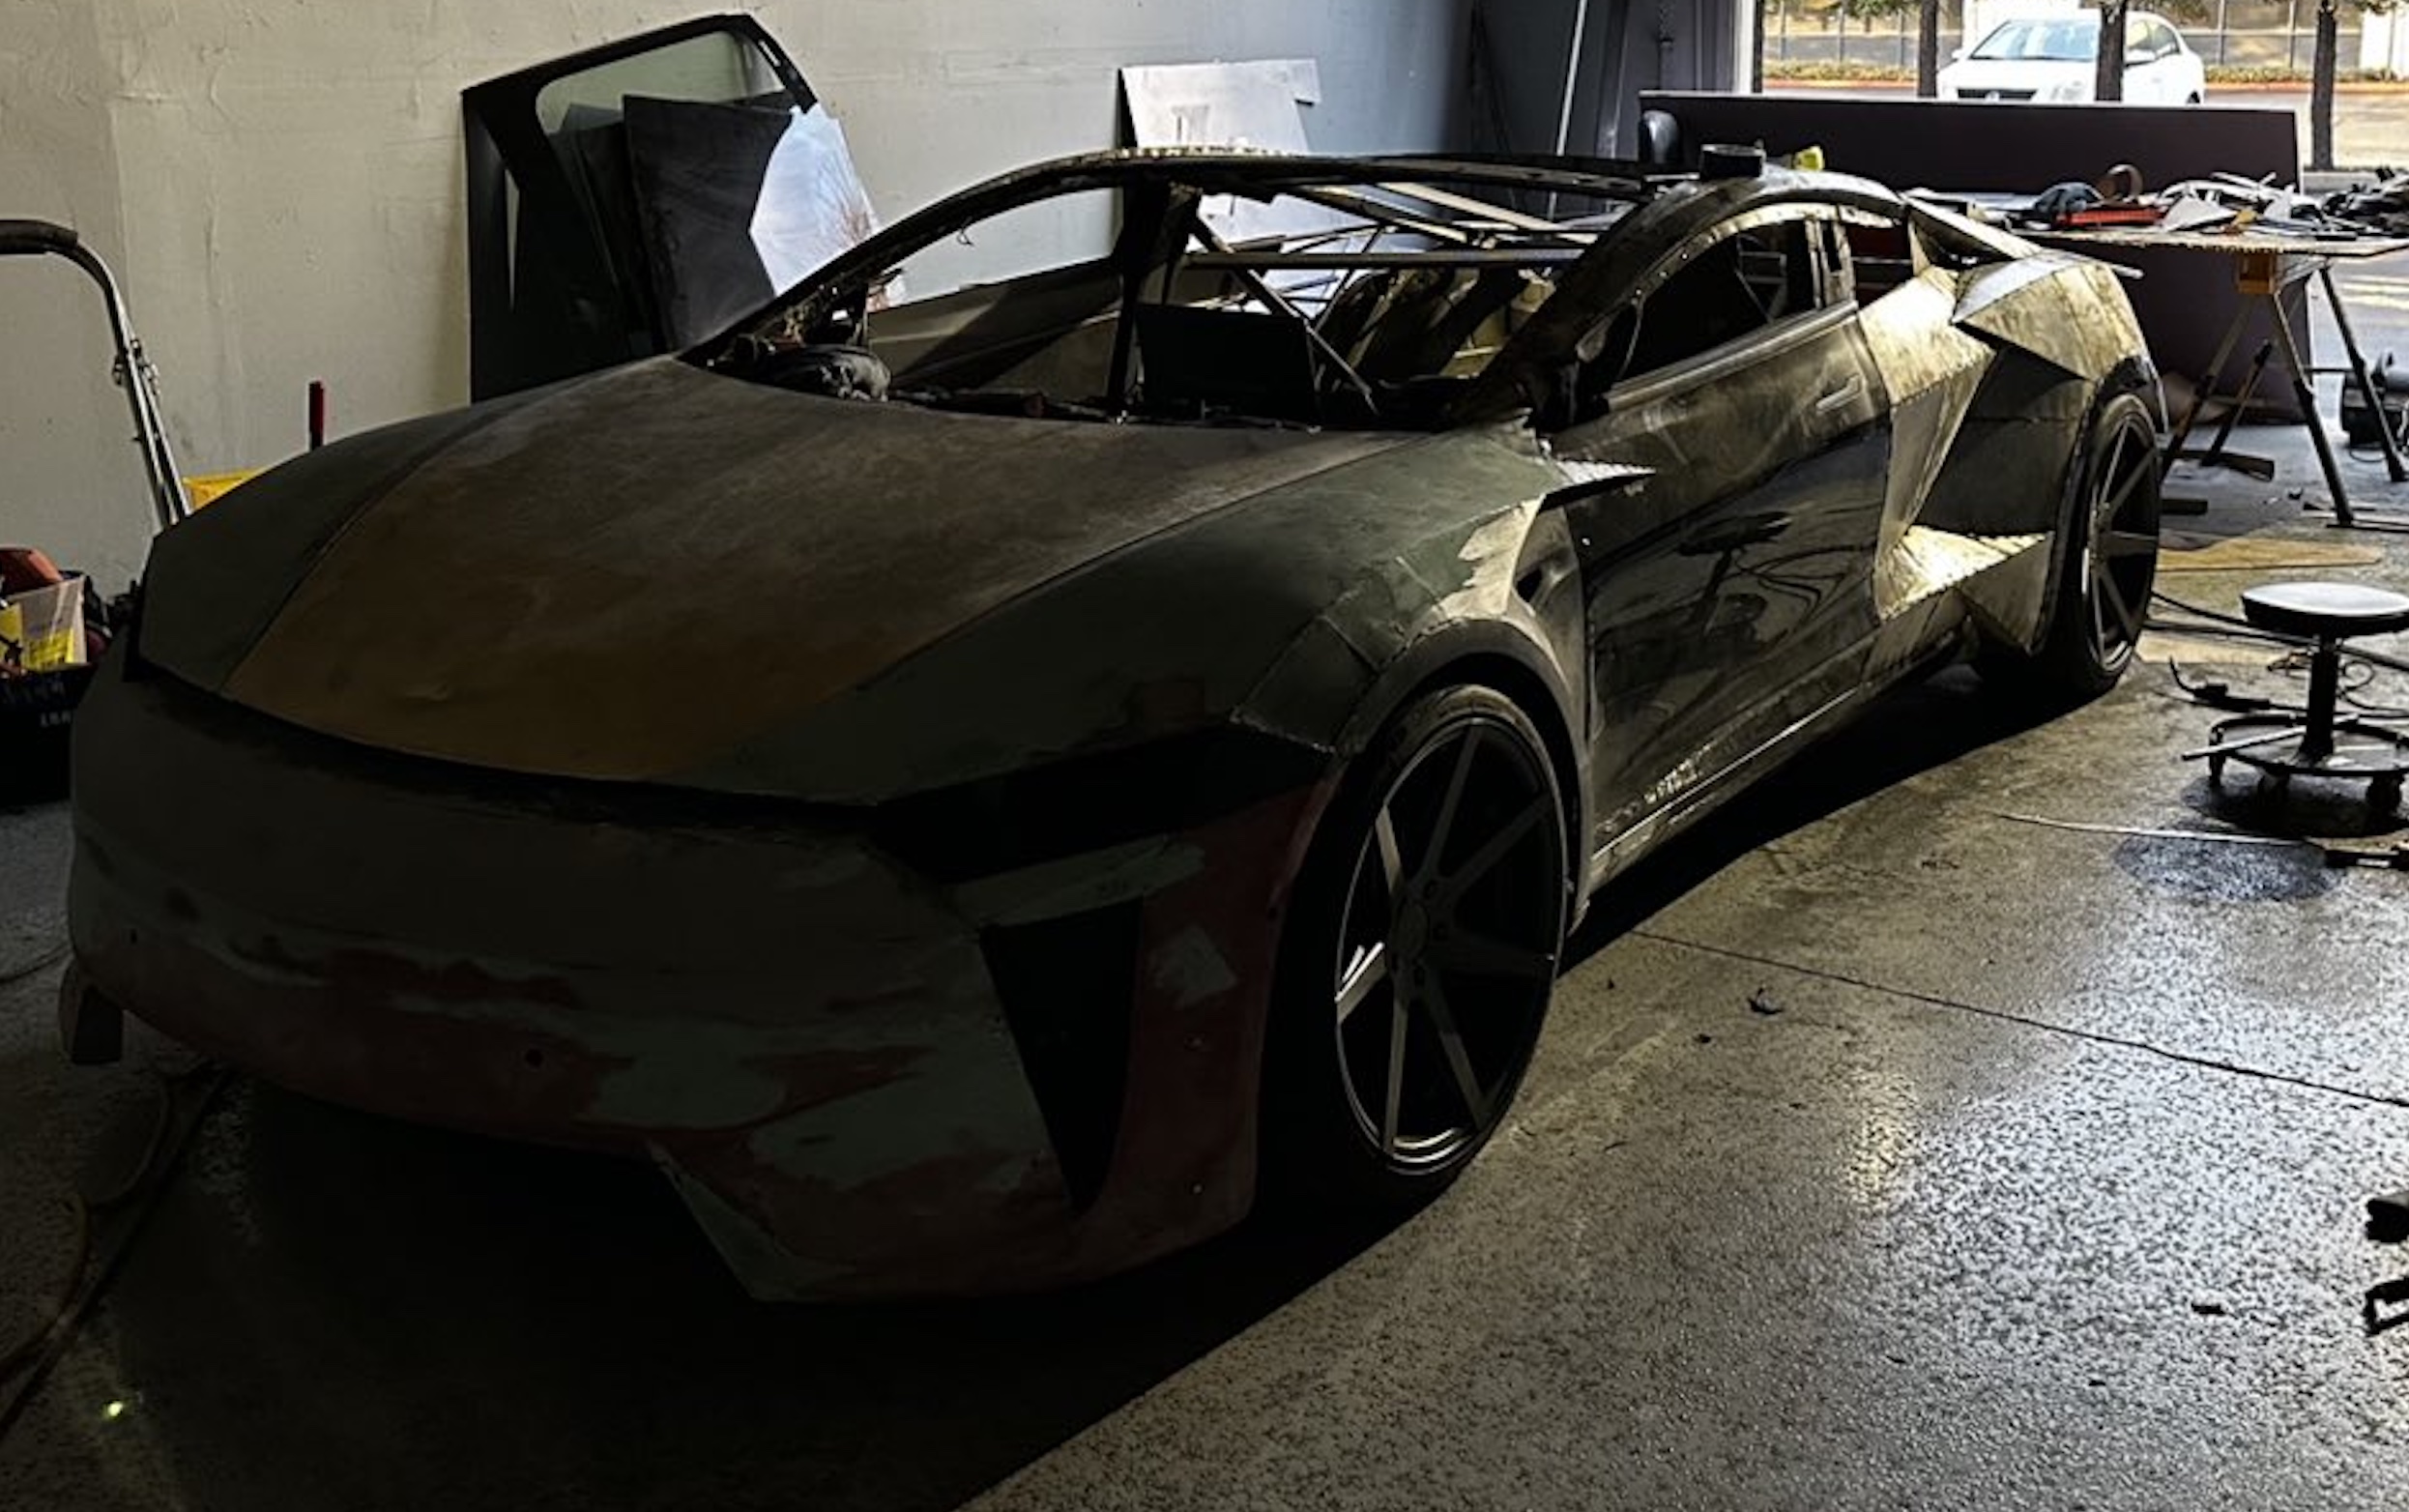
A Tesla owner is taking his hobby and love for electric vehicles to new levels by creating what could only be described as one of the coolest EV-related DIY projects to date. The idea for the project is simple: what happens when you cross a supercar with the Cybertruck? You end up with a two-seater CyberRoadster.
Tesla owner David Andreyev, who goes by the username @Cyber_Hooligan_ on Twitter, has spent the last few months creating a Cybertruck-inspired version of the next-generation Roadster made from a salvaged Model 3 Performance. Starting with a Model 3 Performance is an inspired choice, considering that it is Tesla’s first vehicle that has a dedicated Track Mode.
A look at Andreyev’s YouTube channel, which can be accessed here, shows the meticulous build that the Tesla owner has implemented on the project car. What’s particularly cool about the CyberRoadster is the fact that it’s being built with parts that are also from other Tesla vehicles, like its front bumper that came from a new Model S. Recent videos suggest that the project car’s rear bumper will be from a new Model S as well.
The journey is long for Andreyev, so the completion of the CyberRoadster will likely take some more time. Despite this, seeing the Tesla owner’s DIY journey on such an epic build is more than satisfying. And considering that the CyberRoadster is evidently a labor of love from the Tesla owner, the final results would likely be extremely worth it.
There’s a lot of crazy Tesla modifications that have been done as of late. But some, as it is with a lot of things on the internet these days, have become more silly gimmicks than serious automotive projects. Fortunately, car enthusiasts like Andreyev, who just happen to also love electric vehicles, are taking it upon themselves to create one-of-a-kind EVs that would surely capture the attention of anyone on the road.
Check out the latest video in the CyberRoadster’s creation below.
Don’t hesitate to contact us with news tips. Just send a message to simon@teslarati.com to give us a heads up.

SpaceX wants to catch Starship for launch 14, Elon Musk says

Tesla to open source Model S and Model X designs and software


