News
Installing Solar Panels through SolarCity
 Shortly after placing my order for my Tesla Model S I started looking into installing a solar panel system at home as a way to offset the soon-to-be increased electricity bill. My research turned me to a SolarCity system which I ended up signing up with in April of 2014.
After a number of scoping, design, and utility company challenges the day finally came for installation.
Sizing the Job
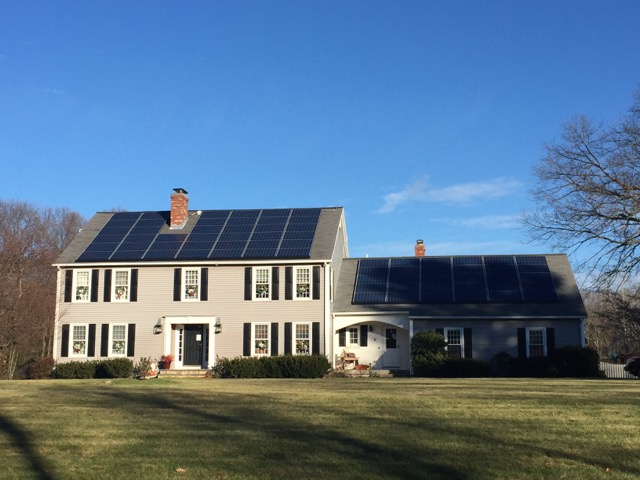
While I had originally hoped for a much larger system, the system that was installed was still large by most people’s standards. The final design called for 70 panels, each capable of generating 255W for a total of 17.8 kW and an annual expected output of 18,611 kWh.
To put that into perspective, my Model S uses an average of 775 kWh (as measured through a digital submeter) or approximately 2,400 miles. That usage will climb a bit for the winter months, but I still intend to use about 9,300 kWh per year for my Model S which equates to 50% of my expected solar generation capacity.
What this means is that I’ll be driving my Model S on 100% solar generated energy and still have solar energy to spare to offset my normal electric costs.
Many installations are half this size or smaller due to a number of constraints. Because of the size of this job, SolarCity booked 2 days for the install and sent a crew of about 8 to do the work.
Scheduling
 It was a bit nerve wracking waiting for the project to begin 8 months after my April sign up date. This put us smack dab in the middle of winter for a December 8th install in New England. We’ve had snow and ice storms along the way which made me more skeptical that the install would ever take place.
I’m happy to report that the entire SolarCity team in charge of the project arrived on the scheduled date. They were late due to leftover work at a different site, but they turned up despite the wet weather, 30 degree temperature and got right to work. It was immediately evident that this crew knew what they were doing and it was just another day on the job despite the magnitude of the install.
Solar Panel Installation
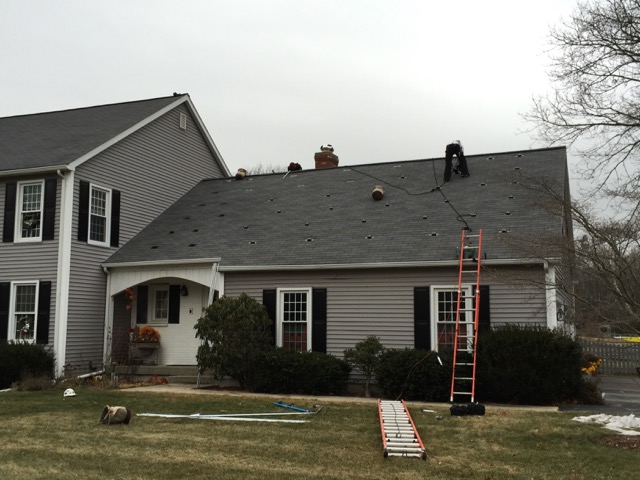 The first order of business was to tape off and secure the area from foot traffic. Anchors are attached to the roof which the crew secured their safety harnesses to.
Once the precautionary safety measures were in place, the crew began setting up dozens of anchor points across the roof surfaces later to be used as mounting points for the solar panels. That part took most of the first day.
 -
-
By the end of the first day they had managed to install solar panels on the smaller of the 2 roof lines and had most of the anchors ready on the larger roof line.
Weather Proof Guarantee
A Noreaster hit right in the middle of the week so installation was postponed. To make matter worse, all of the heavy rain and cold weather ended up icing over the roof. I crawled into both attics below each roof to ensure that all of the nails and anchors on the roof didn’t create a leak and was relieved to find that everything was totally dry.
SolarCity guarantees a leak-free installation so it was great to be able to validate that even after torrential rains.
The crew returned on the third day despite the rain and proceeded to work a full day in extremely cold weather and light rain.
Uh oh, Design Challenges
 Two different design issues were uncovered during the solar panel installation. The first of which was related to a misjudgment on the number of solar panels that would fit. Designers back at corporate had mapped out 70 panels for the roof, but one of the panels would not fit behind the chimney. The crew offered to stick it somewhere else, but we declined as it would have been asymmetrical anywhere else and the aesthetics would not have been good. So we ended up with a total of 69 panels and a slight decrease in target generation capacity.
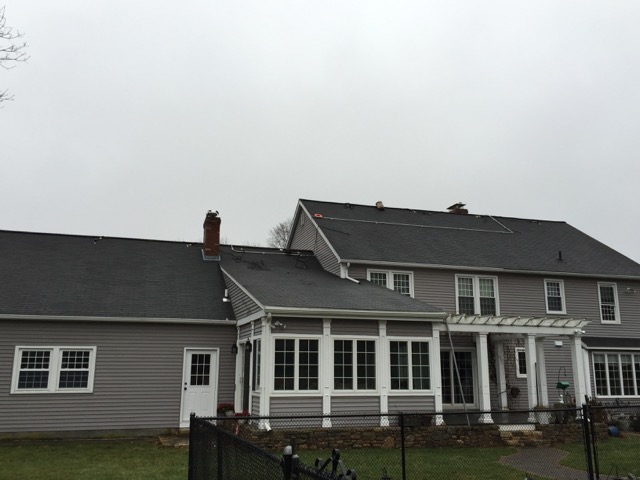
The second issue was identified on the third day. While the entire install was on the front of the house (thanks to National Grid), they had a pipe running in the middle of the roof on the rear of the house which looked stupid and unnecessary.
I spoke to them about it and they cheerfully redesigned and relocated the entire pipe. In the rain. In 30 degree weather. On top of the house. The install team took our concerns seriously and took care of the problem.
The Final Touches
 After lugging the panels up all day (each panel weighs about 45 pounds) and mounting them, they took the time to level each of them so they were completely flat.
At one point a single panel in the middle of the lot was a bit out of place (not perfect) so one of the guys had to slide down the wet, cold, glass on his knees (getting soaked in the process), 30 feet above ground with just a line to keep him safe just to adjust the angle slightly. Those installers are hard core!
-
Electric Connection
 I was surprised that SolarCity needed no access to the house (other than for bathroom breaks) to do the job. The entire connection for my house was on the outside. They needed to cut the power for about 45 minutes to connect into the mains but otherwise there was very little disruption.
The size of the installation required 3 inverters which they placed on the side of the house.
Next Steps
The process leading up to the install (3 part series) was frustrating and error-prone between the reluctant power company and the mistakes made by the out-of-touch engineers back at SolarCity corporate. But SolarCity’s installation team was nothing but first class, all the way. They knew their stuff, were very safety conscious and worked through some harsh conditions to get the job done, and done well. They restored my confidence in the decision I made and I’m confident again that things are going to work out well.
Now that the system is installed and ready to go we need to have the inspections done. SolarCity coordinates it all, but there’s a building inspection, an electrical inspection and then an inspection by the power company. Once all passes (in about 3-4 weeks) we’re given the green light to flip the switches and start putting that free energy from the sun to good use.

Tesla flexed the new features of the Model Y L with a dedicated media event at the company’s Diner on Santa Monica Boulevard in Los Angeles.
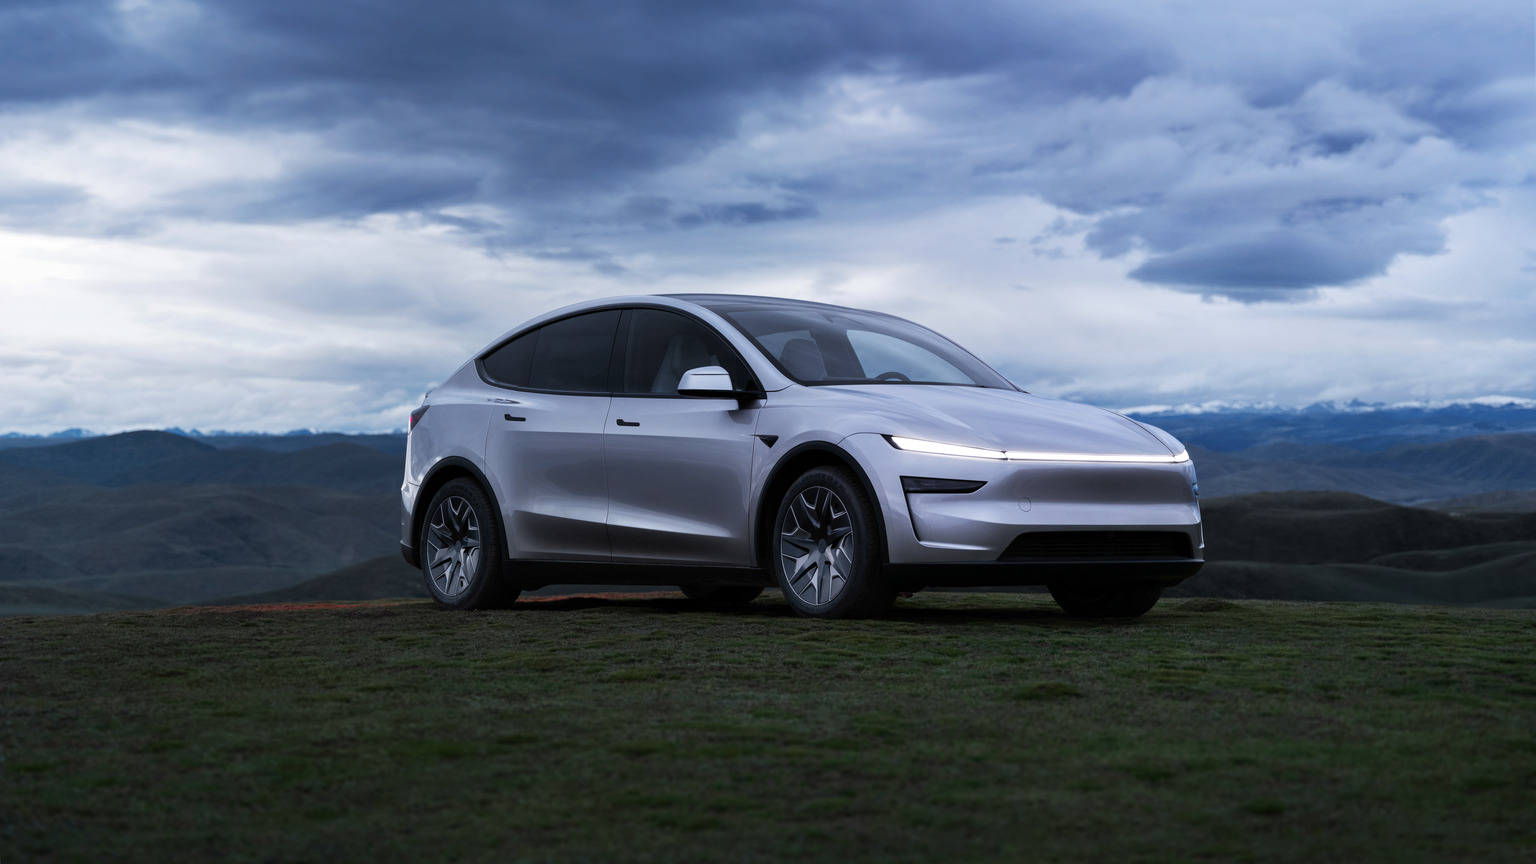
The Model Y L is the extended-wheelbase version of the all-electric crossover, which has been voted the best-selling car in the world on three occasions. The vehicle is already rolling off production lines at Gigafactory Texas, and first deliveries are slated to take place later this year.
Tesla brings Model Y L ‘Launch Series’ to the U.S. at $61,990
Teslarati was invited to the event, but due to some scheduling conflicts, we could not make it to Los Angeles. Instead, we will have our hands on a media unit sometime in August, so we’ll be able to spend some more extended time with the Model Y L.
However, plenty of those who made it to LA shared some cool features that set the Model Y L apart from the Model Y.
Multi-Row Climate Control
Tesla fitted the Model Y L with full climate control on all three rows on the front screen. It can be adjusted by selecting which row you’d like to modify on the right-hand side of the touch screen:
The Model Y L has a little row of icons on the right side of the climate screen so the front passenger can more quickly jump to whatever row they want to control. pic.twitter.com/uJS44mgCvk
— Sawyer Merritt (@SawyerMerritt) July 30, 2026
-
Better Rear Window Visibility
One of the strangest things about the Model Y, especially the Juniper iteration, is the rear window has extremely limited visibility when looking into the rearview mirror.
Tesla has improved upon this with the Model Y L:
This is a drastic difference. https://t.co/wTdhitD5aA pic.twitter.com/z6hFs0Jkss
— TESLARATI (@Teslarati) July 30, 2026
PowerShare will be included
Model Y L will come with PowerShare in North America, with an 11.5kW output to your home. Tesla said it would require Powerwall 3 for operation.
Wireless Charging Pad
There has been some speculation that Tesla would upgrade the wireless charging pads in the United States, but this is not the case.
-
Tesla owner fixes common feature complaint with crafty DIY retrofit
Tesla confirmed that it does not come with the cooled pads as the Y L in China does. This is because North America has not adopted Qi charging yet.
Thermal Management Improvements
These improvements in the Model Y L were seen with thermal management:
- Up to 15% faster cabin cooling
- +23% thermal efficiency gained in hot weather, 7 miles of real-world range gained
- 8x more solar energy reflection off of glass roof
- 30% reduction in solar energy entering the cabin
Some of the thermal management improvements in the new Model Y L Premium:
• Up to 15% faster cabin cooling
• Up to 15 min faster cabin cooling in sunny conditions
• +23% thermal efficiency gained in hot weather +7 miles of real-world range gained
• +10 miles recovered after… pic.twitter.com/jZirFWFdtO— Sawyer Merritt (@SawyerMerritt) July 31, 2026
Demand
Tesla said the Model Y L is almost sold out in the U.S. It comes with
-
- 1 year of FSD Supervised
- 1 year of Supercharging
- 1 year of Premium Connectivity
- Free exterior paint color, interior, and wheel option at no additional cost
Tesla CEO Elon Musk took to his social media platform X on Thursday night to deny a ridiculous rumor regarding the sale of the company’s Chinese vehicle production plant, Gigafactory Shanghai.
On Thursday, the Wall Street Journal, citing sources familiar with the matter, claimed in a scathing new report that Tesla was exploring a potential sale of the entire China business in an effort to help bolster a potential merger between SpaceX and Tesla.
Musk immediately denied the rumor not once but twice, initially calling it “fake news,” and then calling it “absurdly fake news” in a separate post just a few moments later:
This is fake news
— Elon Musk (@elonmusk) July 31, 2026
The original poster of the Wall Street Journal article that Musk saw deleted the initial post sharing the headline and the rumored sale of Tesla’s China business.
This has never even come up in a discussion ever.
Absurdly fake news.
-People should assume news is fake until proven otherwise.
— Elon Musk (@elonmusk) July 31, 2026
The report seemed absolutely and unequivocally false to begin with; Tesla’s business in China is among the most important pieces of the company’s business. Not only does the factory supply vehicles for the domestic market, but also for various other markets in Asia and Europe.
China is also one of the largest automotive markets in the world, and Tesla has performed well there despite the robust competition.
The speculation regarding a Tesla and SpaceX merger has started to gain steam this year as the space exploration company went public just a month ago. There has been speculation that Musk will bridge all of his companies under one “umbrella company,” and analysts believe this could happen before the end of the decade.
The Tesla and SpaceX merger everyone is talking about is quietly building
-
This is the latest iteration of Musk’s very evident war on mainstream media. Reports regarding any of Musk’s companies are quick to get the dreaded “false” or “fake news” response from the CEO when they are unfounded.
Elon Musk
Tesla AI boss reveals how big Optimus is going to get
Tesla’s Optimus chief corrected himself on X, confirming a staggering 10 million robot production target.
![Tesla Optimus Gen 3 [Credit: Tesla]](https://www.teslarati.com/wp-content/uploads/2026/03/tesla-optimus-gen3-diner.jpg)
Tesla’s Optimus program has a new number attached to it, after Ashok Elluswamy, the executive who has run the humanoid robot program since June 2025, posted a three word correction on X Thursday, “Correction, 10 million robots.”
The line clarifies the long term annual capacity Tesla is building toward its planned second Optimus production line at Gigafactory Texas, a figure Musk has cited repeatedly since last year’s shareholder meeting.
The scale is worth noting, because ten million robots a year would mean Tesla building more units annually than most countries sell in new cars. Tesla has framed this as a second line, not the first. The buildout is happening in two phases: a roughly one million unit per year line inside Tesla’s Fremont factory, installed on the floor space vacated when Model S and Model X production ended earlier this year, and a much larger dedicated facility under construction at Giga Texas that broke ground on its first steel structure in May. That Texas facility is the one Elluswamy’s correction refers to, and is expected to reach volume production sometime in 2027.
Correction, 10 million robots https://t.co/0z4nyQNTzp
— Ashok Elluswamy (@aelluswamy) July 30, 2026
Tesla Optimus project fires up as Musk sees production line progress
Elluswamy took over Optimus from Milan Kovac last summer and has spent the months since talking up the program’s trajectory. Elon Musk has also floated the ten million figure at Tesla’s 2025 shareholder meeting.
-
Ending Model S and Model X production to make room for the first Optimus line was one of the more consequential manufacturing decisions in the company’s recent history, retiring two flagship vehicles in favor of a robot that has yet to enter mass production. Musk has previously estimated per unit production costs at $20,000 to $25,000 once Tesla reaches a million units a year, though he hasn’t said what that cost looks like at ten times the volume.

Tesla Model Y L’s new features flexed at unveiling event at Diner

Tesla CEO Elon Musk denies ridiculous Gigafactory Shanghai rumor
![Tesla Optimus Gen 3 [Credit: Tesla]](https://www.teslarati.com/wp-content/uploads/2026/03/tesla-optimus-gen3-diner-80x80.jpg)


