Lifestyle
How to repair your Tesla Model S Door handle (DIY Kit)
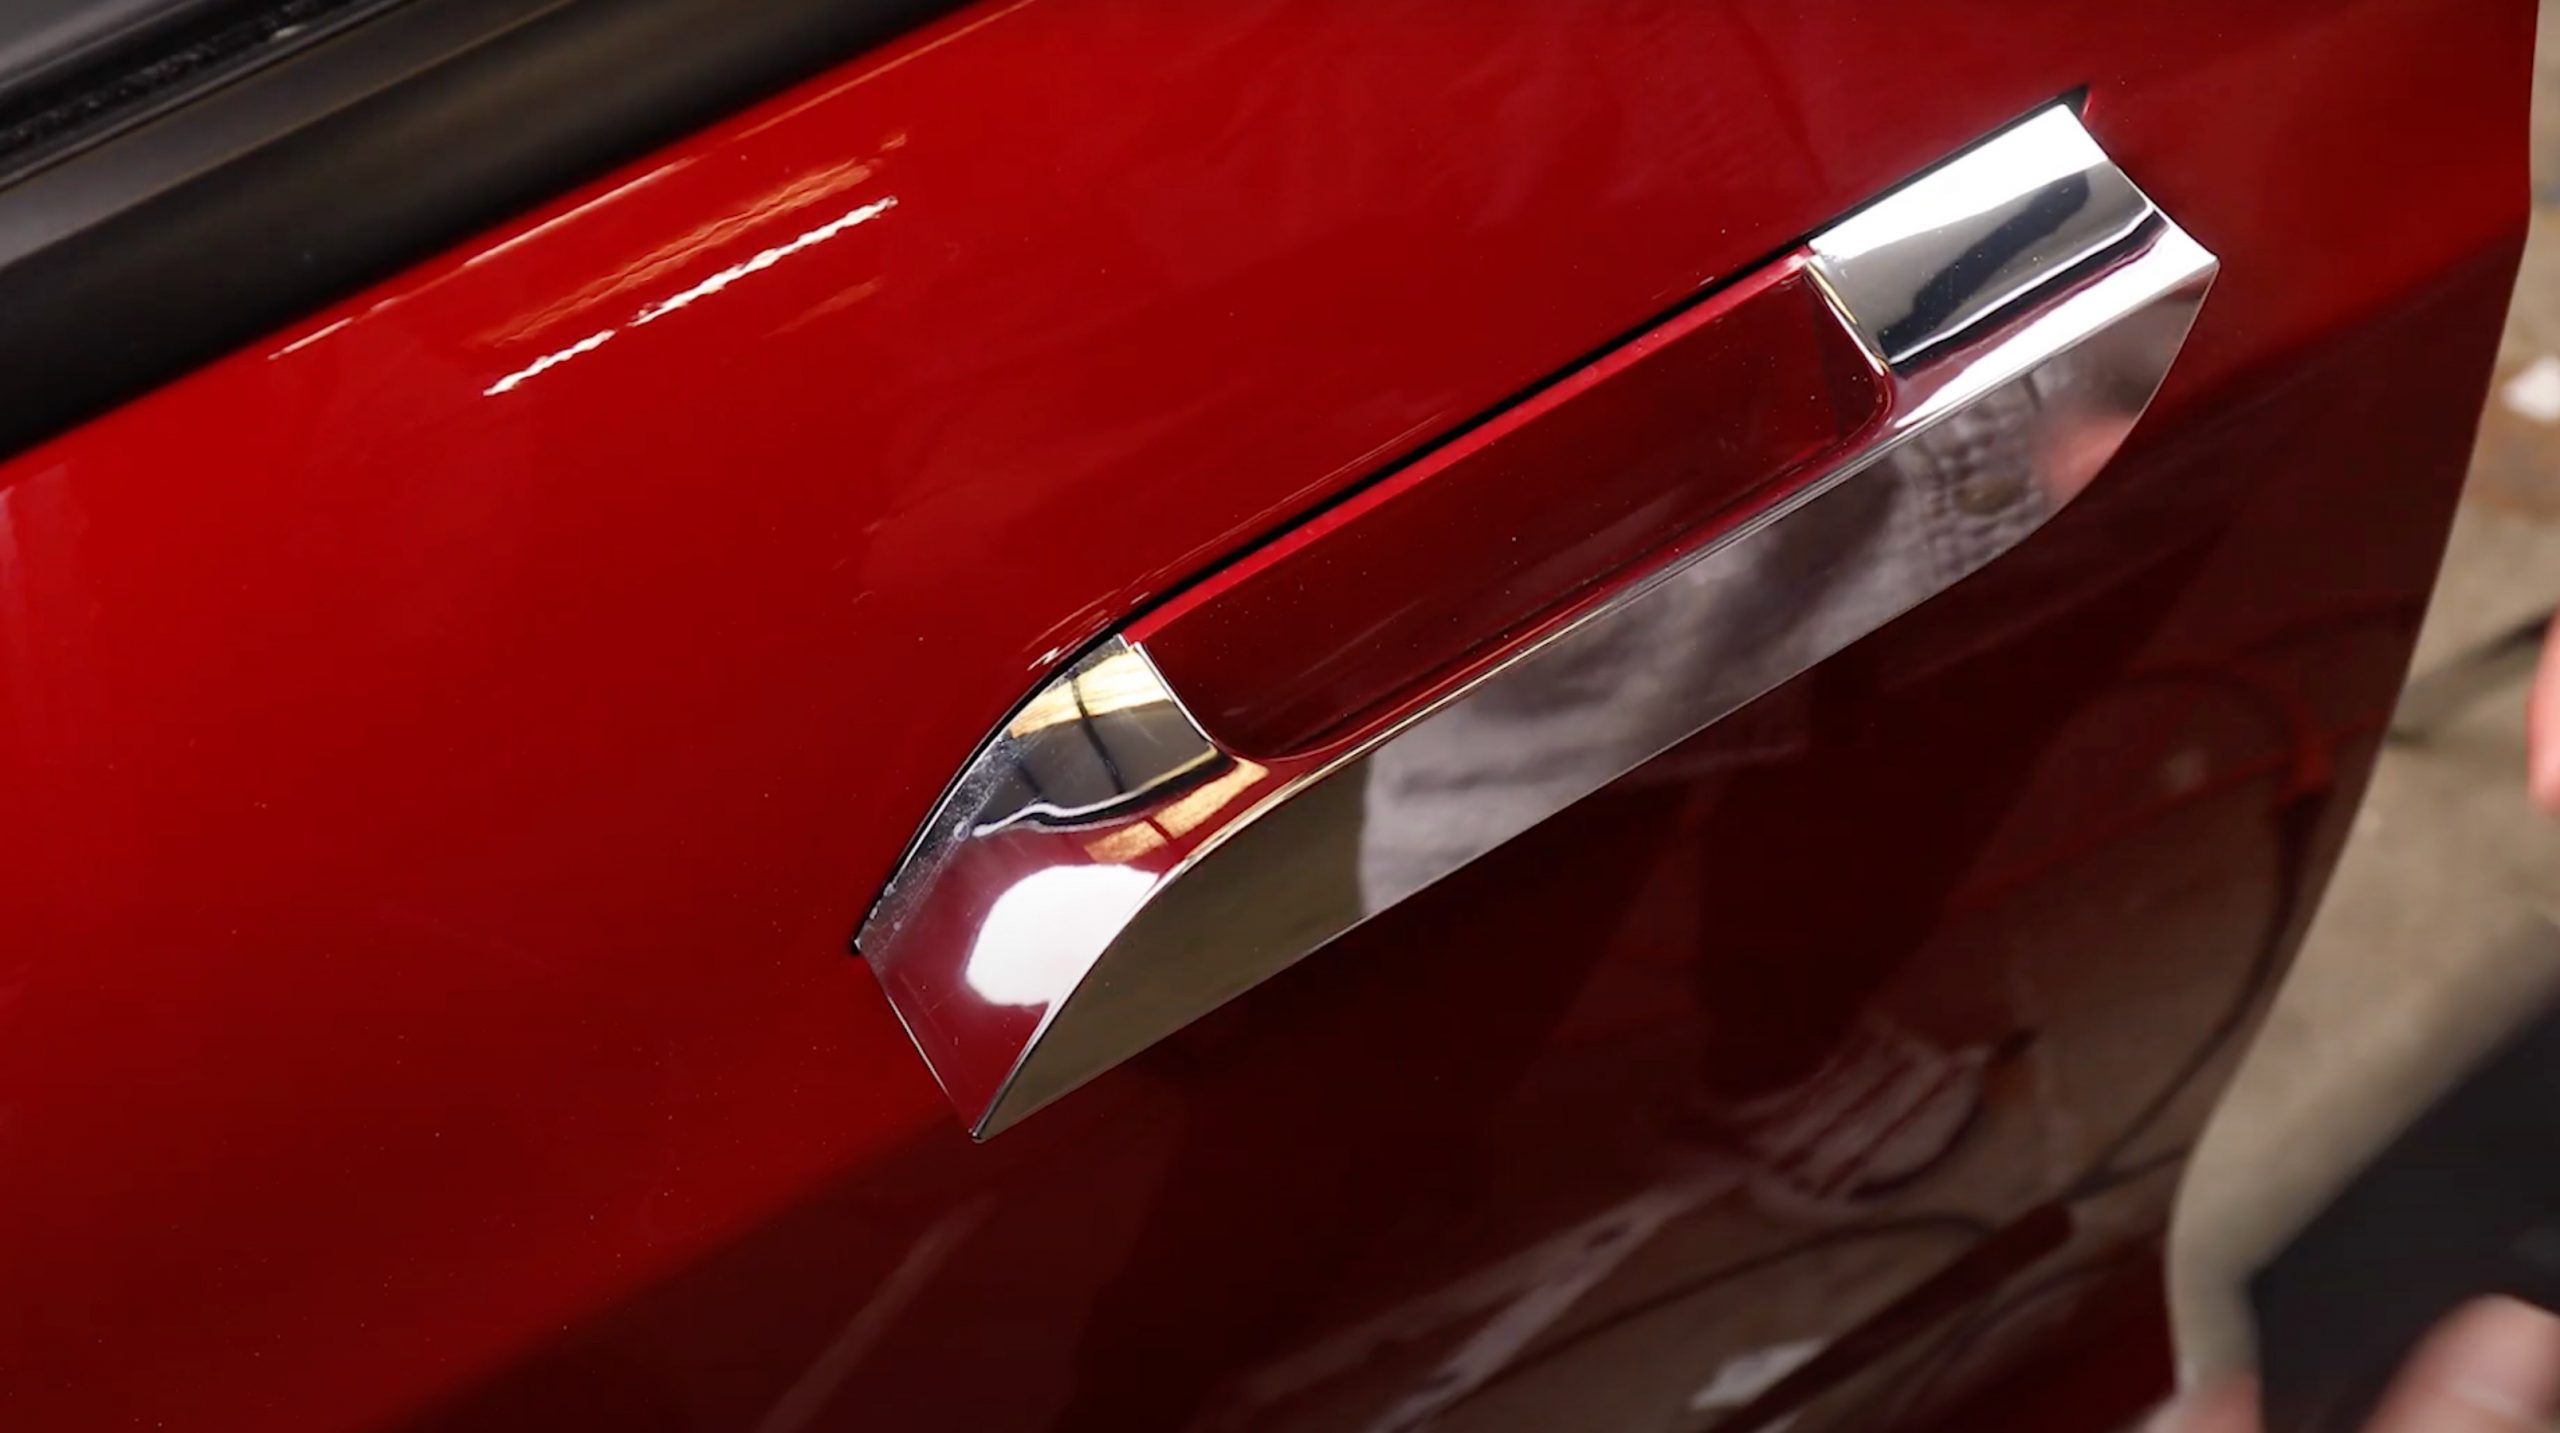
The sudden failure of Tesla Model S self-presenting door handles as a result of component failure is a common and often aggravating experience for many early owners.
The design of the earlier Model S door handle was comprised of cheaper, cast components that often led to breakage, which Tesla finally addressed in the 3rd Gen of Model S door handles.
Under warranty, the answer is simple; call the service center, and schedule an appointment for a replacement, but for many early Model S owners, their warranty has been long gone, and thus stuck with an expensive repair bill that ran upwards of $1000.00 per self-presenting door handle. It also requires a special calibration that only the service center can perform.
The owners of the Electrified Garage have addressed this common issue with a comprehensive DIY Model S Door Handle Rebuild Kit that any handy person can tackle.
The kit includes a stronger machined stainless steel gear, a new e-clip for retaining the pivot gear on the shaft, Original Equipment Panasonic replacement micro-switches, push nuts to hold the vapor barrier securely, and new door panel clips.
Here’s a basic guideline on how to repair your Model S door handle.
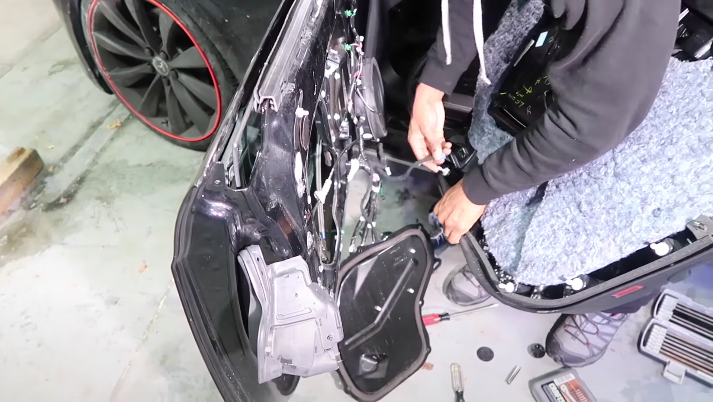
To remove the door handle assembly
- With the door opened, pull the hatch into a position as if you were opening the door.
- Pop off the trim piece with a flat tool, like a flathead screwdriver. Do not apply excessive force.
- Use a Torx T30 bit to remove the two screws behind the door hatch.
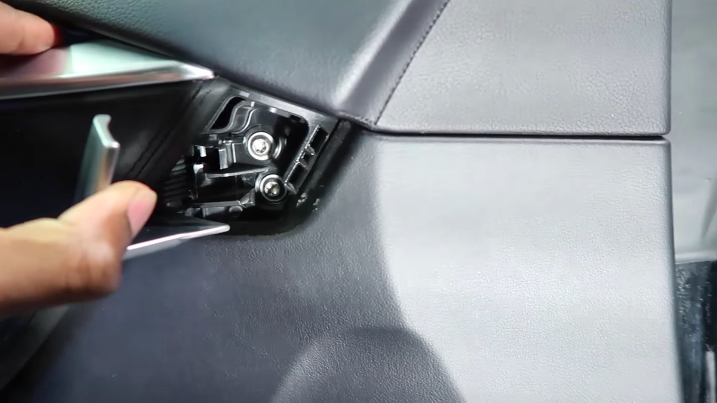
- Use the 9mm socket wrench to remove the single bolt that lies under the door handle.
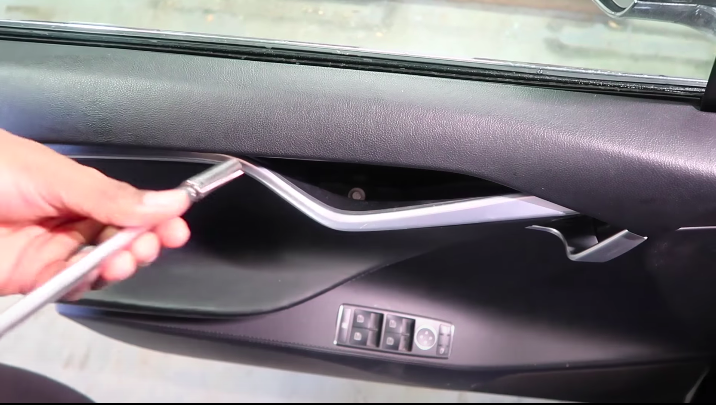
- Use your hands to pop the speaker grille off from the bottom portion of the door.
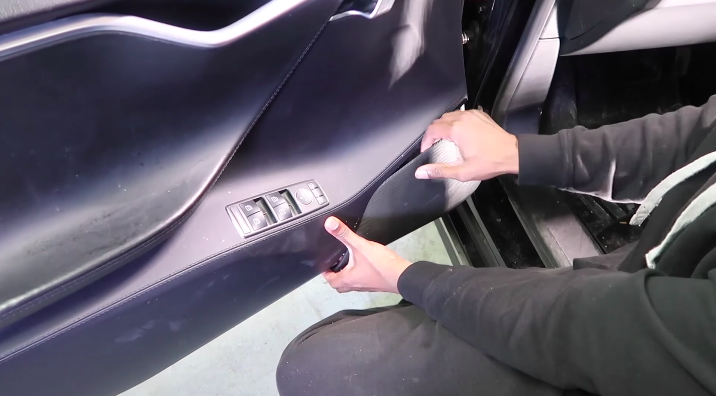
- Then grab the underside above the speaker and the door handle and pull the door covering off firmly.
- Remove any wiring that connects the door covering to the door itself. This includes lights, speaker system wires, and door sensor connectors.
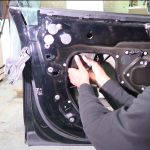
- Use a Torx T20 bit to remove the door cover panel. There will be five screws to remove.
- Use a flathead to push the rubber gasket through the hole on the panel that was most recently removed.
- Use a flathead to push the switch on the side of the door. This will trick the window into thinking the door is closed, which will push the window glass upward. It will give you easier access to screws at the top of the door frame.
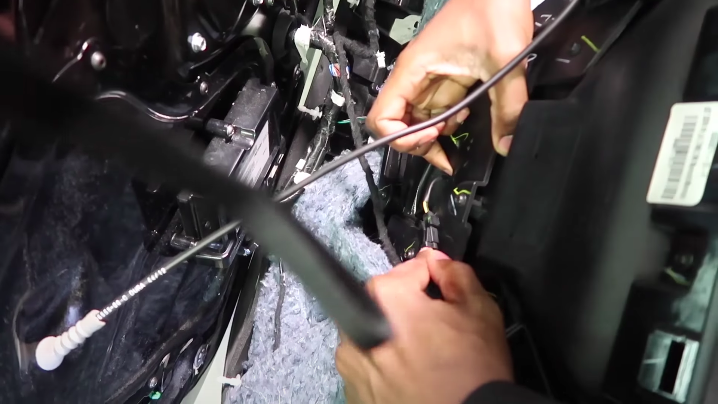
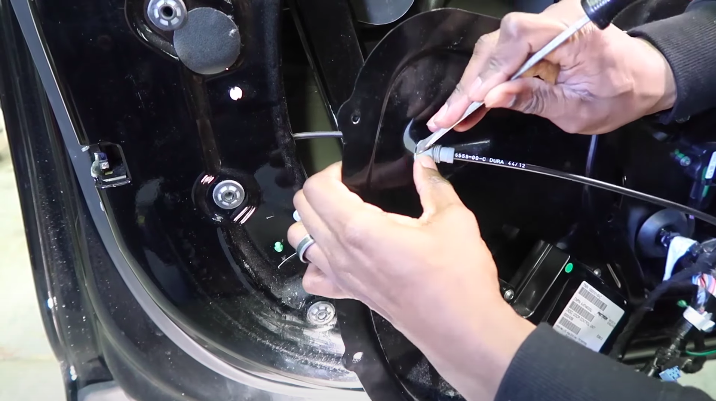
- Use a trim removal device or flat tool to remove the small white piece from the door panel. This secures the door handle harness into place.
- Unplug the door handle harness.
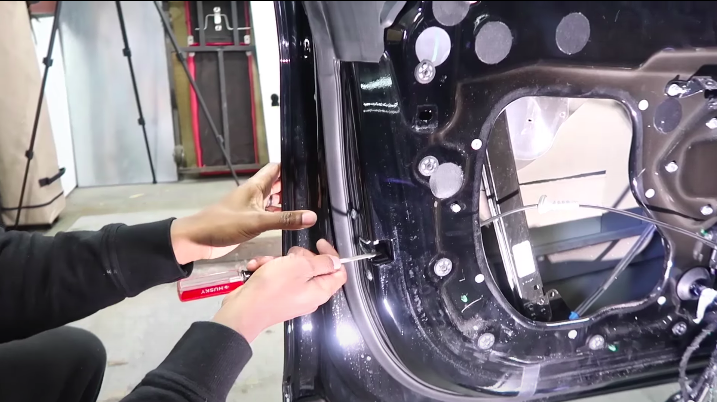
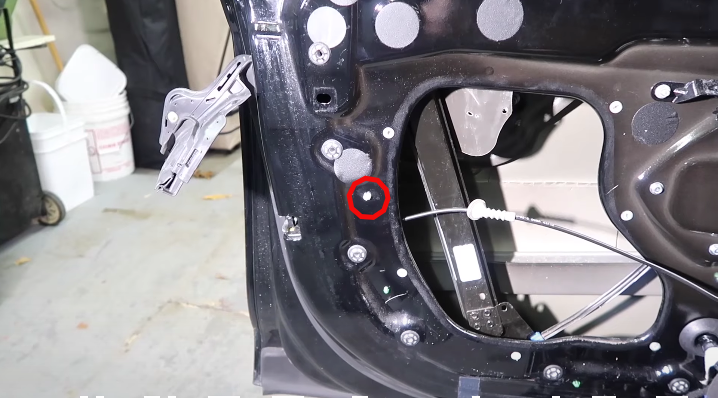
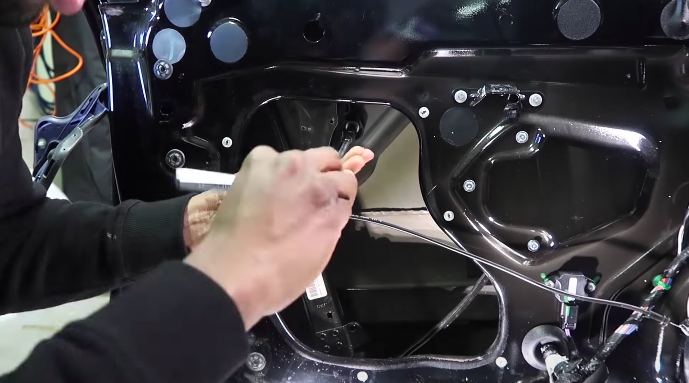
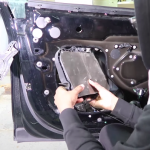
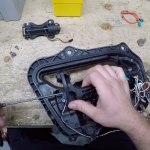
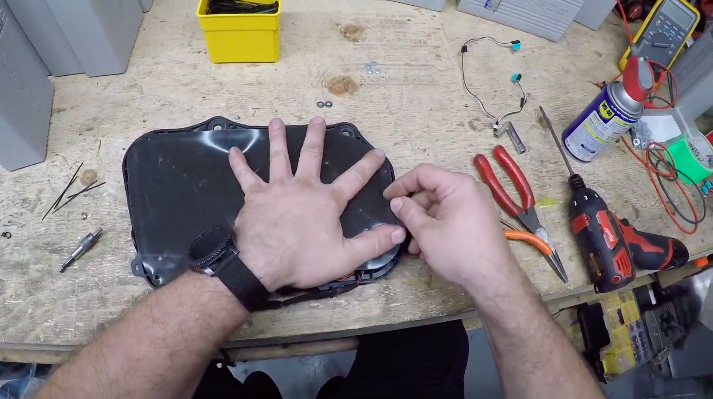
- Remove the two black plastic door covers from the door panel that are shown below. This is done by simply pressing from the back of the pieces with your hand.
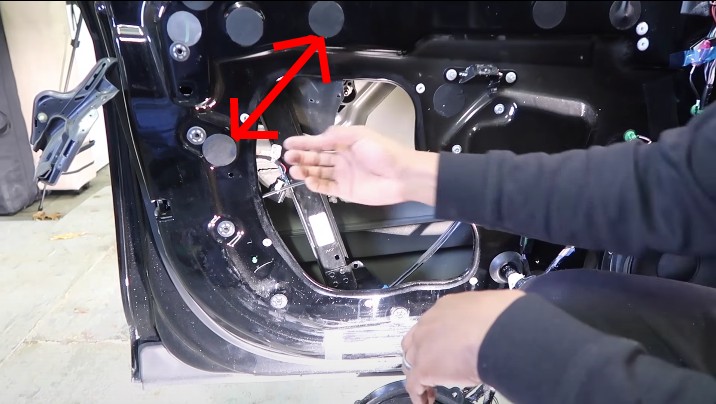
- Use a 10mm socket wrench to remove the two bolts that are in each of these two holes and another that lies within the open space in the center of the door.
-
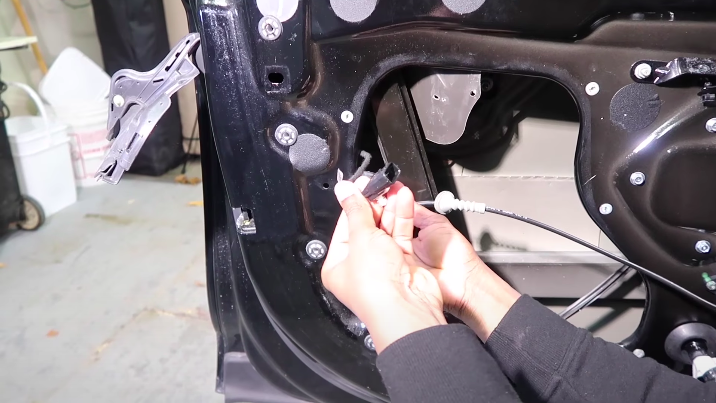
- Push the door handle on the exterior of the door back into the door assembly. Use your right hand to stabilize the door and your left hand to push the door handle in.
- Reconnect the blue window power wire into the appropriate connection point. This is located at the bottom of the door. Once this is completed, roll the window down and disconnect the connection once again.
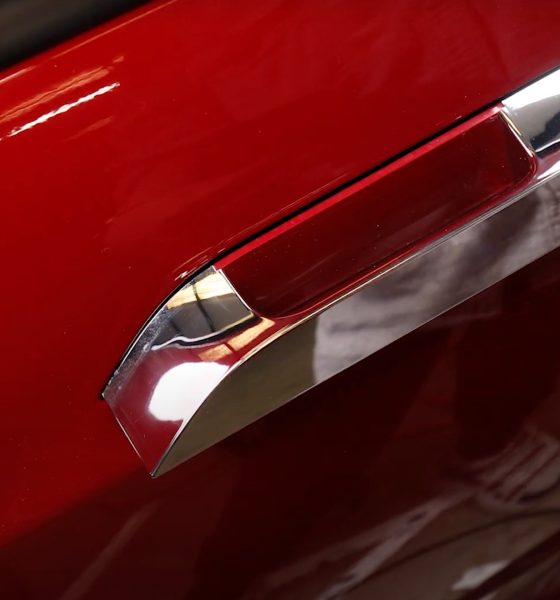
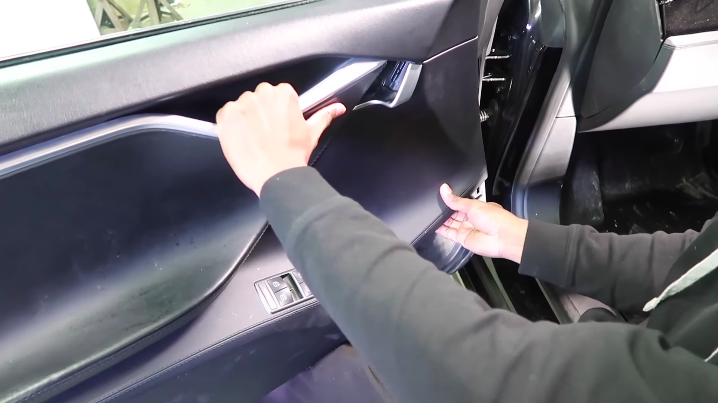
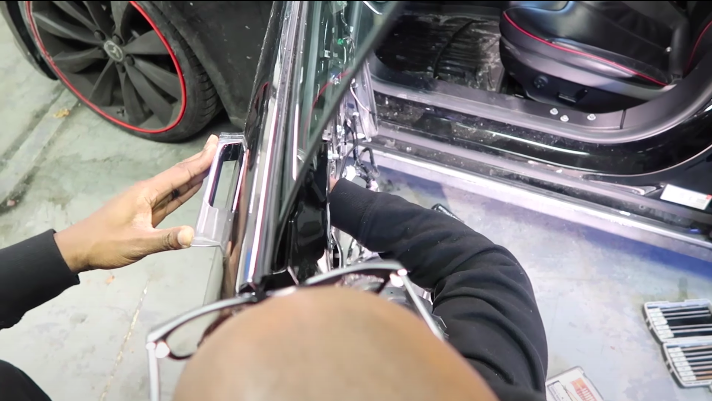
- Grab the top chrome-colored trim piece located at the top of the outside of the door. Gently remove this piece by slightly pulling and working your way down the piece. Do this gradually and try not to remove it in one pull. It could damage the trim or the door itself.
-
- Remove the bolt located under the chrome trim piece. It is easiest to do this with a regular wrench and slowly loosen. You can wrap the wrench in electrical tape to prevent possible scratching of the window glass.
- Reconnect the blue window power connector once again and roll the window all the way up. Once the window is rolled up, disconnect the connector wire once again.
- The door assembly can then be pulled out. Pull in a firm, controlled fashion.
-

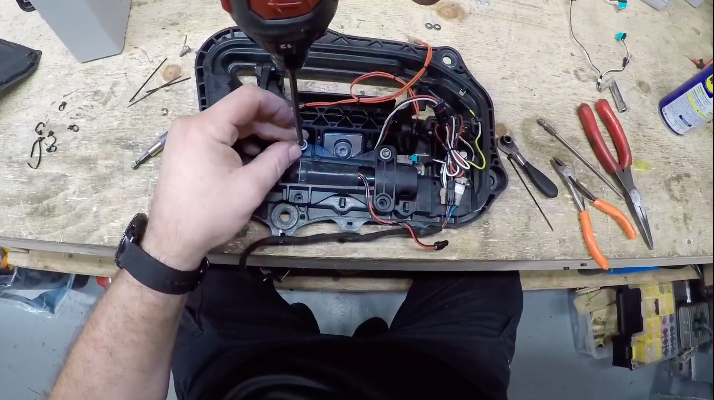
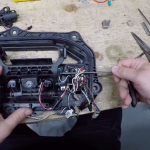
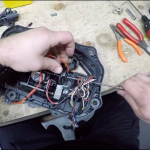
To repair the door assembly:
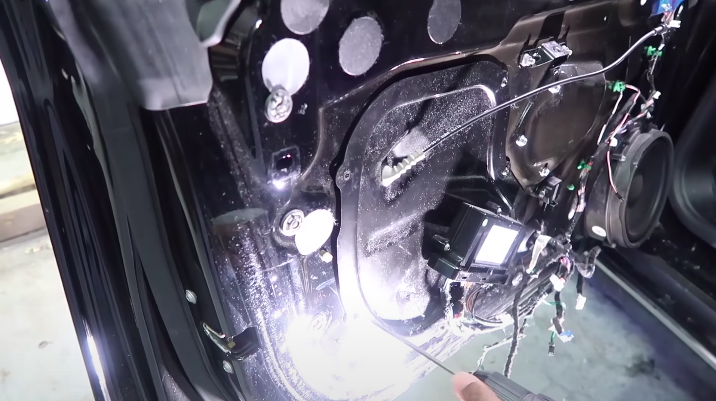
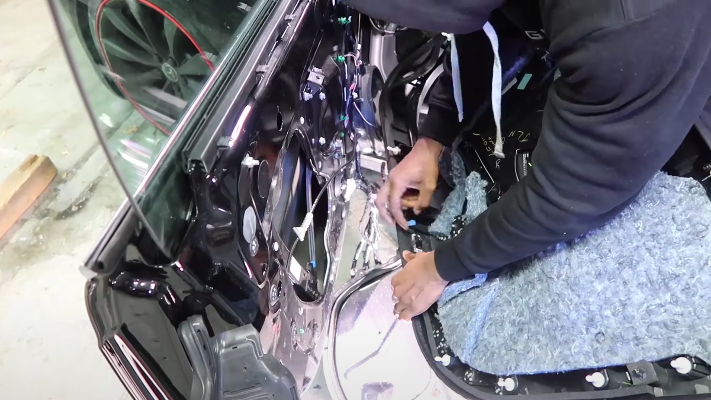
- Remove the vapor cover from the assembly. This is usually connected with zip ties. Be careful to not cut any wires while removing.
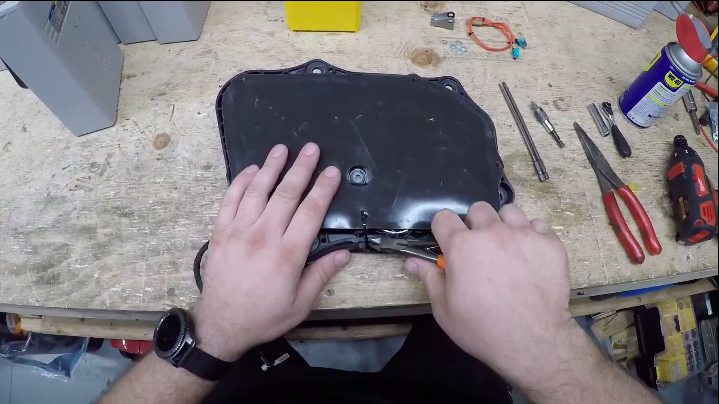
- Remove the five centrally located bolts with the correctly-sized Torx bits.
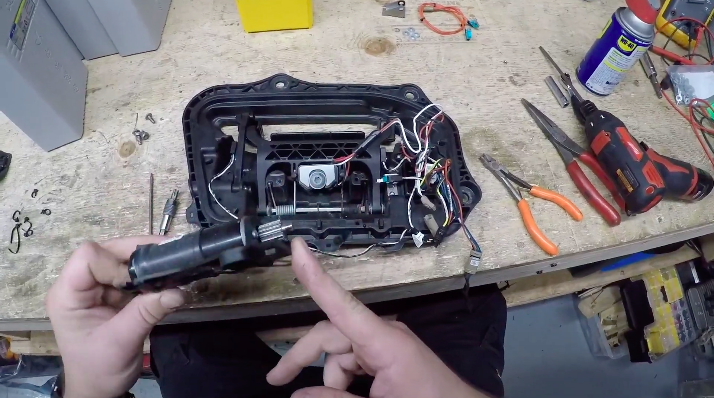
- Remove the motor, which is the small cylindrical black piece held in by these bolts.
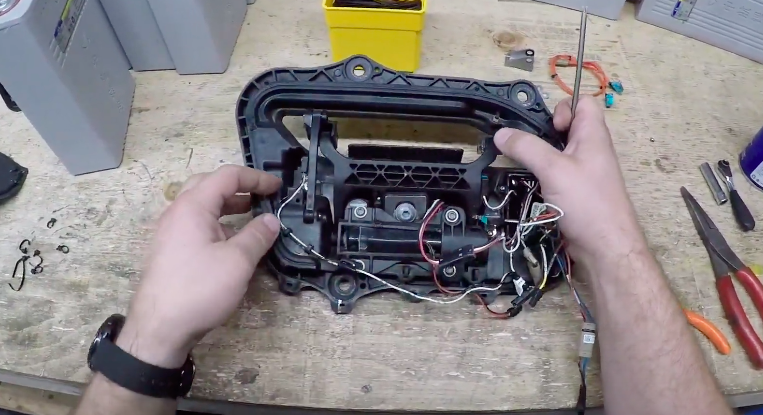
- Remove the two screws that maintain the position of the door handle.
-
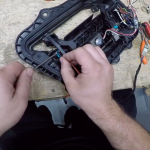
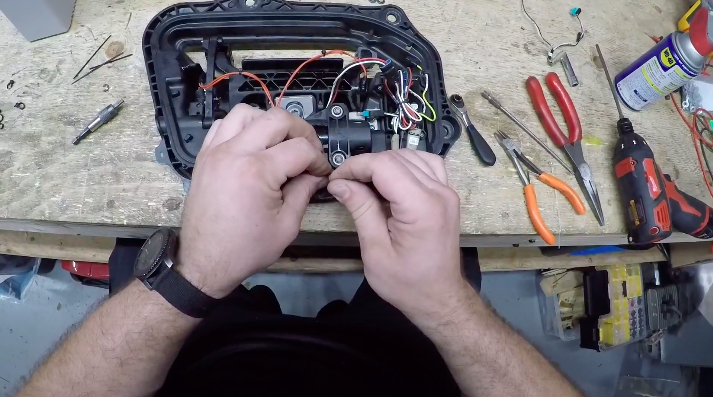
- Remove the pin that is housed on the rear side of the assembly. This can be lubricated with WD-40 and pushed out with a pair of needlenose pliers.

- Install the new gear into the door assembly by pressing down on the door handle.
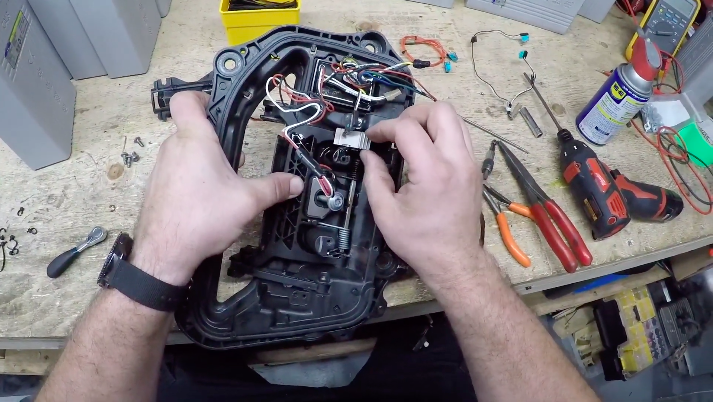
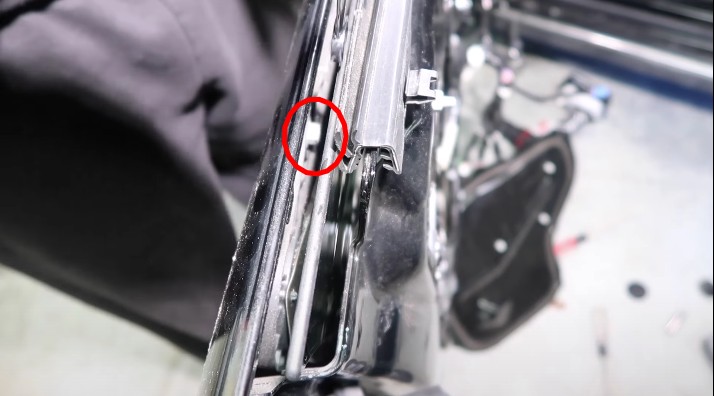
- Slide the pin back through and make sure the center notch on the pin is aligned with the middle slot. Install a new metal clip from the kit in the center notch.
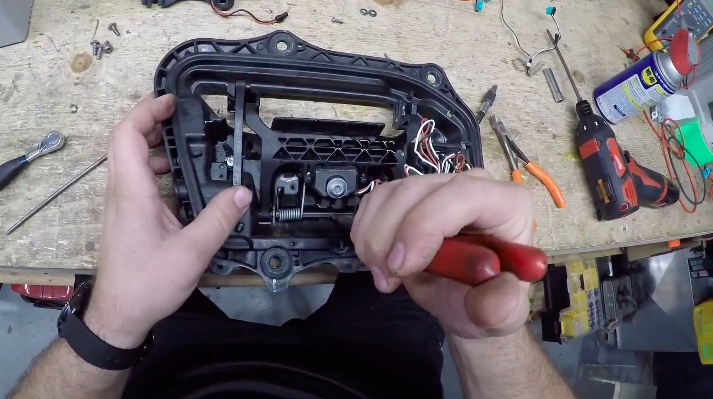
- Reinstall the screws that were removed in Step 4.
-
- Resecure the main power wire for the door handle to the bottom of the assembly with zip ties.
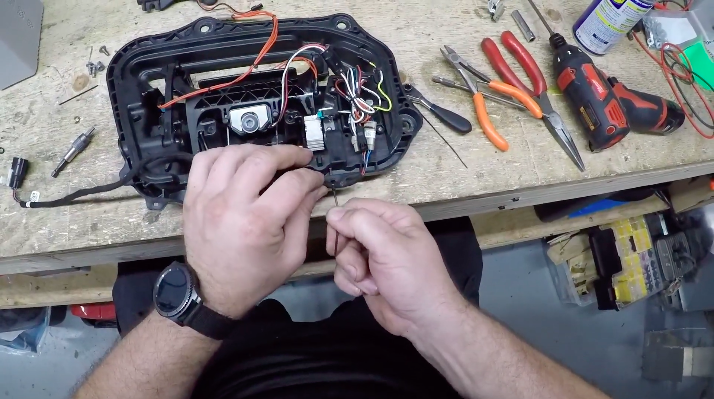
- Reinstall the motor from Step 3 and resecure it with the appropriate screws.
- Resecure all wires with zip ties and reapply the vapor cover.
-
Elon Musk
NASA’s first human outpost on the Moon starts now – SpaceX on deck
NASA named the rovers, landers, and vendors that will build America’s first Moon Base.
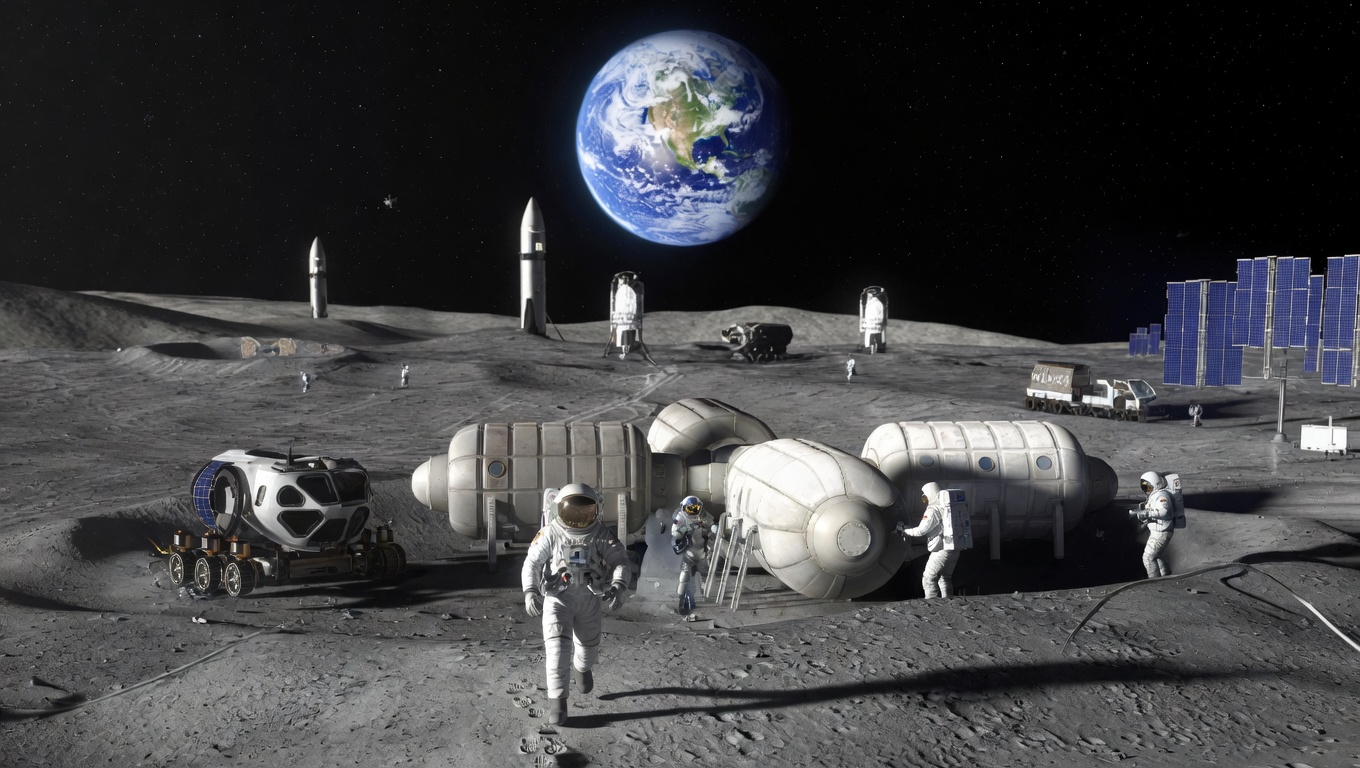
NASA has laid out its most detailed Moon Base plan to date, describing a permanent outpost near the Moon’s south pole that the agency intends to build over the coming decade as a direct stepping stone to Mars. “The Moon Base will be America’s and humanity’s first outpost on another celestial world,” NASA Administrator Jared Isaacman said, adding that every mission crewed and uncrewed “will be a learning opportunity as we return to the lunar surface, build the infrastructure to stay, and master the skills required to live and operate in one of the most demanding and dangerous environments imaginable.”
The plan is structured in three phases involving both uncrewed and crewed missions to deliver equipment, vehicles, and infrastructure to the surface, with the first three moon base missions targeted to launch before the end of 2026.
Moon Base I, targeting fall 2026, will use Blue Origin’s Blue Moon Mark 1 lander to deliver scientific instruments to the Shackleton Connecting Ridge, the same region where Artemis astronauts will land. Moon Base II will send Astrobotic’s Griffin lander carrying more than 1,100 pounds of cargo including Astrolab’s FLIP rover to begin developing mobility systems on the surface. Moon Base III will carry the Lunar Vertex science mission on Intuitive Machines’ Nova-C Trinity lander to study lunar swirls near the south pole, with ESA and Korean science payloads aboard.
On the rover side, NASA awarded Astrolab $219 million and Lunar Outpost $220 million to build the first phase of Lunar Terrain Vehicles, with both rovers targeted for deployment to the lunar surface by 2028. Astrolab’s crewed rover weighs roughly 2,000 pounds and can reach over 6 mph. Lunar Outpost’s Pegasus rover can operate autonomously or via remote control at over 9 mph. Blue Origin separately received $188 million with an option worth $280.4 million to deliver cargo landers for rover transport.
NASA also confirmed that MoonFall, a mission deploying four survey drones to scout Artemis landing sites, has selected Firefly Aerospace to build the transport spacecraft, with a 2028 launch target.
SpaceX sits at the center of that commercial layer. SpaceX holds the NASA Human Landing System contract for the Starship-derived lander that will put astronauts on the surface under Artemis IV, currently targeting 2028. Before that can happen, SpaceX must demonstrate in-orbit propellant transfer at scale, a process requiring multiple Starship tanker launches to fuel a single mission. Water ice at the lunar south pole is central to the base’s long-term viability, as it can be converted into drinking water, breathable oxygen, and rocket fuel, directly reducing dependence on Earth resupply. That resource loop becomes far more practical if Starship can land and be refueled on or near the Moon itself.
Elon Musk has publicly stated that Starship V3, which recently completed its first flight, should be capable enough for initial Mars missions. The Moon Base plan announced Tuesday is the infrastructure layer that connects everything between those two ambitions, and SpaceX is the only American company currently contracted to build the rocket that gets humans to either destination.
Elon Musk
Tesla ditches India after years of broken promises
Tesla has ditched its plans to build a factory in India after years of failed negotiations.
Tesla’s long-running effort to establish a manufacturing presence in India is officially over. India’s Minister of Heavy Industries H.D. Kumaraswamy confirmed on May 19, 2026 that Tesla has informed authorities it will not proceed with a manufacturing facility in the country.
Tesla first signaled serious interest in India around 2021, when it began hiring local staff and lobbying the Indian government for lower import tariffs. The ask was straightforward: reduce duties enough for Tesla to test the market with imported vehicles before committing capital to a local factory. India’s position was equally firm, with an ask of Tesla to commit to manufacturing first, then receive tariff relief. Neither side moved, and the talks quietly collapsed.
Tesla to open first India experience center in Mumbai on July 15
India had offered a policy that would reduce import duties from 110% down to 15% on EVs priced above $35,000, provided companies committed at least $500 million toward local manufacturing investment within three years. Tesla declined to participate. The tariff standoff was only part of the problem. Analysts pointed to significant gaps in India’s local supply chain, inadequate industrial infrastructure, and a mismatch between Tesla’s premium pricing and the purchasing power of India’s automotive market as additional factors that made the investment difficult to justify.
First signs of an unraveling relationship came in April 2024, when Musk abruptly cancelled a planned trip to India where he was set to meet Prime Minister Modi and announce Tesla’s market entry. By July 2024, Fortune reported that Tesla executives had stopped contacting Indian government officials entirely. The government at that point understood Tesla had capital constraints and no plans to invest.
The more fundamental issue is that Tesla’s existing factories are currently operating at approximately 60% capacity, making a commitment to building new manufacturing capacity in a new market difficult to defend to investors. Tesla will continue selling imported Model Y vehicles through its existing showrooms in Mumbai, Delhi, Gurugram, and Bengaluru, but local production is no longer part of the plan.
Elon Musk
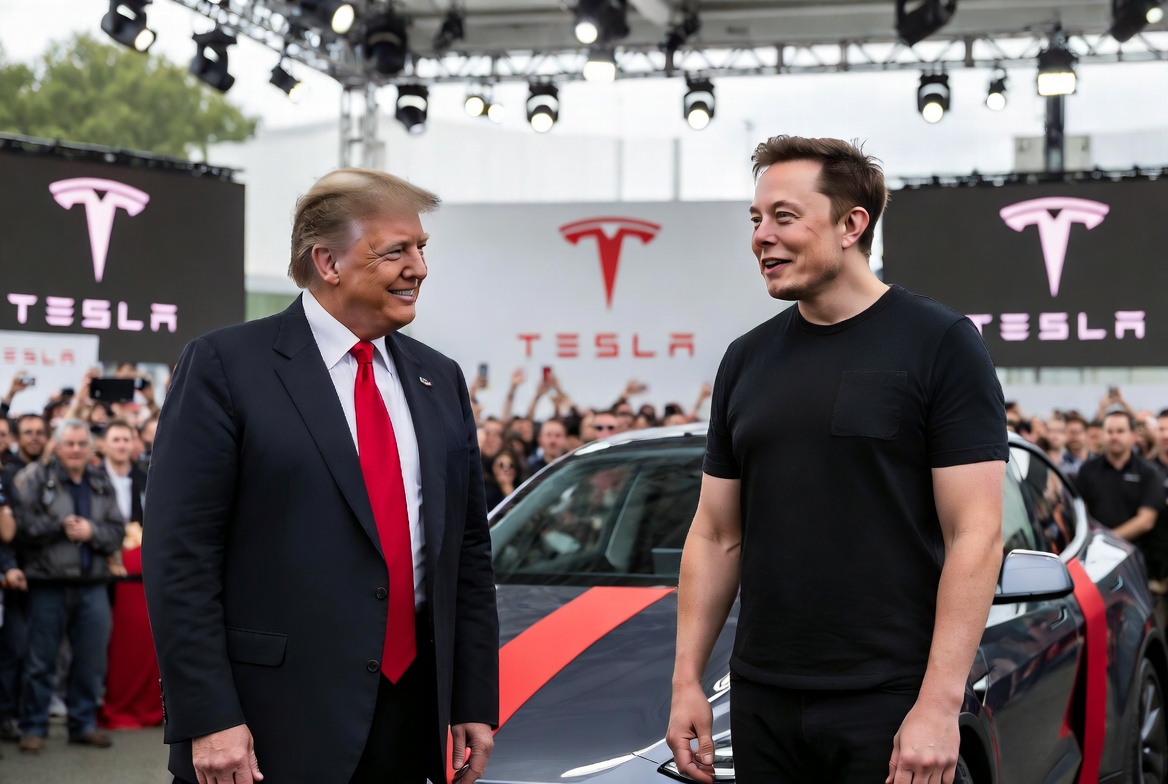
Trump’s invite for Elon just reshuffled Tesla’s big Signature Delivery Event
Tesla rescheduled its final Model S farewell to May 20 after Musk joined Trump in China.
Tesla has rescheduled its Model S and Model X Signature Edition delivery event to Wednesday, May 20, 2026, after abruptly calling off the original May 12 celebration. The event will take place at Tesla’s factory at 45500 Fremont Boulevard in Fremont, California, the same location where the Model S first rolled off the line in 2012. Invitees received a follow-up email asking them to reconfirm attendance and download a new QR code ticket, with Tesla noting that all travel and accommodation expenses remain the buyer’s responsibility.
The reason behind the original cancellation came into focus the same day it was announced. President Trump invited Elon Musk, Apple’s Tim Cook, BlackRock’s Larry Fink, Boeing’s Kelly Ortberg, and executives from Goldman Sachs, Blackstone, Citigroup, and Meta to join his trip to China this week for a summit with President Xi Jinping. The agenda covers trade, artificial intelligence, export controls, Taiwan, and the Iran war, following weeks of escalating friction between Washington and Beijing over AI technology, sanctions, and rare earth exports. Trump wrote on Truth Social, “I am very much looking forward to my trip to China, an amazing Country, with a Leader, President Xi, respected by all.”
Tesla launches 200mph Model S “Gold” Signature in invite-only purchase
The vehicles at the center of all this are the last Model S and Model X units Tesla will ever build. Priced at $159,420 each, the 250 Model S and 100 Model X Signature Edition units come finished in Garnet Red with a one-year no-resale agreement, giving Tesla right of first refusal if the owner decides to sell. As Teslarati reported, the Model S defined Tesla’s early identity as a serious luxury automaker, and the Fremont factory line that built it is now being converted to manufacture Optimus humanoid robots.
Musk’s inclusion in the China delegation drew attention given his very public relationship with Trump, and the invitation signals the two have moved past and past grievances. Trump originally brought Musk on to lead the Department of Government Efficiency following his inauguration, and despite a sharp public dispute in mid-2025, the two have appeared together repeatedly in recent months. A seat on the China trip, the most diplomatically consequential visit of Trump’s current term, puts Musk back at the table on U.S. economic policy at a moment when Tesla’s China revenue remains one of the company’s most important financial pillars.

Elon Musk strikes down reports on SpaceX IPO rumors

Tesla’s Robotaxi dreams just took a massive step toward reality


