DIY
Model S Front Seat Covers Review: Outerwear for Your Inner Tesla
EVannex front seat covers protect, provide increased comfort, better positioning, added storage and are superbly made. The drawbacks are reduced heating, seat control access and ease of ingress/egress.
I’m a “child of the ’80s” and remember very clearly the expectation that a savvy car owner would cover their precious leather seats. Shortly after taking delivery of their new Signature Red 1983 Volvo wagon– okay, so it wasn’t “Sig Red,” but it was a gorgeous burgundy– my parents bought a set of the fashionable seat covers of that era: sheepskin. I vividly remember that from the start they were insufferably messy. The “fuzzies” and “fur” would shed off those covers in what was nearly a cloud of dust. Completely unusable, especially for the Army-regulation black sweater my dad wore, the covers were quickly sent to cardboard purgatory. After a few extra trips across the Atlantic Ocean, they were eventually disposed of… still creating a haze of fibers in the air anytime you dared to touch them. Unprotected, the Volvo’s tan leather seats did end up showing their age, cracking over the next decade until an Army tractor trailer guillotined the front of the car and rendered that patina irrelevant.
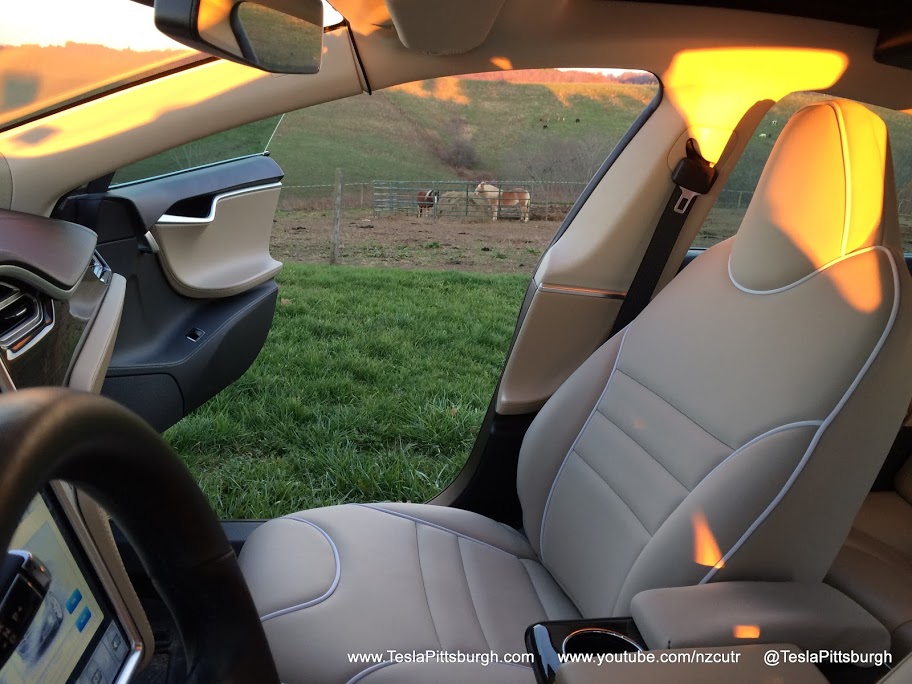
As an adult, my cars have been a mix of leather and cloth seats. The cloth seats have their advantages: “stickier” in curves, warmer in winter, cooler in summer. But nothing quite compares to the smell and feel of a proper leather seat. When we bought our Tesla we might well have considered the textile seats if they were offered in tan. How is this STILL NOT an option? We didn’t want a black interior, even though the mixture of materials on the black textile interiors do seem appropriately upmarket. So we bought tan leather.
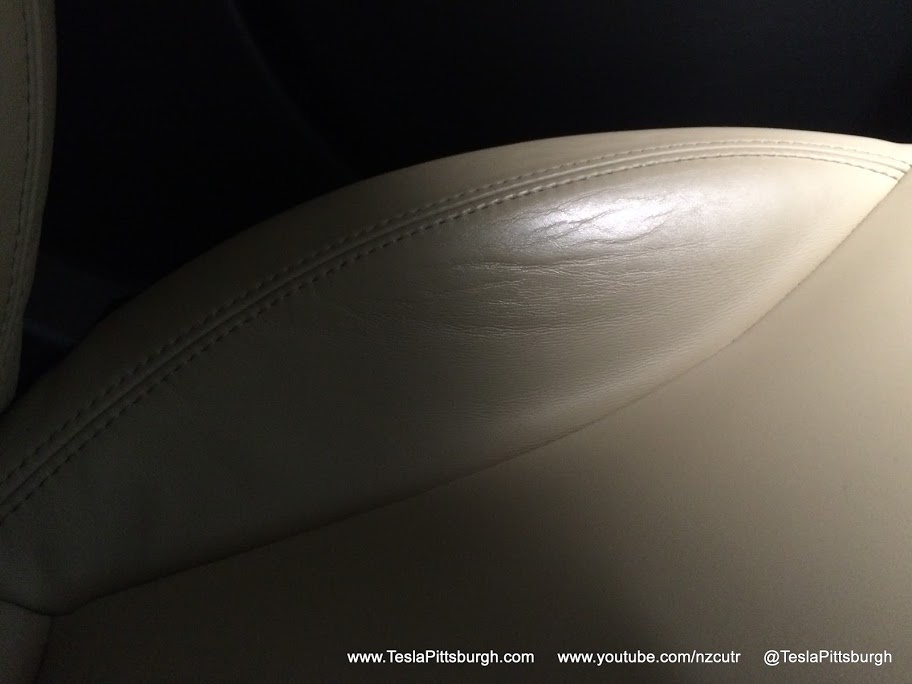
The leather has been wearing well overall, but the opportunity to fit custom covers to the seats was one I couldn’t pass up. After all, we have… CHILDREN. More pertinent, we use the car on every trip we can from daily commuting to camping trips. Adding protection to the seats of a car we fully intend to keep until it croaks seems like a smart idea. In the old days you could easily recover or swap out worn leather seats, but that has gotten a lot more complicated in the era of integrated airbags. Our 18 month old car is showing some wear on the outboard bolsters (creases and lines from getting in and out) and there is a tiny pinhole in the passenger cushion, so I’ve been doing some of that mental math already.
ORDERING / COLORS
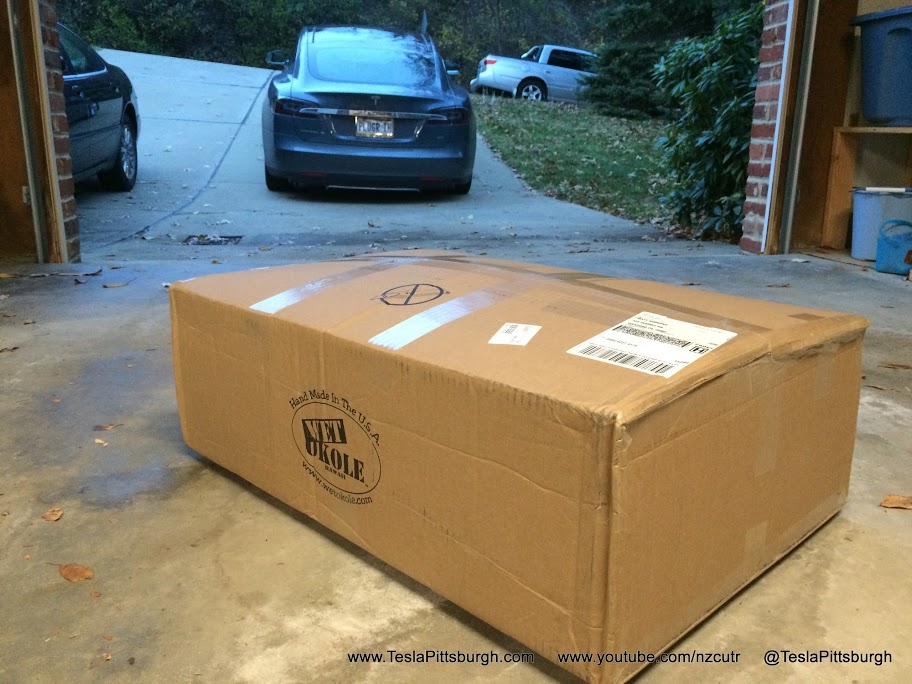
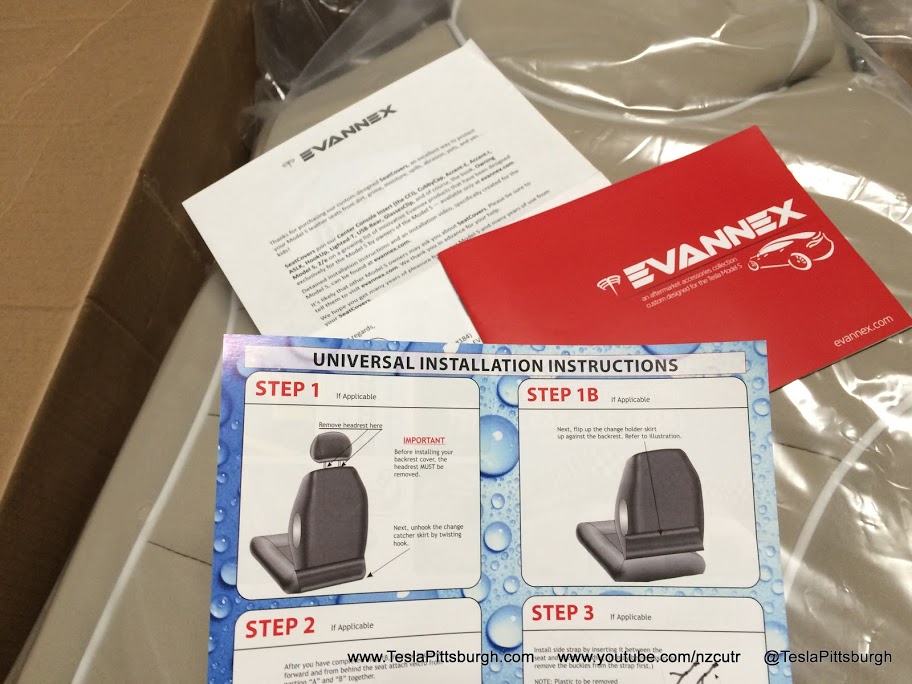
My front seat covers through EVAnnex arrived quickly and in a large box. After heaving the box into my garage, the fun began. They’re made by a company in Hawaii called Wet Okole. I wasn’t entirely sure what to expect when I read they were neoprene; I’m not a diver and don’t plan to submerge my Tesla like Sacha Baron Cohen. Wet suit material didn’t seem like the right choice– but it turns out I was wrong! It’s perfect. There is some stretch and give but enough integrity to the covers’ shape that you won’t have a sloppy fit if you’re diligent during the installation.
DESIGN
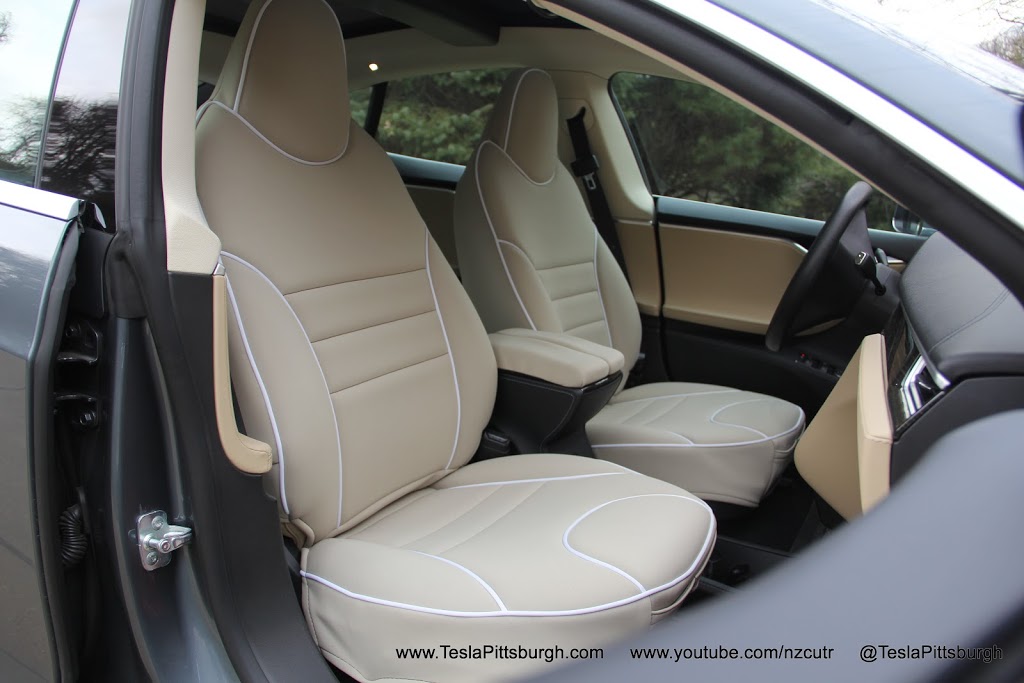
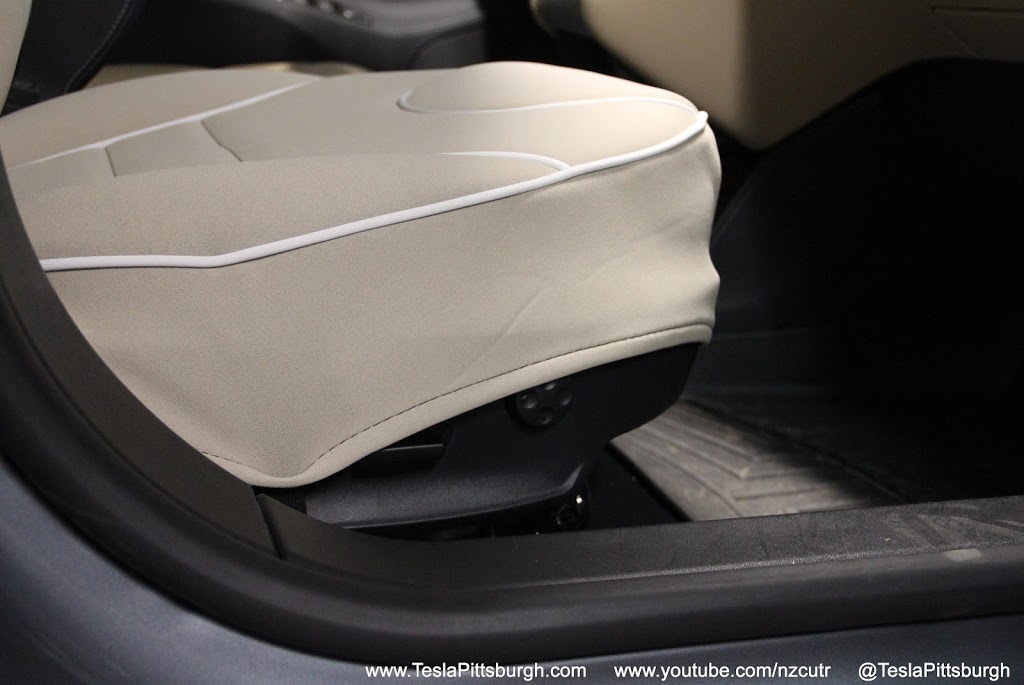
As I unboxed the covers it was obvious that the workmanship is very well done– truly, it’s impressive. Though the stitching pattern is slightly different from the factory seats, the bolsters and other seat sections are faithfully reproduced with separately cut pieces of padded neoprene. The amount of time and effort it takes to assemble, plus the material quality makes every penny of their $349 price justifiable. I daresay they’re even a bargain for what you get. Each seat has an upper and lower cover, so the set is four sections in all. The seat cushion is held on by a combination of straps and the installer’s determination. The seat back sections are secured with a couple of clips, some shoving and the enemy of reusable rockets: gravity. There are also two little neoprene shower cap-shaped pieces to wrap around the armrests.
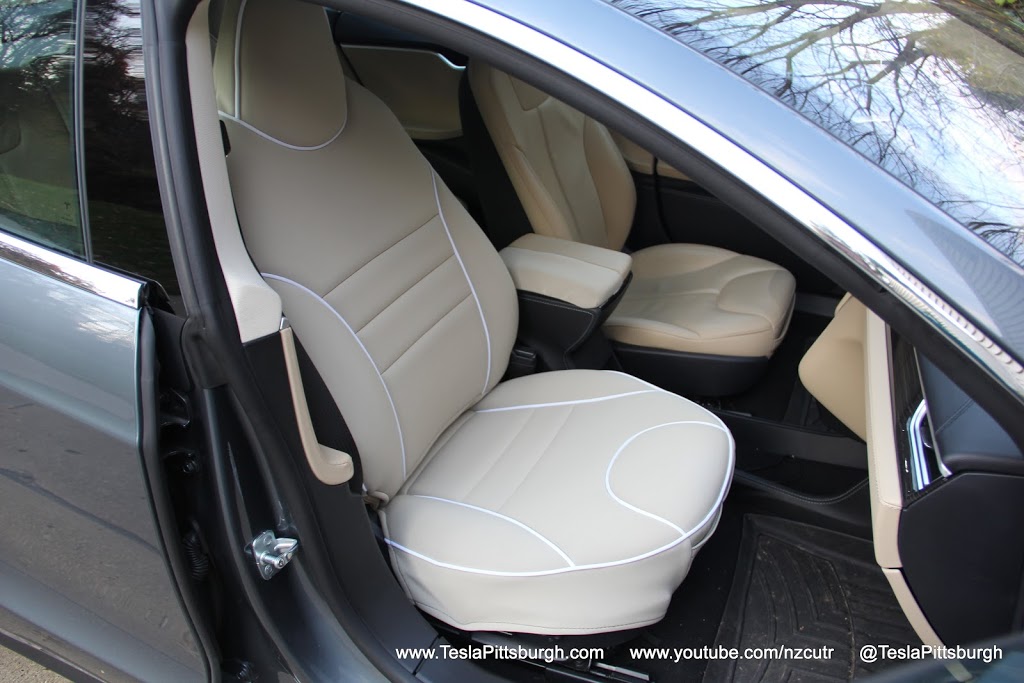
The covers are fully piped in a complementary color and fully lined so that nothing will rub or bind on the backside, which could cause unseen damage to the leather you are trying to protect. EVAnnex currently offers three color combinations: black with red piping (which tempted the boy racer in me), grey with white piping (I almost got these because my car is grey– but then I remembered my dash and door panels would still be tan) or tan with white piping. The tan is a slightly “cooler” tone than the factory leather but not so much as to be an obvious difference between the other interior panels in most lighting conditions. I have to admit, the white piping seemed like an odd choice at first. For stain resistance (and the Tesla’s inherently black accented interior) I would have thought black piping to be a more natural choice. Once installed, I decided that the white picks up the tones of both the headliner and the satin metal trim that encircles the cabin and displays. The result is quite appealing and since the material is stain resistant already, I think EVAnnex made a bolder (and correct) decision here.
INSTALLATION
Instructions provided with the covers are easily understood and no special skills are required, other than a little flexibility. It’s key to raise, slightly recline and to move the seats rearward. Clips on the factory “skirt” at the backside of the seat bottom need to be unhooked, the only disassembly necessary.
The bottom cushion cover goes on first, with the front centered and some fairly aggressive shoving required to push the trailing edge and its associated straps through the gap between the cushion and the seat back. You have to make sure to get enough of the cover through or else the final fitting will be loose and sloshing around. Straps then encircle the cushion lengthwise and are clipped and stowed under the cushion. EVAnnex recommends dismembering an innocent coat hanger to do this but I’m still young and spry enough to shove the rippling musculature of my forearms under the seat easily without requiring medication later. A final strap spans the underside of the seat width-wise, though its placement isn’t ideal.
The upper chunk o’ cover slips on more easily. You do have to be careful to get the right one, as a slit in the side of the cover is meant to provide a pathway for the outboard airbags that nestle in the seat’s bolster. Other than that, you just feed it down from the top of the back rest. The lower edge on the front requires a repeat of the graceless mashing and poking to get it through the gap and to the back of the seat. The back portion of the cover wraps all the way down around all the loose ends you’ve already pulled through the gap in the seat sections. Between the thickness of the cover pieces and the tight gap between the upper and lower seats, the covers are held quite tight on the front side without any further attachment points. Reattach the factory skirt clips, then attach the upper section’s clips to something sturdy underneath the seat.

There are some mysterious appearances of Velcro on the covers but I couldn’t figure out how they were supposed to go together. The back edge of cushion has a strip that seems like it is meant to join with another orphaned strip on the bottom of the upper cover but… it’s a mystery to me. The factory skirt piece ends up separating the two pieces so I don’t see any way to join them, even if I could get everything line up in a useful way.
DURABILITY/USAGE
First thing I noticed when I tried sliding into the seat the next morning was that… well… I couldn’t slide into the seat. Awkwardly half-cheeked and beached on the bolster, I did a quick mental check to make sure that I had not recently overeaten in my sleep or parked beside a gravity well. I concluded it had to be the grippy nature of the neoprene. In a car that is as low-slung as the Tesla (which is also missing the overhead grab handles, my dear Elon) the inability to slide on the cover could be an issue for those who have more limited mobility. Even after several weeks’ use, I find that entering the car is a “two-position” affair. First contact with my rear isn’t enough to drive away with so I have to very deliberately shift my weight and bear it partly through my elbow on the center armrest to complete my rotation and achieve something approximating the middle of the seat.
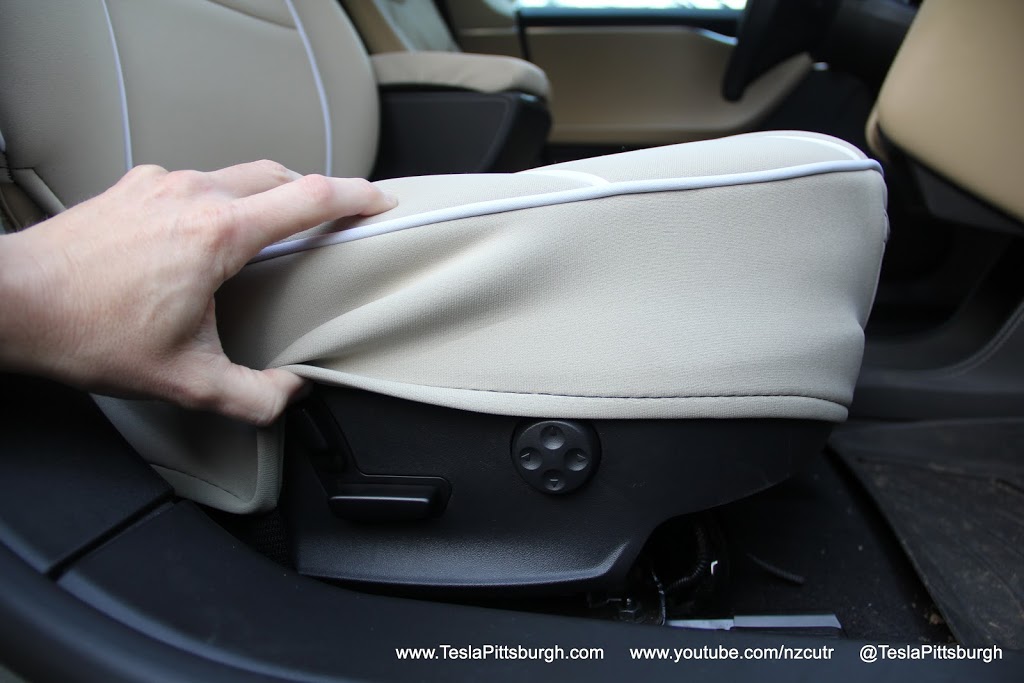
The second thing I assumed was that my wife’s driving settings must be loaded, except they weren’t. The seat cover’s padding is generous enough that the added bulk to the seat requires some compensation on my preset. I had to adjust it backward and downward to get back to my normal driving position. That proved to be a little more dangerous than I anticipated. My life flashed before my eyes (almost) as the seat edged closer and closer to the steering wheel– completely out of control! The cover is rather plus-sized where the seat’s motion controls are located and that, combined with my tautly pulled side strap, resulted in the cover blocking about half of them and locking the buttons in place even after I released them. As I struggled to release the cover from the controls, I felt like Luke Skywalker in the Death Star’s garbage compactor. I loosened that strap but the access to the controls is still annoyingly difficult if you fidget with them on a regular basis.

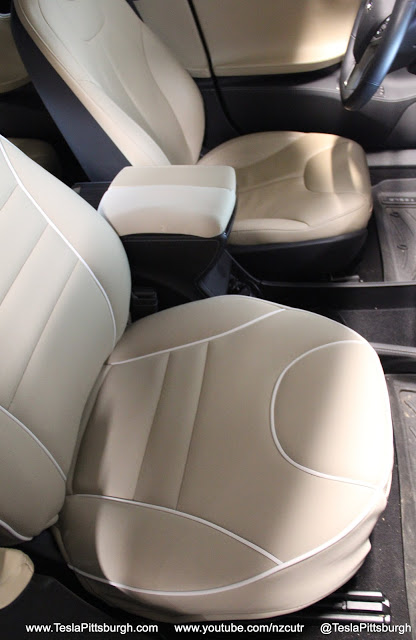
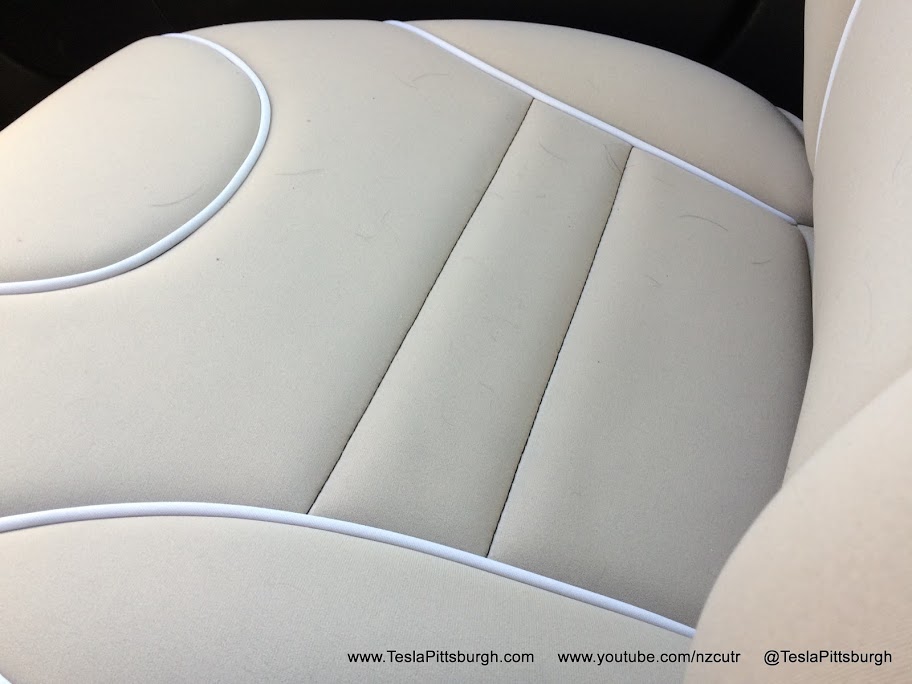
Ostensibly the covers are about adding years to the seats, but they have some real immediate benefits too. Since the covers are so nicely padded, they definitely improve the seat comfort (especially those rock-hard headrests!) Noticeably softer, the cover effectively reduces the span of the flatter center sections and make the bolsters bigger. The net effect is quite sporty. Now we’re not talking “Next Generation Seats” tight and “huggy,” but for someone of a medium frame like me, the stock seat has always been a little too wide and I slide around in corners. The cover snugs up the seat by doubling down on the bolsters and the grip of the neoprene. While it makes entry and exit tougher, it makes cornering a LOT better.
When you’re not cornering like a banshee with vertigo, there are some real-life compromises to ponder. The covers will make the seats a lot messier. Turns out that the neoprene’s friction means that any pet hair or debris on your clothes– which would normally not fall off on a leather seat because they stick to your pants better– will immediately surrender to the traction offered by the neoprene and quite a collection of gunk builds up very quickly. Even more annoyingly, it won’t just brush off; it’s THERE no matter how you flail at it. My daughter had a sleepover with a family that has a black Labrador and when I picked her up I SWEAR it looks like half of the dog is clinging to that seat now. Trust me. OCD sufferers will want to color-coordinate their pets and possibly their family members.
On the other hand, the covers do make some cleanups a lot easier. Within 15 minutes of installing the passenger cover, we had to rush off to an event. My wife took her seat with her lunch still in hand and.. yep, you guessed it: tomato right onto the seat cover. “Well, this’ll be a GREAT test,” I thought as we whooshed up the driveway. We had a schedule to keep so the mess had to wait, but later a little water and wiping cleaned it off completely. The covers can even been removed and machine washed at your home– try that with the leather!
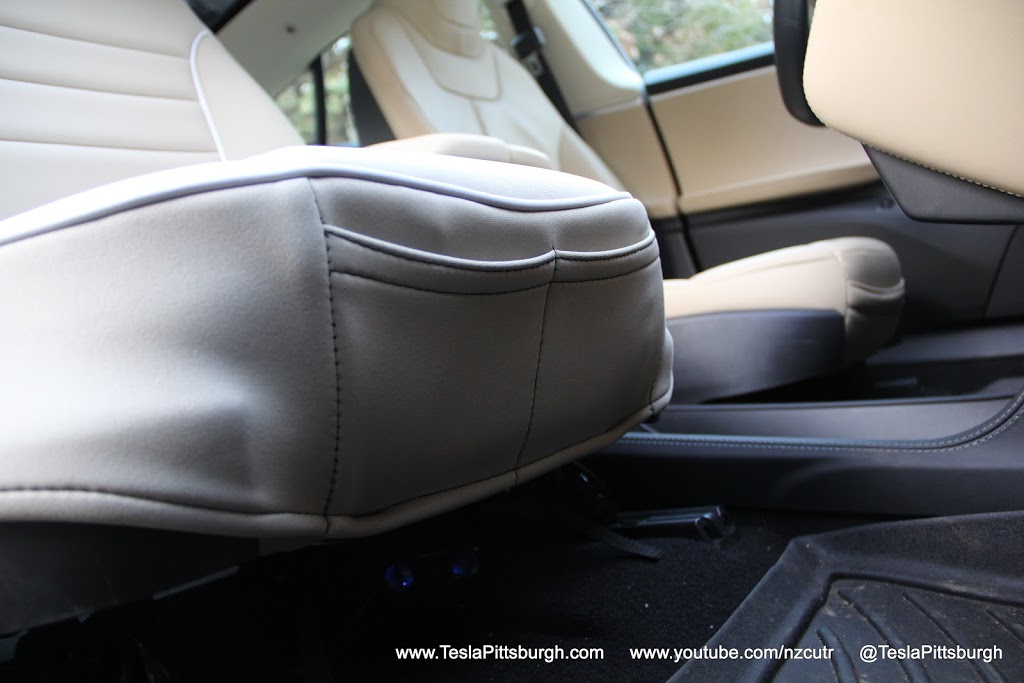
The armrests’ neoprene bags fit less elegantly than the rest of the covers. They’re kind of hard to get into place and definitely aren’t a great a fit, but they offer the same benefits. The armrests are softer to bang your bony protuberances into. Every now and then my armrest would not be quite clicked into place and would slide inadvertently and the covers stiffen that action up– perhaps too much. They’ll cling together like a pair of romantic worms and then once separated they’re like jilted lovers who can’t stand to be on the same end of the console with each other.
With winter looming, the seat heater was a big concern of mine. I will say that the initial performance is definitely worse and it tops out lower. Keep in mind that the seat is NEVER cold to the touch. You are now free of that “blimey, I’ve just sat on an ice cube” effect, but heating position 1 is now dead to you. Heating position 2 (my normal setting) is like a rumor; your neighbor’s best friends’ sister’s cousin heard from his girlfriend’s stepdad’s boss that the seat heater is on. Setting 3 is now just a toggle for on/off and it’s pretty pleasant when on. Absolutely, you can feel the heat working through the cover but you will no longer be able to use it a torture device on unsuspecting passengers and tapping through 1 and 2 has been annoying with our schizophrenic winter coming and going on a daily basis.
STORAGE
When the Next Generation seats came out, I was among those who thought immediately: they are superior. More time in newer cars has muddled that opinion and after getting used to having the front “kangaroo pouch” pocket on my seat, I’d certainly miss it if I ever upgraded to the Next Gen seats. I don’t know if covers for the newer seats will offer a pouch or not, but on these covers they’ve actually expanded the pouch into two separate pockets. Each pocket is about the size of the original seat pocket and– while that seems like a big improvement– it’s actually a negative for me. For people who keep their work badges or registrations there it’s probably fine, but I always shoved my phone in the pocket. With one pocket, the phone is centered and out of my way. The two pockets on the cover are separated by a row of stitching, right down the middle of the seat. That means my phone ends up jamming into the bottom of one leg or the other, instead of riding between them. It’s uncomfortable enough that I’ve stopped using the front pockets completely.
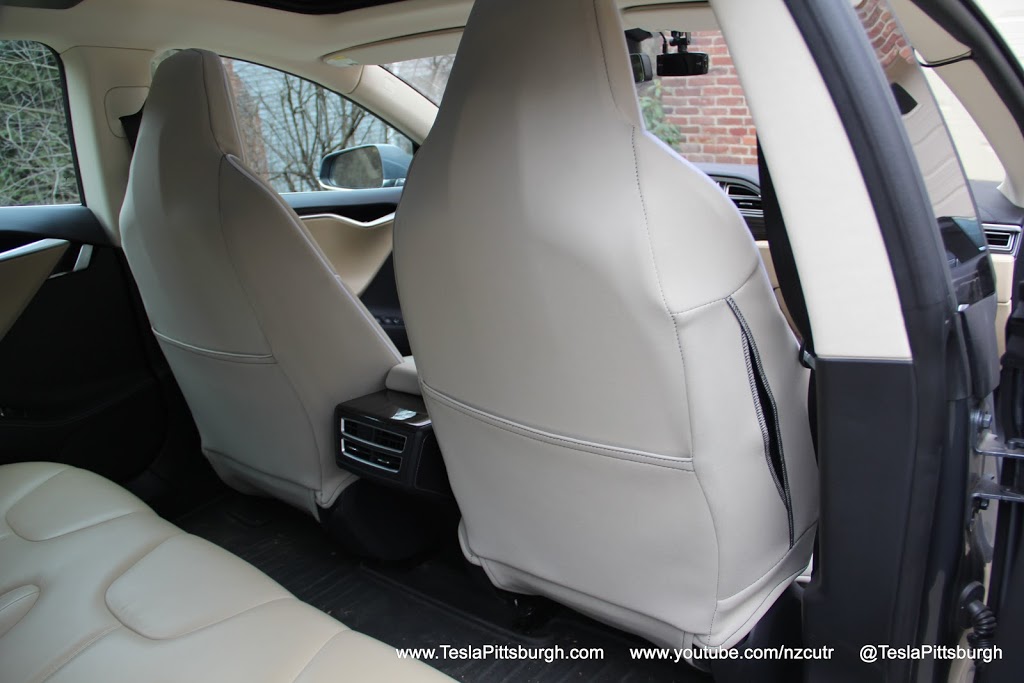
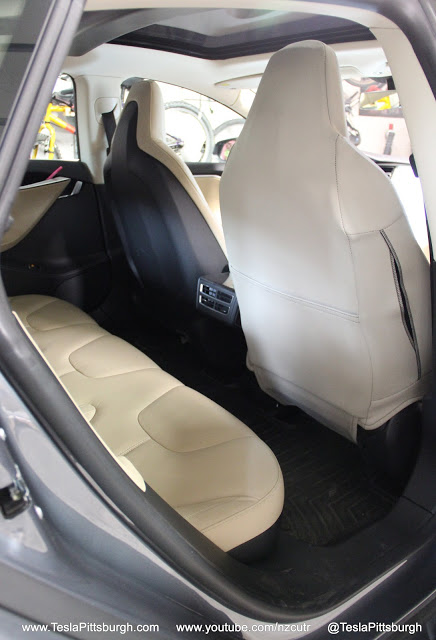
The seat covers add another pocket in the back, which is much more valuable. Rear seat passengers actually get no storage space in the Model S– well, except for the little notch by the door handle which my daughter likes to leave batteries in so they will crash and bang on every turn and slowly DRIVE HER FATHER CRAZY. Aside from those meager holes where spent tissues also go to die, the typical seat back pouch is missing on the Tesla. These covers add it back in a generously sized pouch that should have some piping on the seam, but doesn’t. It’s large enough to hold magazines and books but probably not padded enough to protect a tablet’s screen from the hard plastic on the other side if things get bouncy. I’d also recommend you avoid large or heavy items. The neoprene isn’t likely to stretch out badly like my Chrysler’s leather did: it has become a gaping maw of abused leather, like the seat went on a diet and forgot to buy new clothes. However, excessive volume or weight in the neoprene will cause it to droop and unflatteringly open up the airbag slit on the side.
SUMMARY
With modern car seats becoming more difficult for an owner to replace due to the integrated airbags, protecting the original seats becomes a wise choice– particularly on a car with a potentially long lifespan. These seat covers designed for the Model S and offered through EVannex do more than just protect the original seats, they actually enhance them in a number of ways like increased comfort, better positioning, added storage and, of course, superb materials and construction. The drawbacks are few and mainly involve personal choices related to the heating, seat control access and ease of ingress/egress. Given the level of detail and quality, the price seems to be very reasonable at $349/set and well worth it for a custom fit product.
VIDEO REVIEW
Tesla owners have long griped about the wireless phone charger in the Model Y and other vehicles. It often turns smartphones into miniature ovens rather than reliably topping them up.
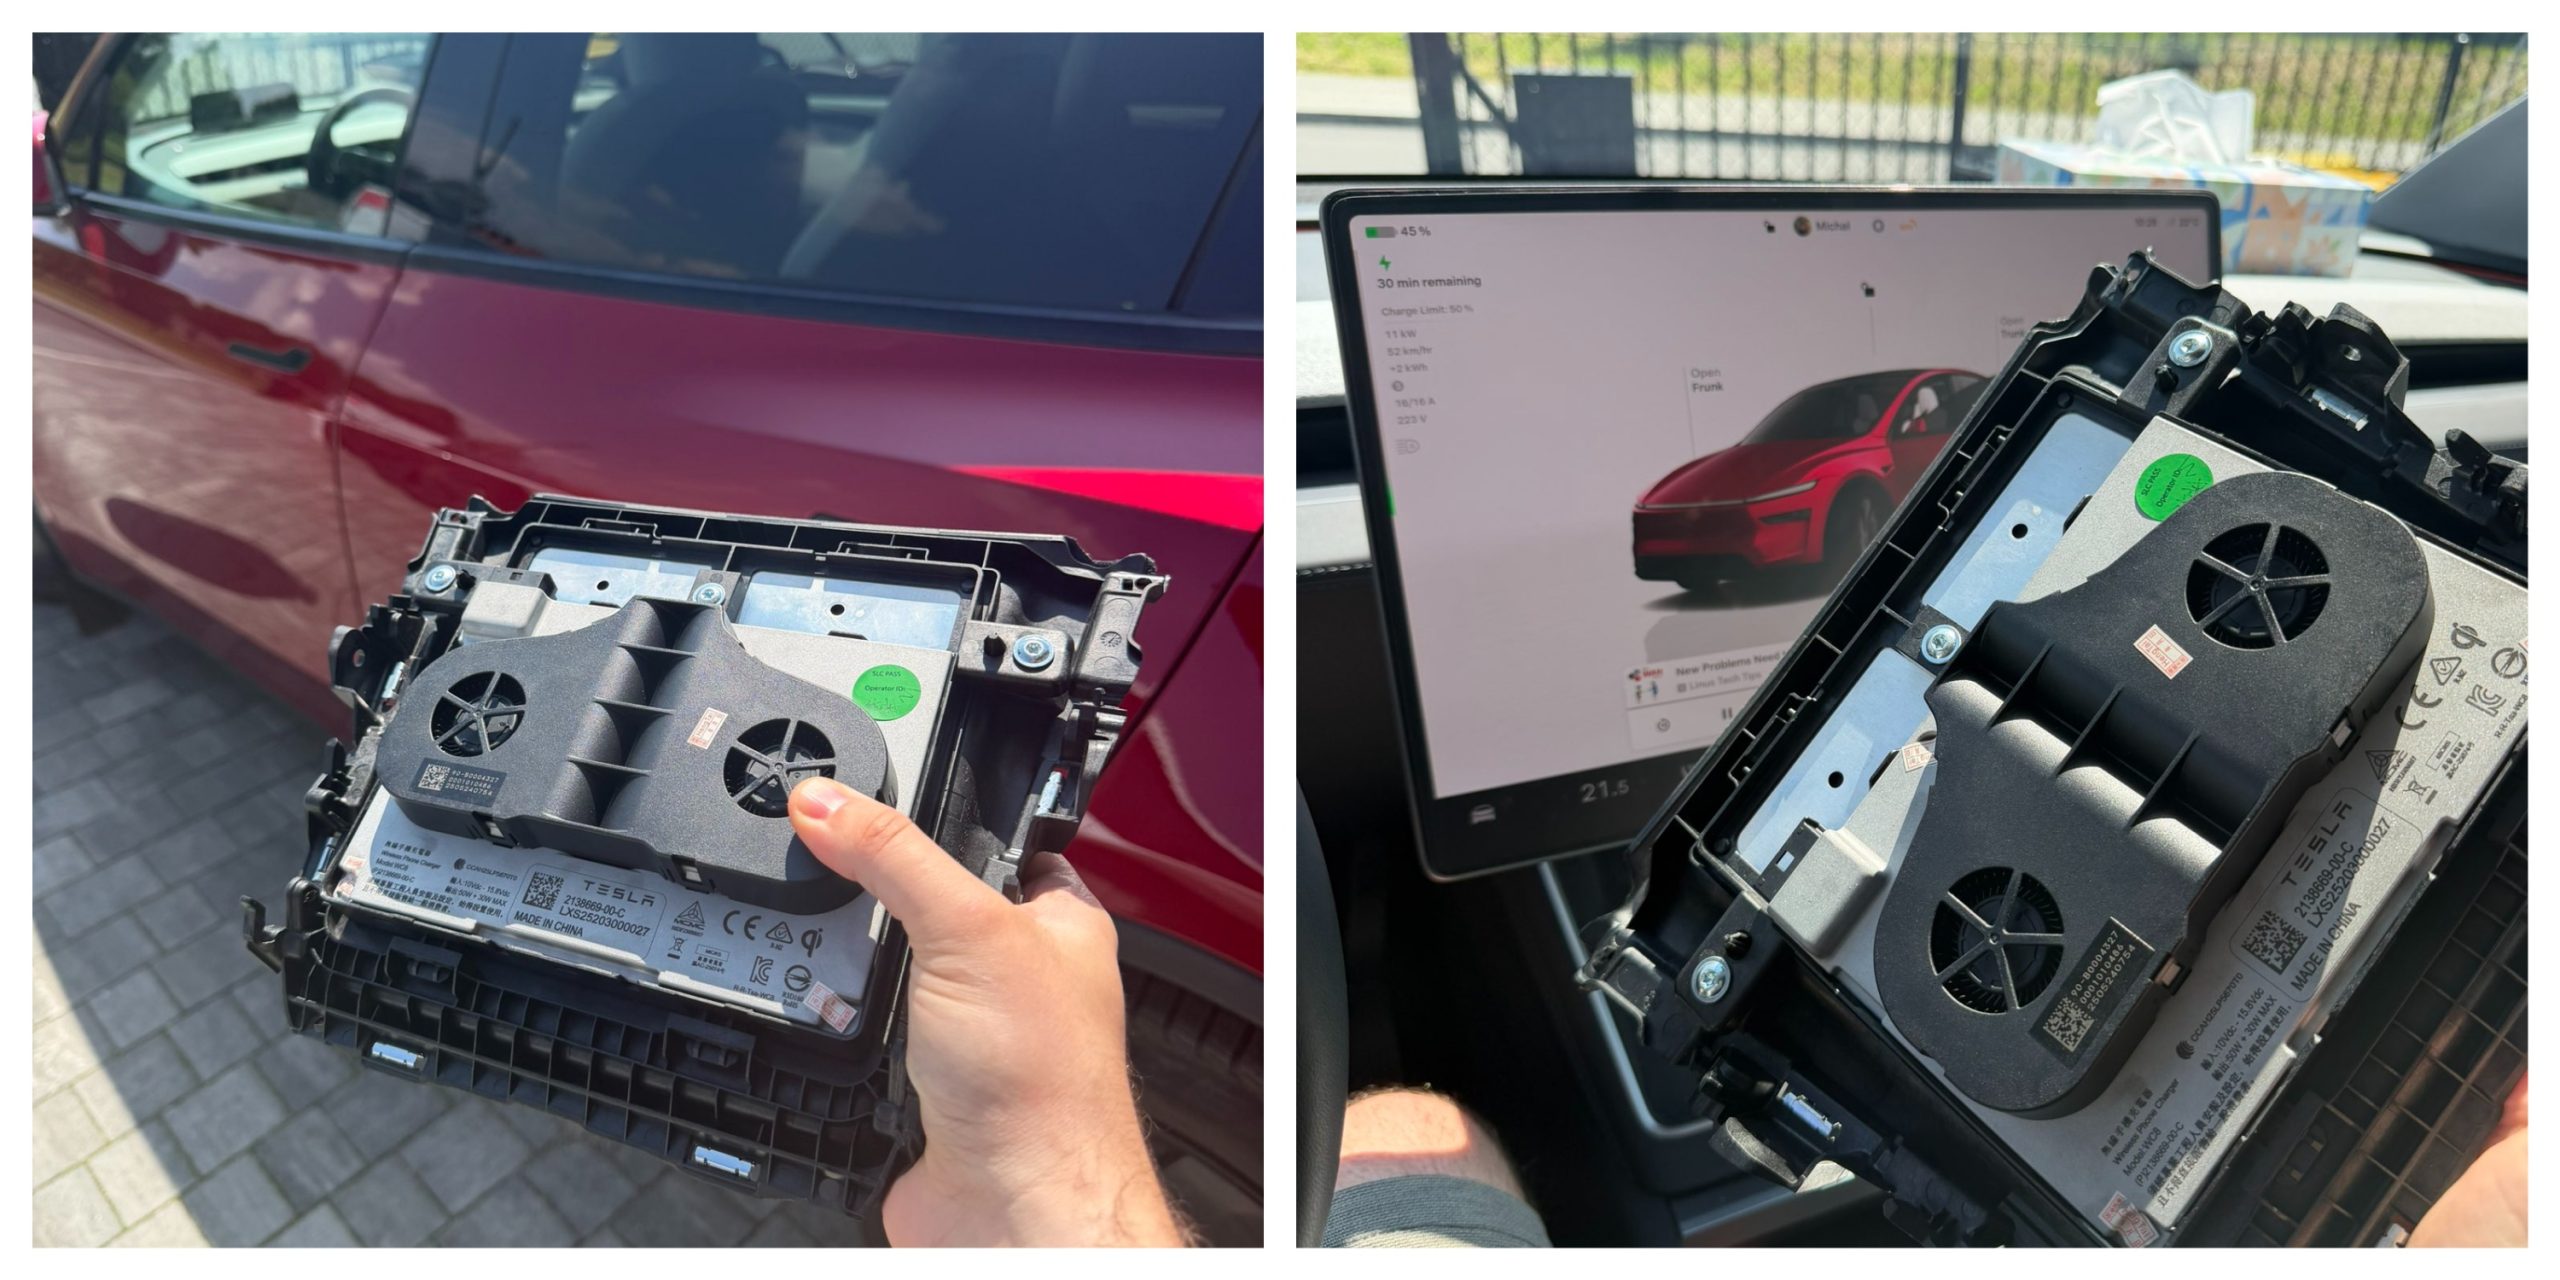
Software engineer and Model Y owner Michał Gapiński tackled this issue head-on with a clever DIY upgrade, swapping the cooled wireless charger pad from the China-made Model YL in for the one that came standard in his vehicle.
There are several key differences between the U.S.-built Model Y’s wireless charging pad and the one that Tesla has been installing in the Model YL. The one installed in U.S.-built vehicles lacks active cooling and relies on basic heat dissipation, leading to rapid temperature buildup during charging. In contrast, the Model YL integrates a small fan for active cooling.
Will it fit? Fingers crossed, I want a first YL charger deployed in the regular juniper pic.twitter.com/wWDqSNFVkW
— Michał Gapiński (@mikegapinski) June 2, 2026
This design maintains lower temperatures even in warm ambient conditions, though it does not support faster Qi2 charging on iPhones. The connector matches exactly, making physical swaps feasible on compatible consoles, but coding is required to enable full functionality.
Owners in the U.S. have complained about the wireless charging pad, with many reporting that overheating is fairly common. Within 20 or 30 minutes of placing a phone on the wireless charging pad, many have reported overheating messages on their phones, which halt charging and essentially turn the pad into a fancy place to rest your phone.
Many owners have opted to simply plug their phones into a charging cord. Tesla has acknowledged the problem by releasing several solutions for owners, including a relatively new feature that allows you to simply turn off the charging and simply act as a holder for your phone while driving.
Gapiński said that he sourced the cooled pad affordably from China, and it cost under $200 for the part.
He removed the existing console charger, swapped in the new unit, confirming a perfect connector fit, and handled the trim differences. Since the parameter isn’t fully secured, he enabled it through custom coding outside official Toolbox.
Connector is identical, she fits, now time to code it. https://t.co/Y9idgDrpCq pic.twitter.com/uwwgq6blg7
— Michał Gapiński (@mikegapinski) June 2, 2026
The fan activates quietly, blending with AC and seat cooling. He reported the installation was effective and the wireless charging pad worked perfectly; it even kept the phone cool as it stayed at just 86 degrees Fahrenheit. Many times, the wireless charging pad will bring the phone’s temperature well above 100 degrees, sometimes even being relatively hot to the touch.
The retrofit worked, no issues. First Model Y with a cooled wireless charger! No QI2/faster charging on the iPhone but it does not boil the phone even when it is 30 degrees outside.
The fan kicks in, it is not audible especially with the air conditioning and seat cooling. The… https://t.co/JOyR8Tb1Yo pic.twitter.com/kJcYhQIlYq
— Michał Gapiński (@mikegapinski) June 2, 2026
This retrofit highlighted an elegant, owner-driven solution to a factory shortcoming. It is expected that Tesla will begin installing the cooled charging pads into new cars in the U.S. soon, and hopefully, it will offer some sort of retrofit service or kit to owners here who want to use the charging pad effectively.
For those who love to tinker, it’s an accessible upgrade, proving that innovation thrives beyond the production line.
Back in 2019, YouTuber Simone Giertz, the self-proclaimed “Queen of Sh*tty Robots,” created a one-off Tesla Model 3 build that took the automotive world by storm. Fondly dubbed as “Truckla,” Giertz noted that the vehicle was actually her dream car — as crazy as that may sound.
Now almost four years later, the YouTuber posted an update on Truckla. And just like every other big project that one probably started, Giertz stated that she actually stopped working on Truckla when the vehicle was about 80% complete. The car is driving though, but a lot of stuff was not really working very well.
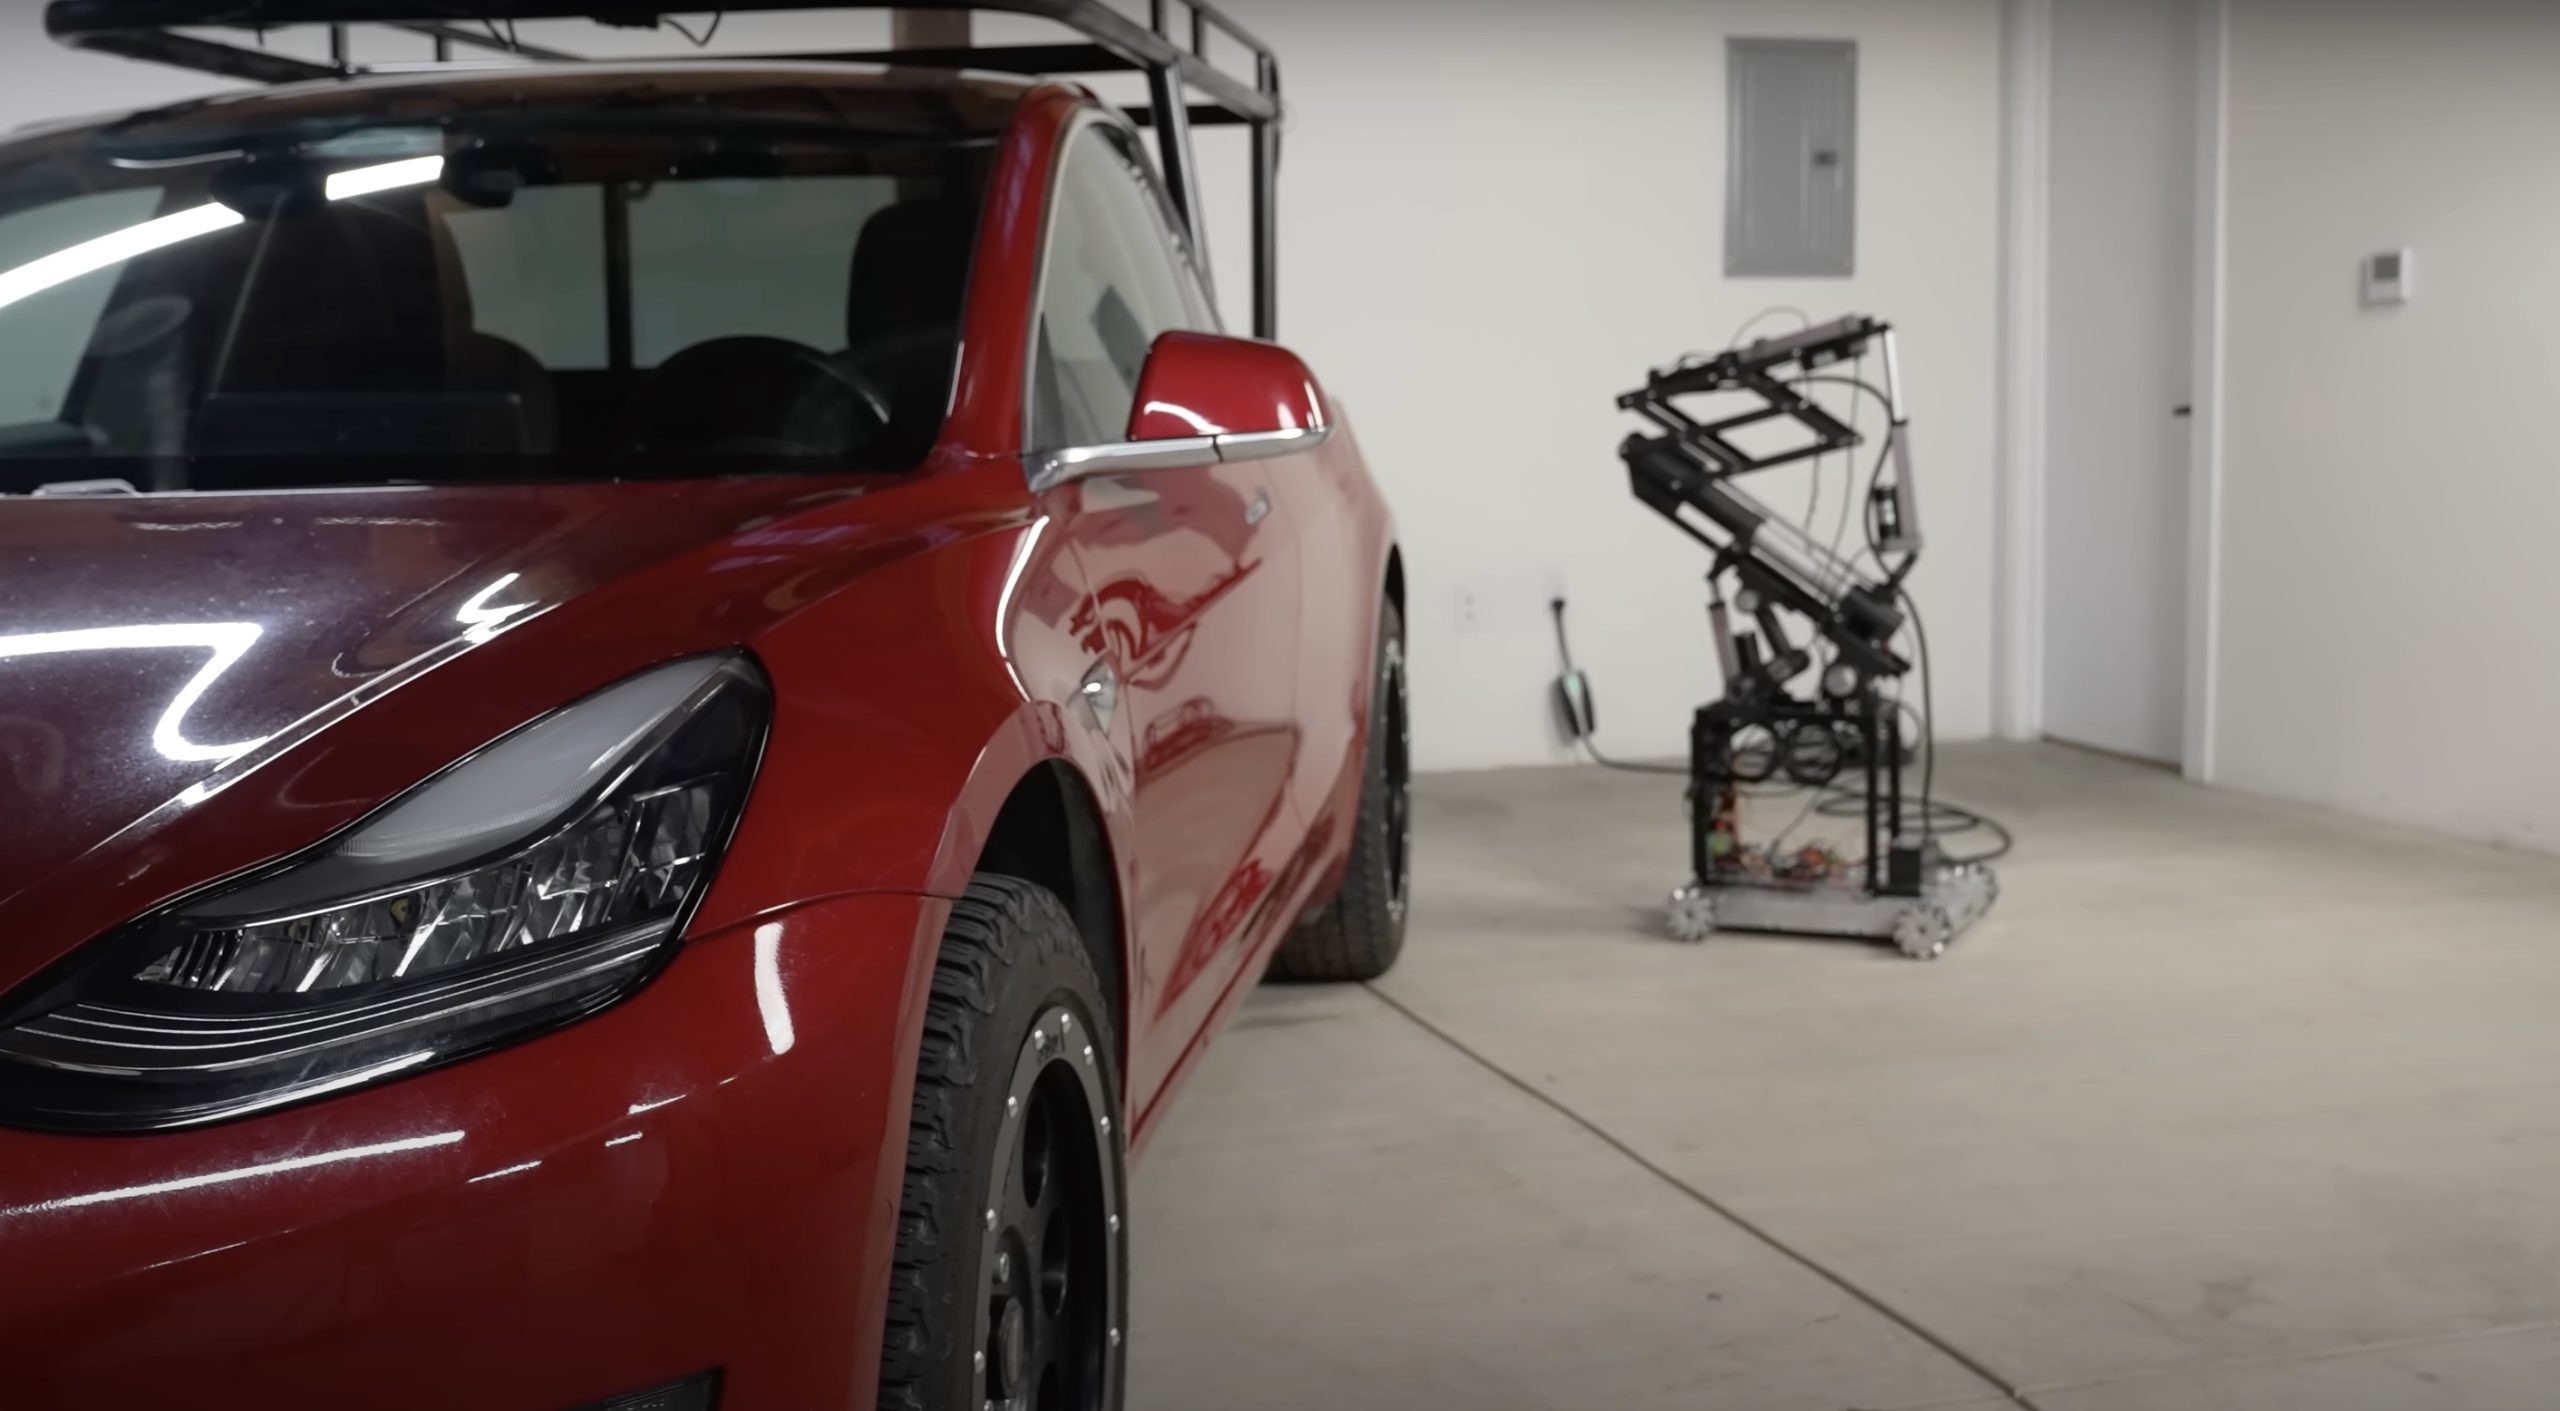
Thus, for her Truckla update, Giertz shared how most of her Model 3 pickup truck conversion was essentially completed. Truckla got a lot of detailing done, she got a slight lift, and she now has a functional tailgate. One has to admit, Truckla’s tailgate is pretty darn cool.
The “Queen of Sh*tty Robots” also opted to give Truckla a friend in the form of an automatic robot charger. Unlike Tesla’s rather interesting snake charger from years past, Truckla’s charger would come in the form of a rover, thanks to her friends at robotics platform Viam. Giertz aptly named Truckla’s robot charger friend “Chargela,” which is an appropriate name for such an invention.
Also true to form for Giertz, Chargela’s first encounter with Truckla was just a tiny bit awkward. One could say that Chargela may have just been a little bit nervous on his first try without human hands helping him. Most importantly, the system did work, so Giertz would likely keep using Chargela for her Model 3 pickup.
Teslas are very tech-heavy vehicles, so projects like Giertz’s Truckla are always remarkable. The fact that the Model 3 works perfectly fine despite having a good chunk of it cut off and turned into a pickup truck bed is mighty impressive any way one looks at it. Overall, Truckla will always be one of the coolest Tesla DIY projects to date, so any updates about the vehicle are always appreciated.
Truckla’s nearly four-year update can be viewed below.
Don’t hesitate to contact us with news tips. Just send a message to simon@teslarati.com to give us a heads up.
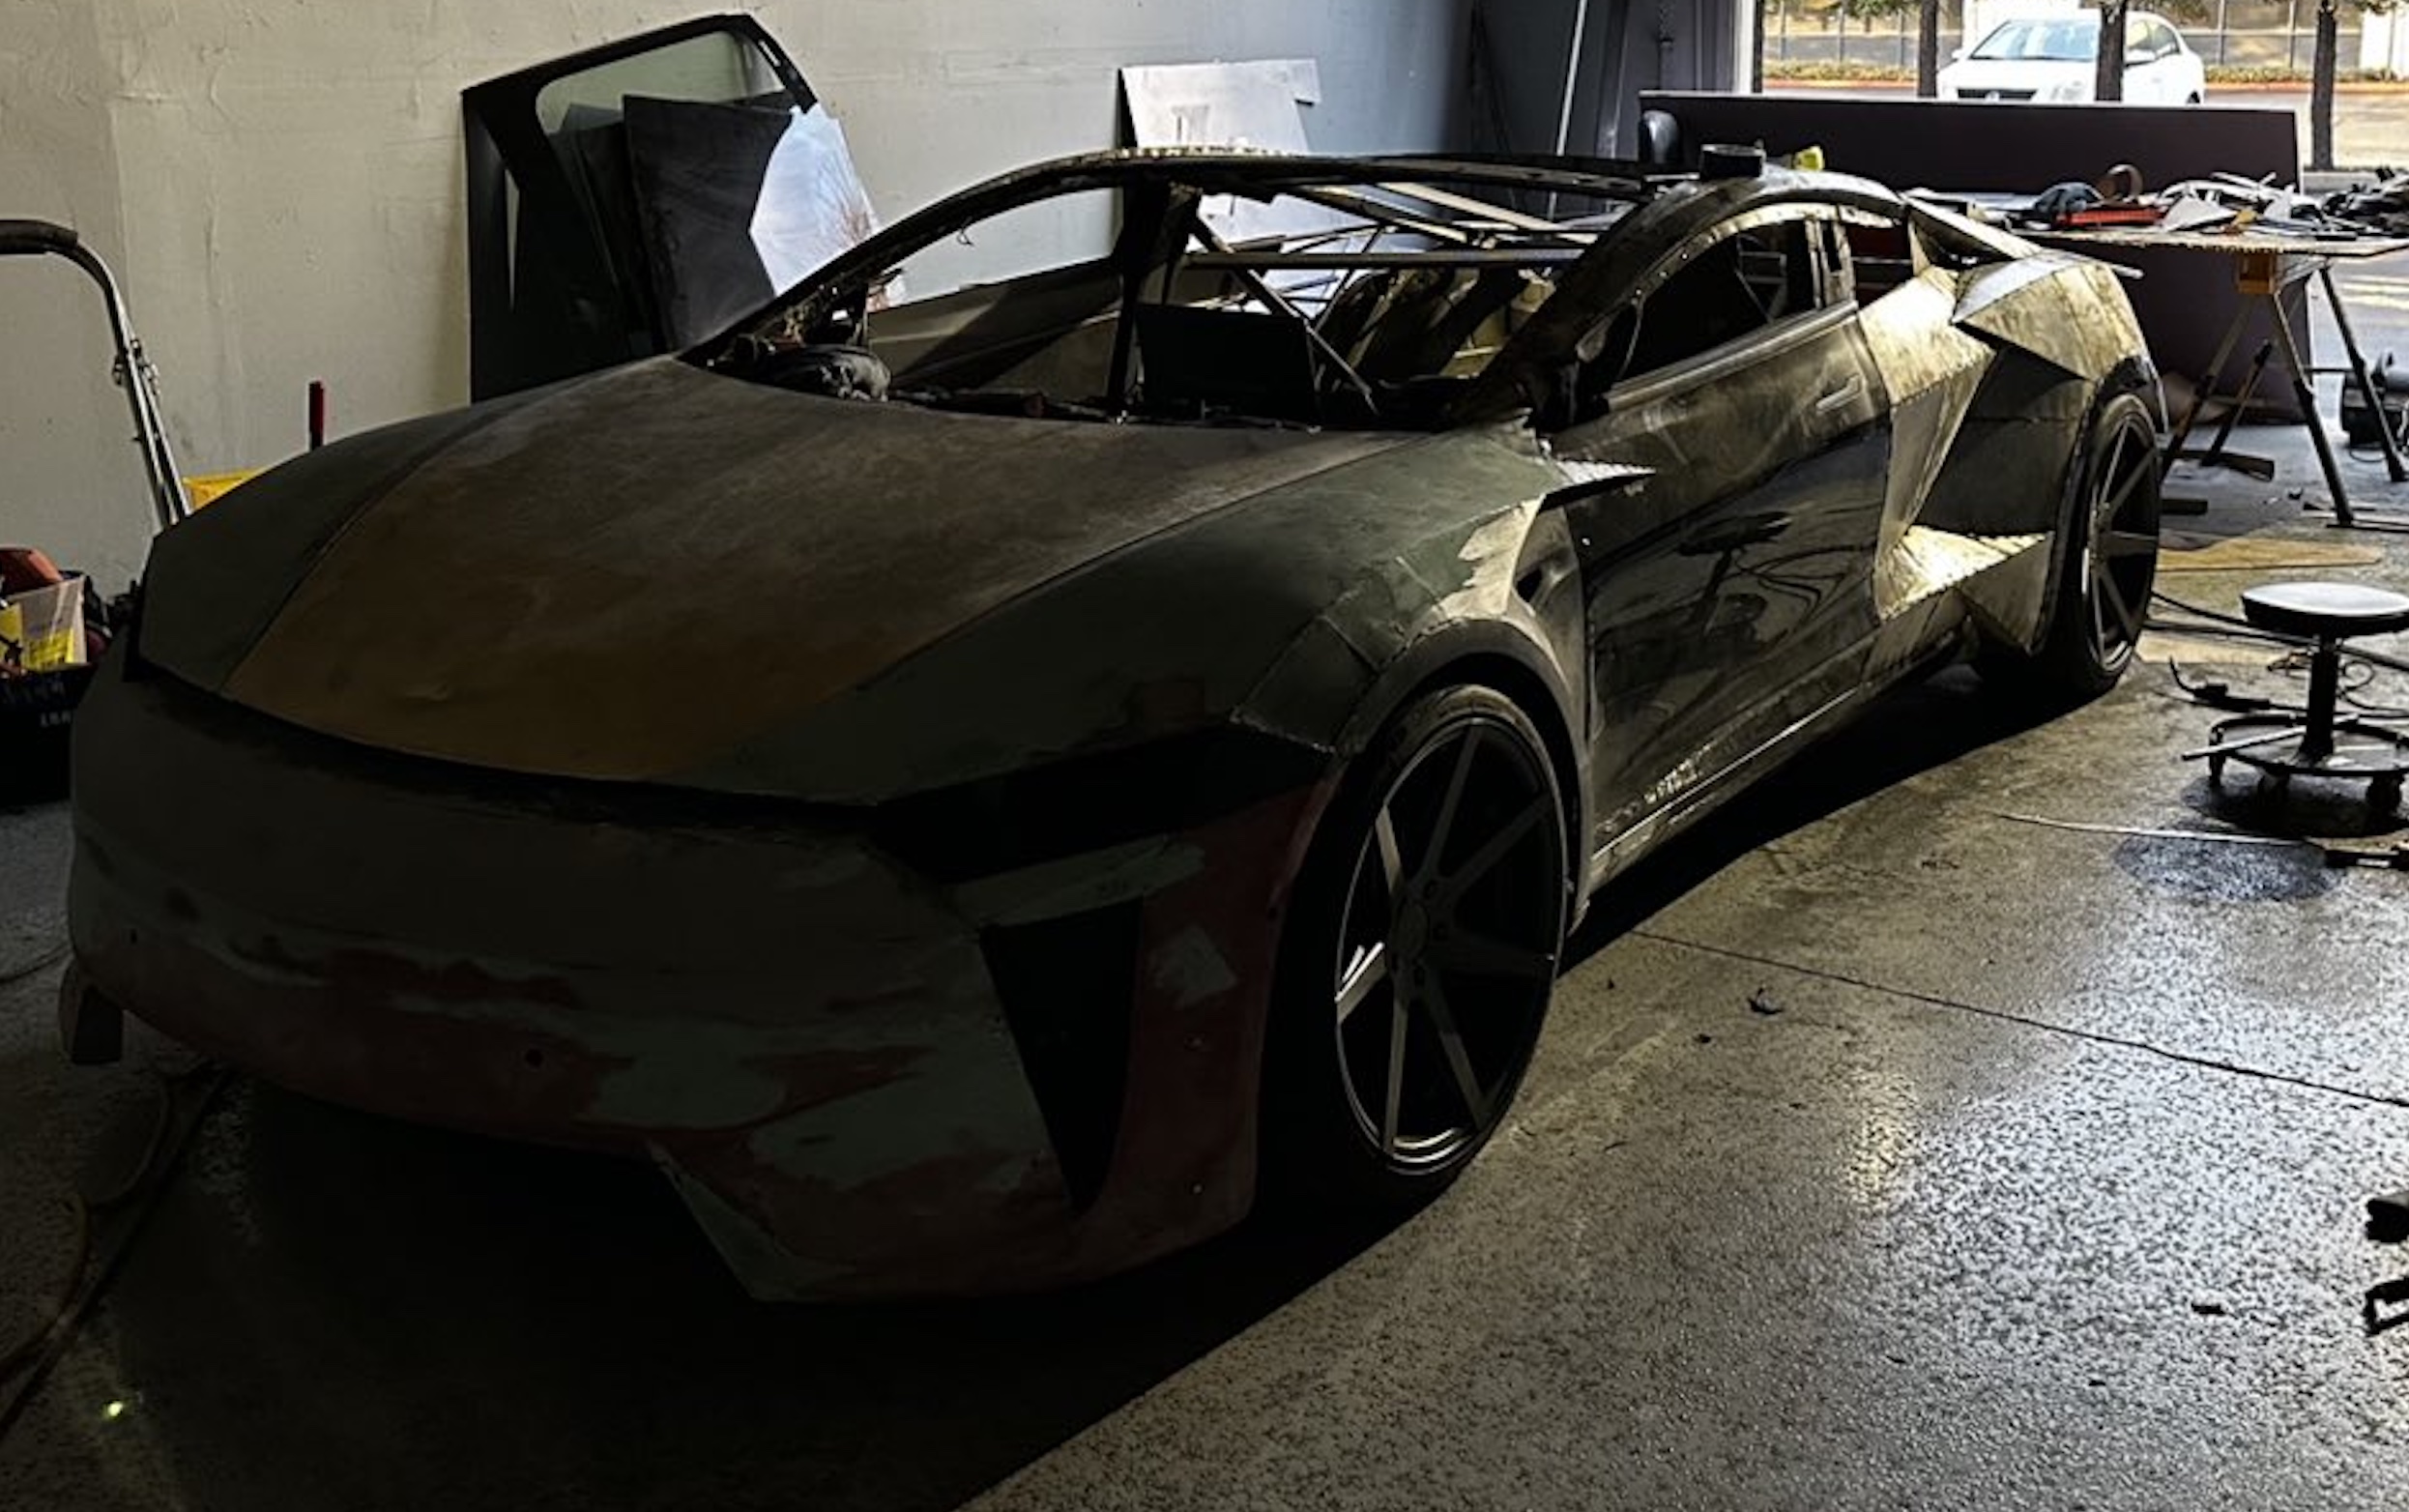
A Tesla owner is taking his hobby and love for electric vehicles to new levels by creating what could only be described as one of the coolest EV-related DIY projects to date. The idea for the project is simple: what happens when you cross a supercar with the Cybertruck? You end up with a two-seater CyberRoadster.
Tesla owner David Andreyev, who goes by the username @Cyber_Hooligan_ on Twitter, has spent the last few months creating a Cybertruck-inspired version of the next-generation Roadster made from a salvaged Model 3 Performance. Starting with a Model 3 Performance is an inspired choice, considering that it is Tesla’s first vehicle that has a dedicated Track Mode.
A look at Andreyev’s YouTube channel, which can be accessed here, shows the meticulous build that the Tesla owner has implemented on the project car. What’s particularly cool about the CyberRoadster is the fact that it’s being built with parts that are also from other Tesla vehicles, like its front bumper that came from a new Model S. Recent videos suggest that the project car’s rear bumper will be from a new Model S as well.
The journey is long for Andreyev, so the completion of the CyberRoadster will likely take some more time. Despite this, seeing the Tesla owner’s DIY journey on such an epic build is more than satisfying. And considering that the CyberRoadster is evidently a labor of love from the Tesla owner, the final results would likely be extremely worth it.
There’s a lot of crazy Tesla modifications that have been done as of late. But some, as it is with a lot of things on the internet these days, have become more silly gimmicks than serious automotive projects. Fortunately, car enthusiasts like Andreyev, who just happen to also love electric vehicles, are taking it upon themselves to create one-of-a-kind EVs that would surely capture the attention of anyone on the road.
Check out the latest video in the CyberRoadster’s creation below.
Don’t hesitate to contact us with news tips. Just send a message to simon@teslarati.com to give us a heads up.

Tesla Phone? Not quite, but close: analyst

Tesla reveals huge Cybercab detail in new guide for First Responders


