Lifestyle
How to repair your Tesla Model S Door handle (DIY Kit)
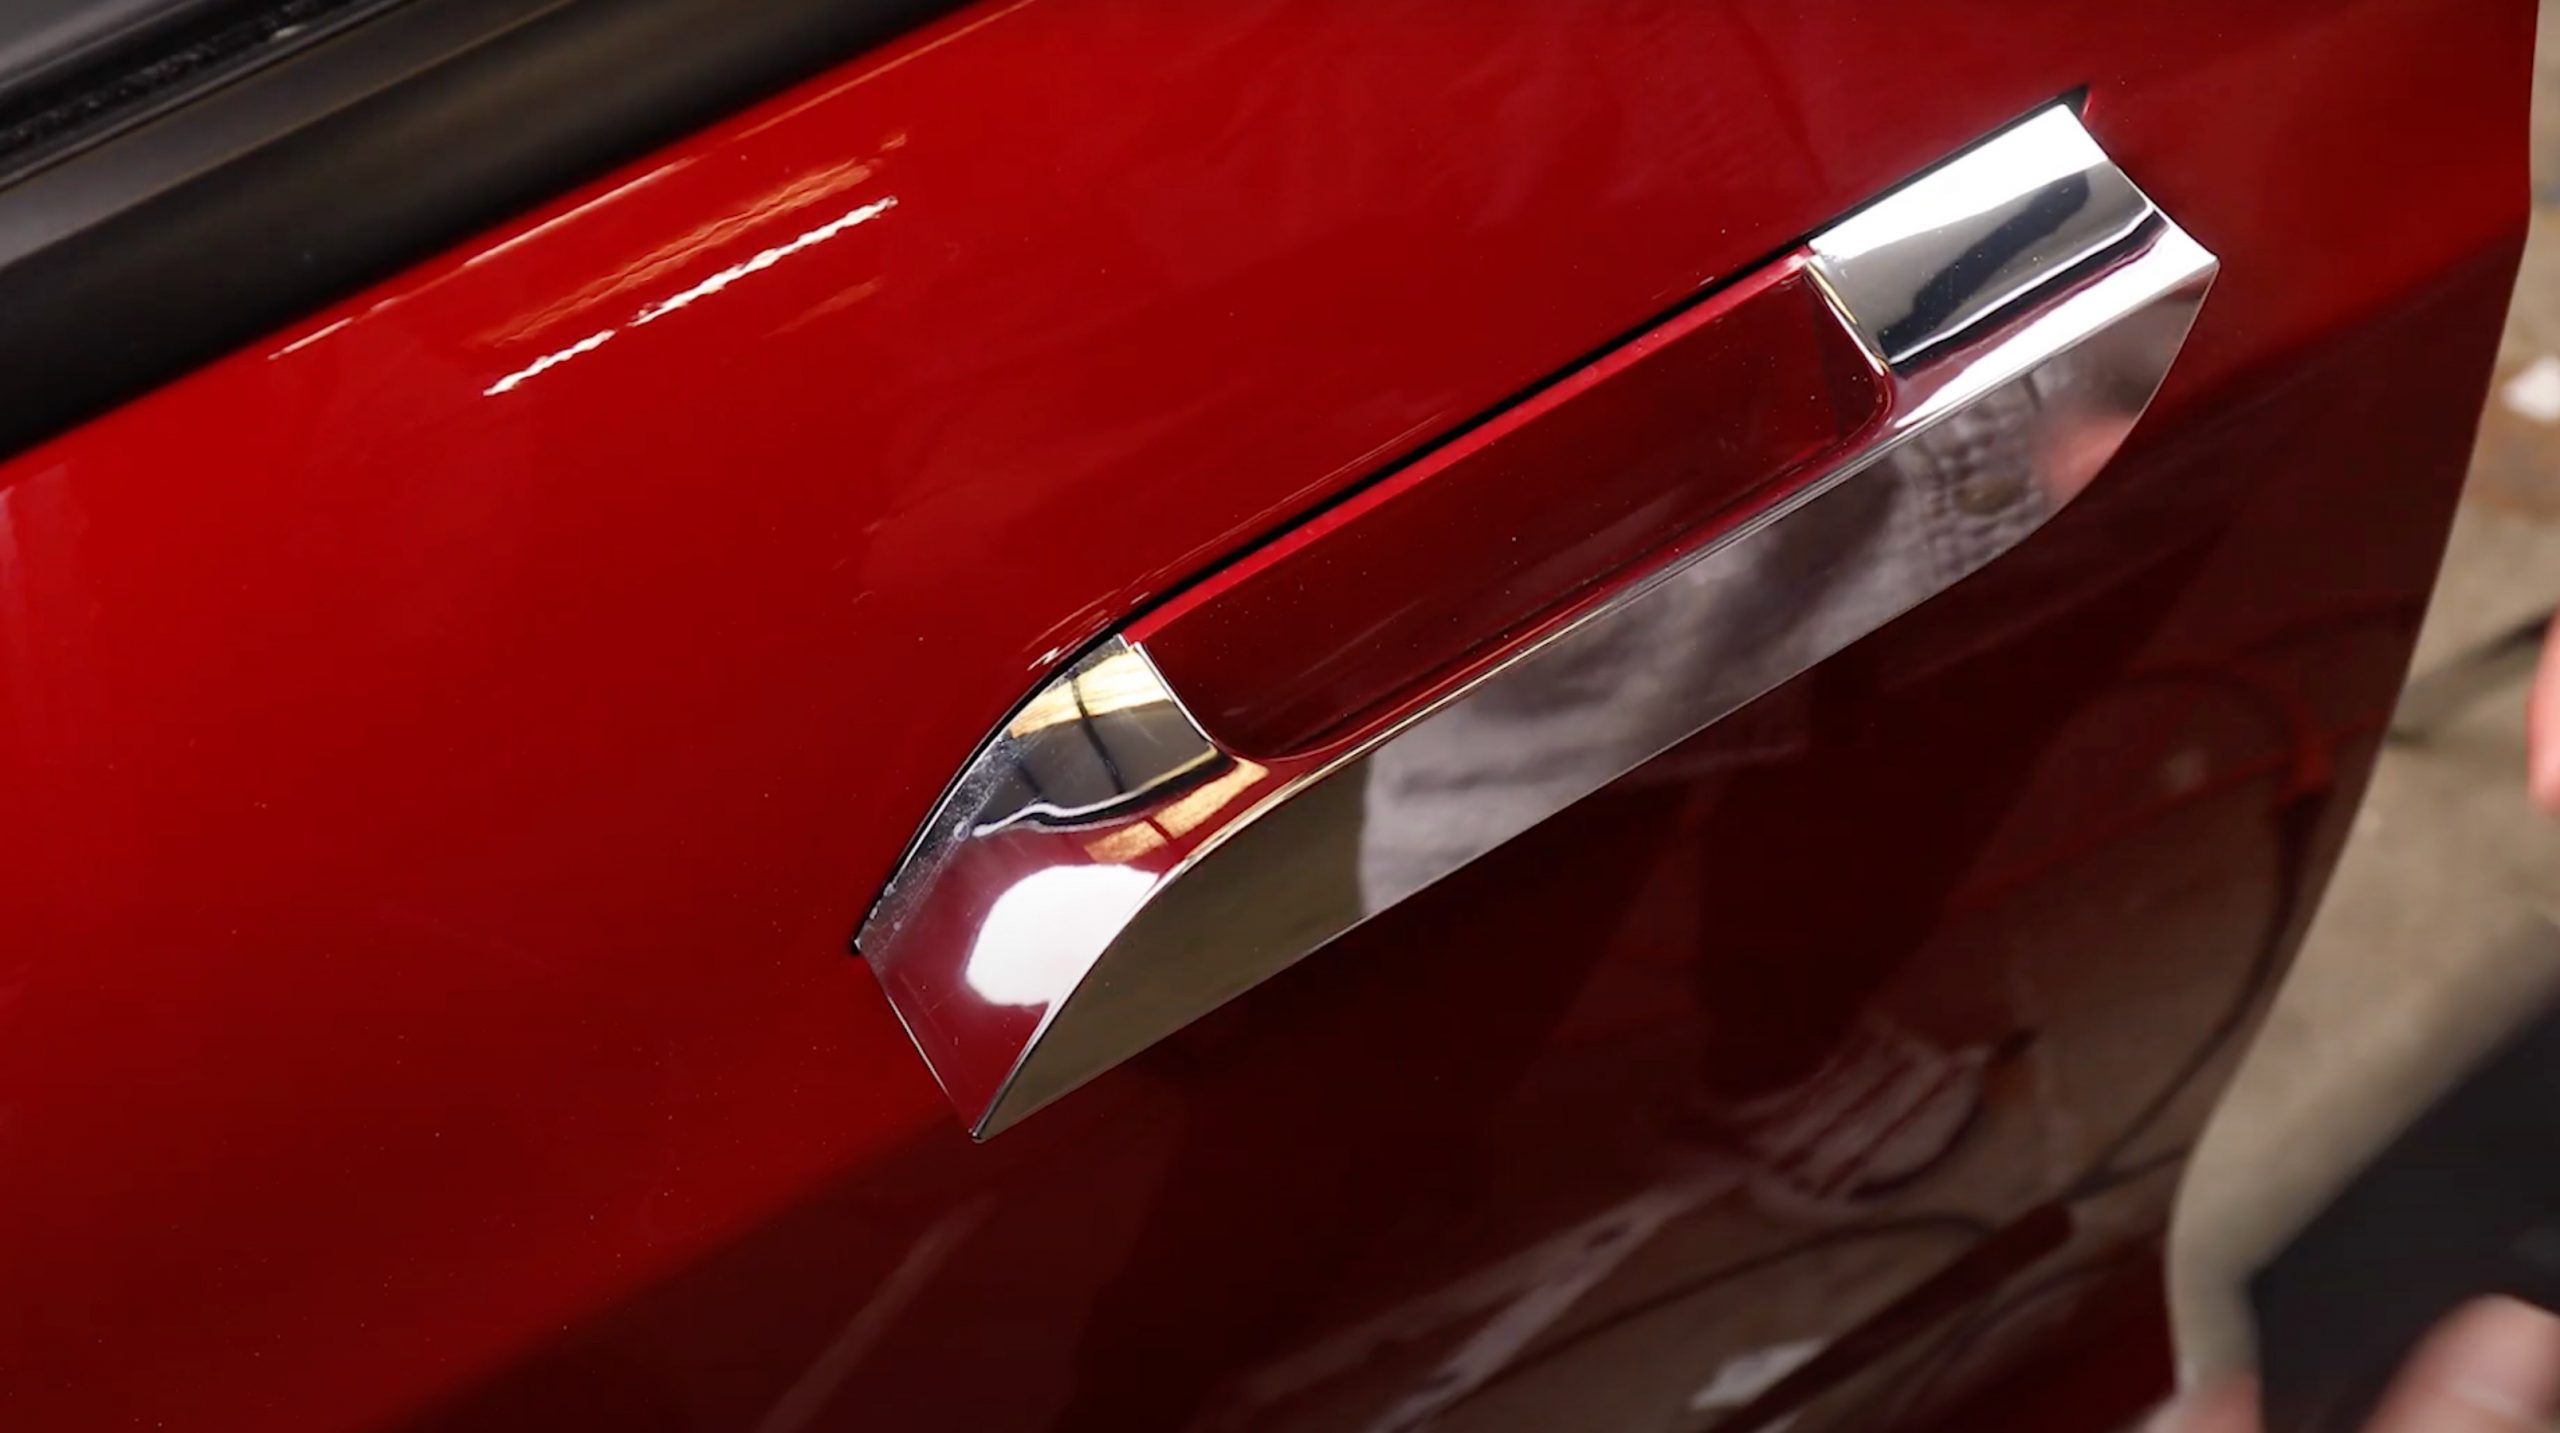
The sudden failure of Tesla Model S self-presenting door handles as a result of component failure is a common and often aggravating experience for many early owners.
The design of the earlier Model S door handle was comprised of cheaper, cast components that often led to breakage, which Tesla finally addressed in the 3rd Gen of Model S door handles.
Under warranty, the answer is simple; call the service center, and schedule an appointment for a replacement, but for many early Model S owners, their warranty has been long gone, and thus stuck with an expensive repair bill that ran upwards of $1000.00 per self-presenting door handle. It also requires a special calibration that only the service center can perform.
The owners of the Electrified Garage have addressed this common issue with a comprehensive DIY Model S Door Handle Rebuild Kit that any handy person can tackle.
The kit includes a stronger machined stainless steel gear, a new e-clip for retaining the pivot gear on the shaft, Original Equipment Panasonic replacement micro-switches, push nuts to hold the vapor barrier securely, and new door panel clips.
Here’s a basic guideline on how to repair your Model S door handle.
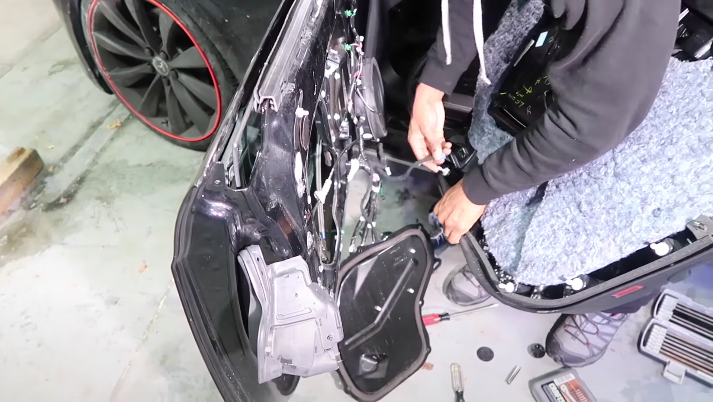
To remove the door handle assembly
 -
-
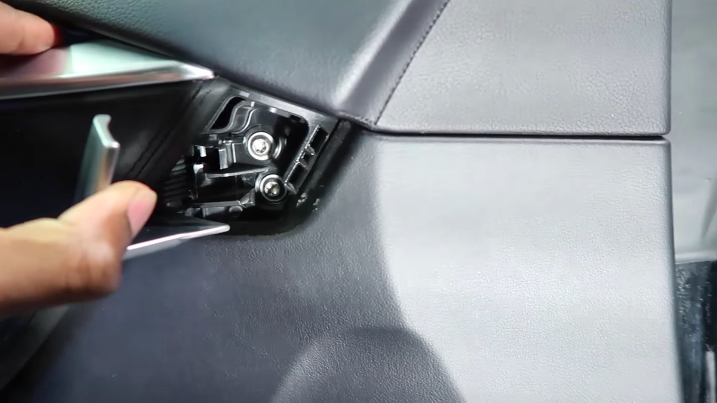
- With the door opened, pull the hatch into a position as if you were opening the door.
- Pop off the trim piece with a flat tool, like a flathead screwdriver. Do not apply excessive force.
- Use a Torx T30 bit to remove the two screws behind the door hatch.
- Use the 9mm socket wrench to remove the single bolt that lies under the door handle.
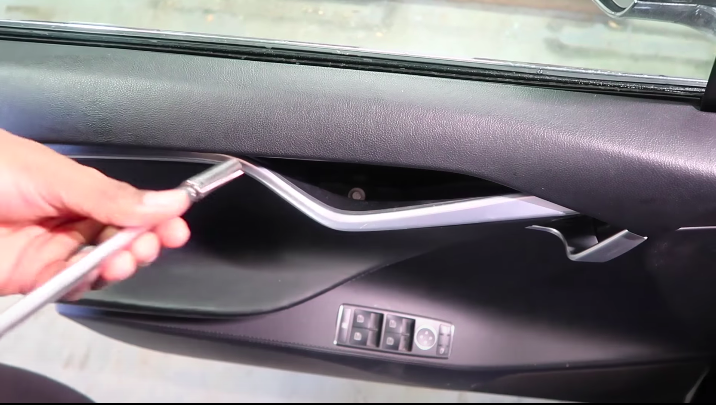
- Use your hands to pop the speaker grille off from the bottom portion of the door.
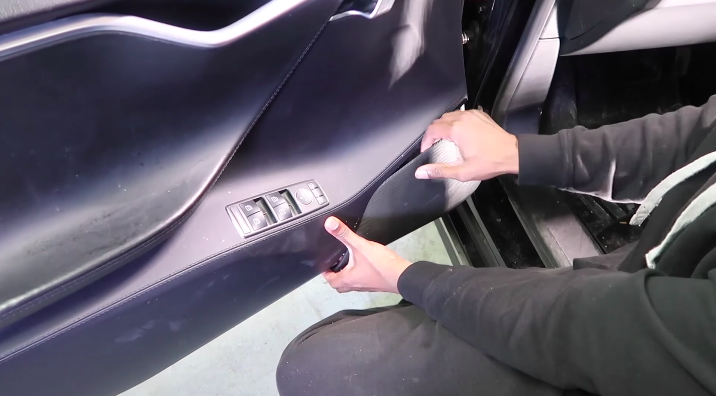
- Then grab the underside above the speaker and the door handle and pull the door covering off firmly.
- Remove any wiring that connects the door covering to the door itself. This includes lights, speaker system wires, and door sensor connectors.
- Use a Torx T20 bit to remove the door cover panel. There will be five screws to remove.
- Use a flathead to push the rubber gasket through the hole on the panel that was most recently removed.
- Use a flathead to push the switch on the side of the door. This will trick the window into thinking the door is closed, which will push the window glass upward. It will give you easier access to screws at the top of the door frame.
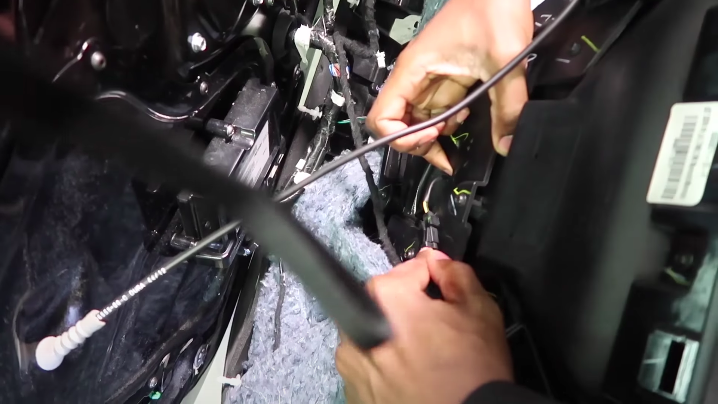
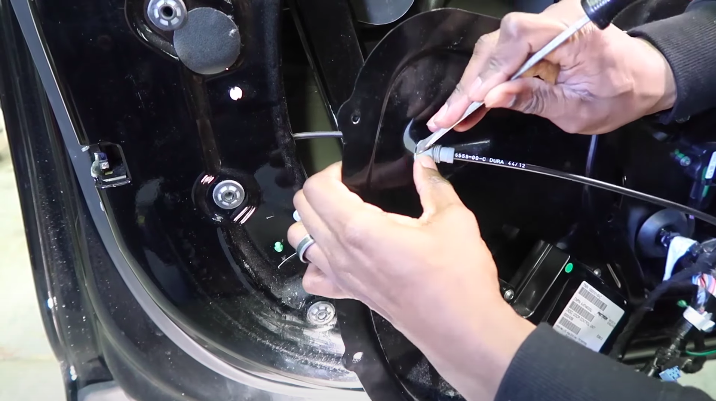
- Use a trim removal device or flat tool to remove the small white piece from the door panel. This secures the door handle harness into place.
- Unplug the door handle harness.
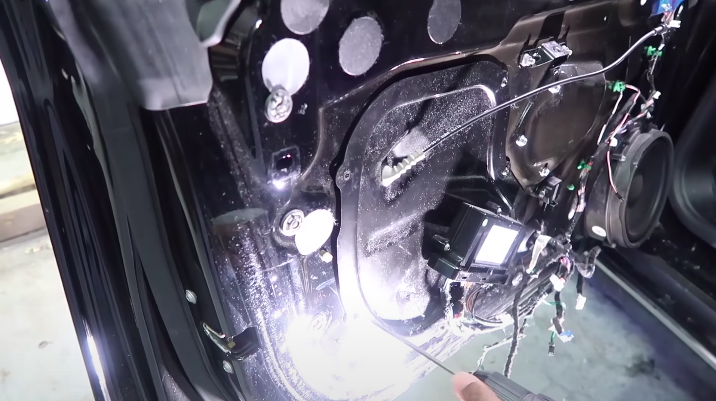
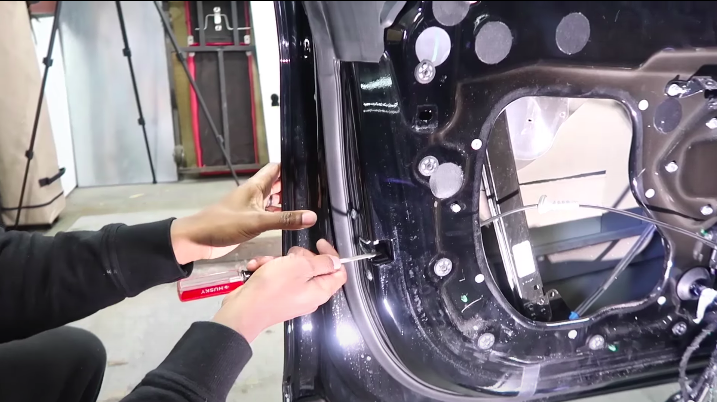
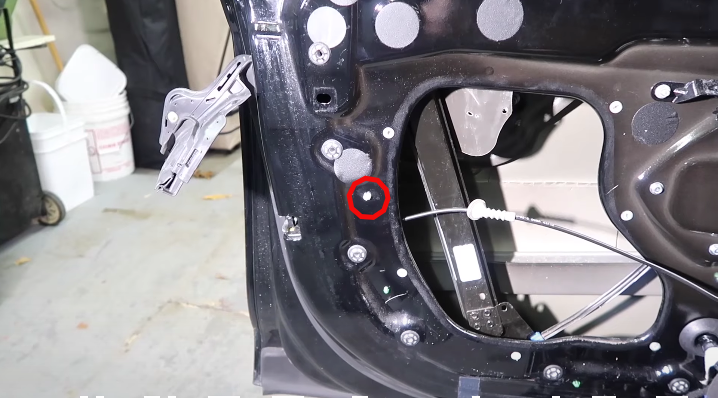
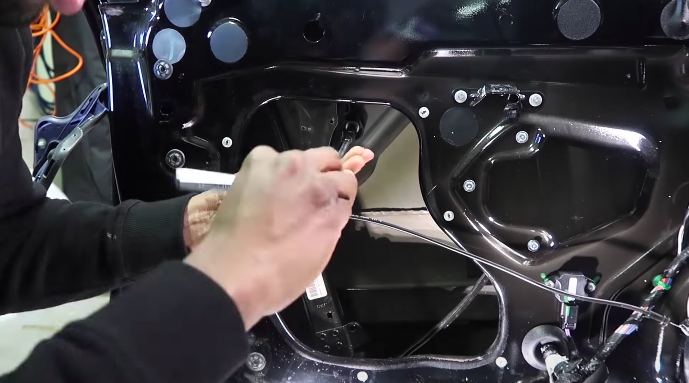
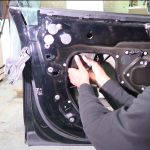
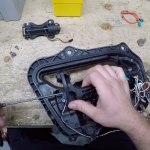
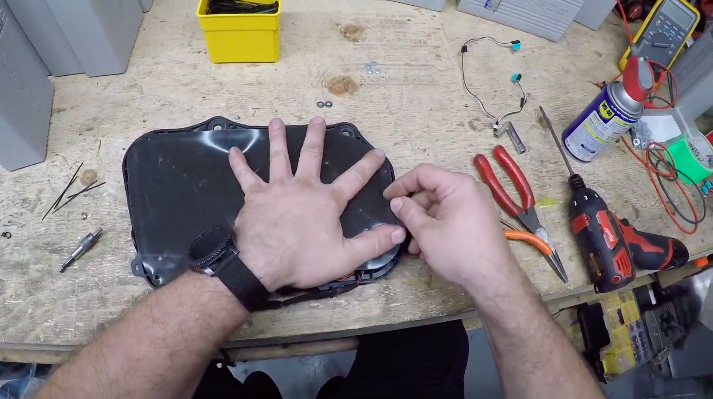
- Remove the two black plastic door covers from the door panel that are shown below. This is done by simply pressing from the back of the pieces with your hand.
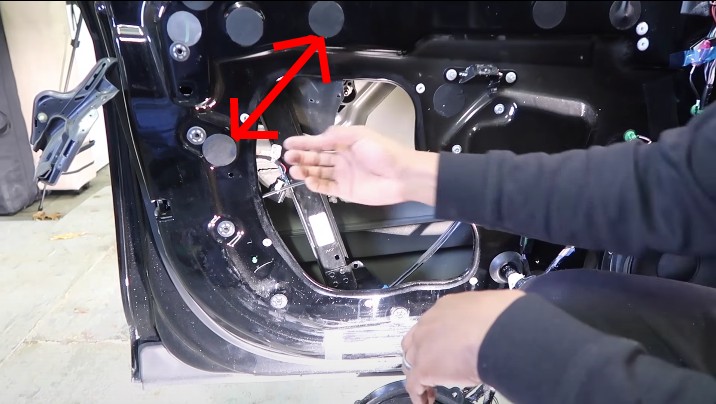
- Use a 10mm socket wrench to remove the two bolts that are in each of these two holes and another that lies within the open space in the center of the door.
-
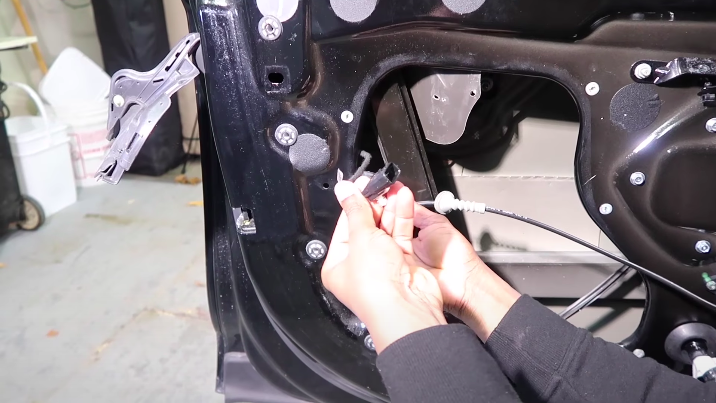
- Push the door handle on the exterior of the door back into the door assembly. Use your right hand to stabilize the door and your left hand to push the door handle in.
- Reconnect the blue window power wire into the appropriate connection point. This is located at the bottom of the door. Once this is completed, roll the window down and disconnect the connection once again.
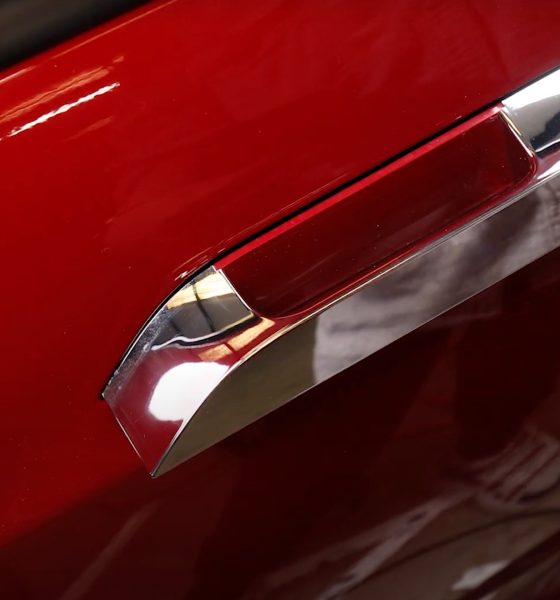
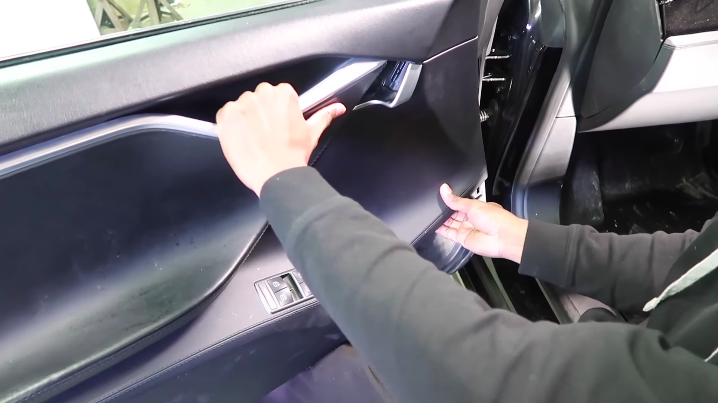
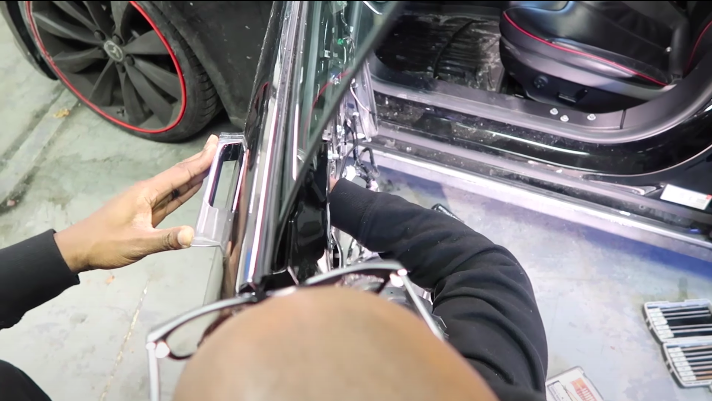
- Grab the top chrome-colored trim piece located at the top of the outside of the door. Gently remove this piece by slightly pulling and working your way down the piece. Do this gradually and try not to remove it in one pull. It could damage the trim or the door itself.
-
- Remove the bolt located under the chrome trim piece. It is easiest to do this with a regular wrench and slowly loosen. You can wrap the wrench in electrical tape to prevent possible scratching of the window glass.
- Reconnect the blue window power connector once again and roll the window all the way up. Once the window is rolled up, disconnect the connector wire once again.
- The door assembly can then be pulled out. Pull in a firm, controlled fashion.
-

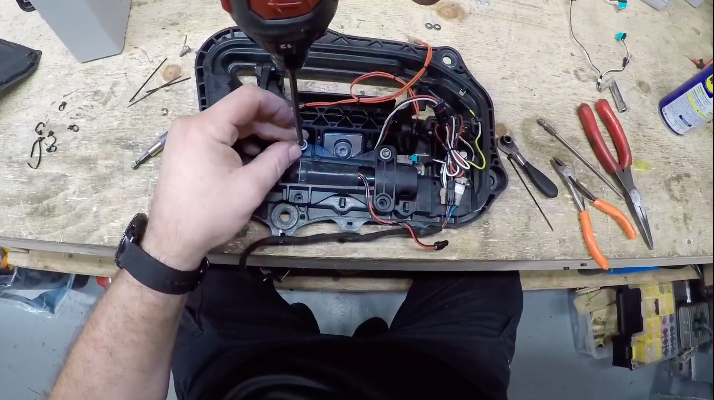
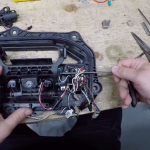
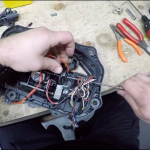
To repair the door assembly:
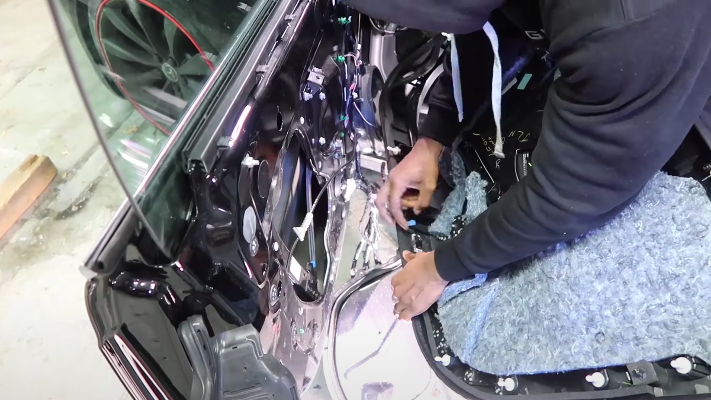
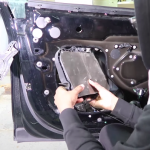
- Remove the vapor cover from the assembly. This is usually connected with zip ties. Be careful to not cut any wires while removing.
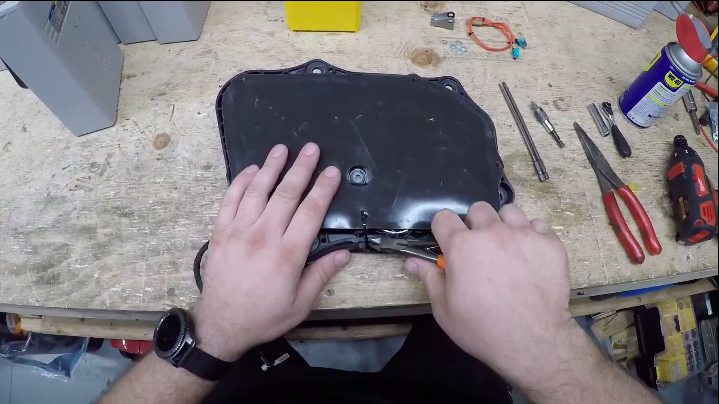
- Remove the five centrally located bolts with the correctly-sized Torx bits.
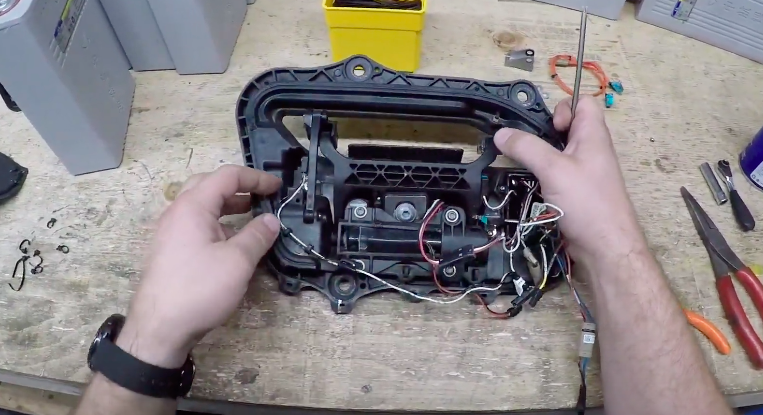
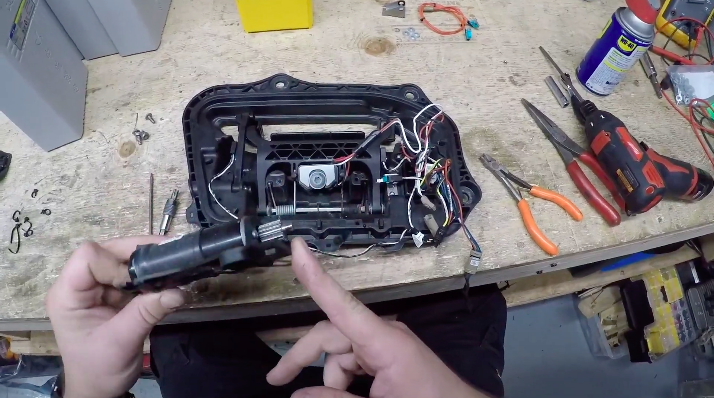
- Remove the motor, which is the small cylindrical black piece held in by these bolts.
- Remove the two screws that maintain the position of the door handle.
-
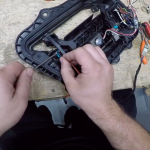
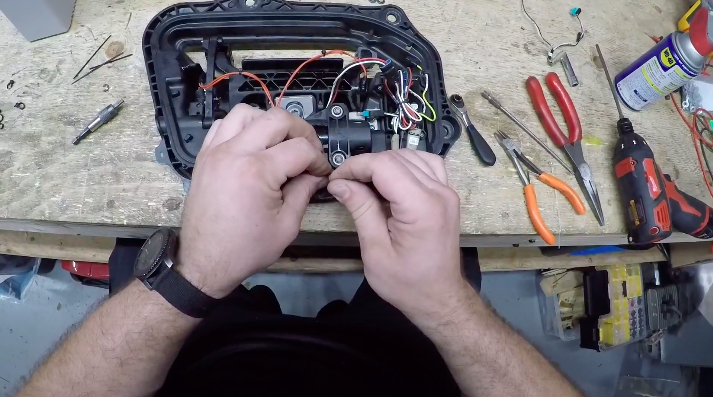
- Remove the pin that is housed on the rear side of the assembly. This can be lubricated with WD-40 and pushed out with a pair of needlenose pliers.

- Install the new gear into the door assembly by pressing down on the door handle.
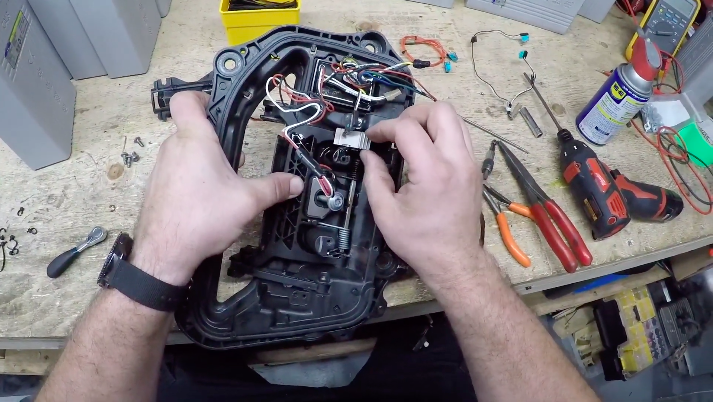
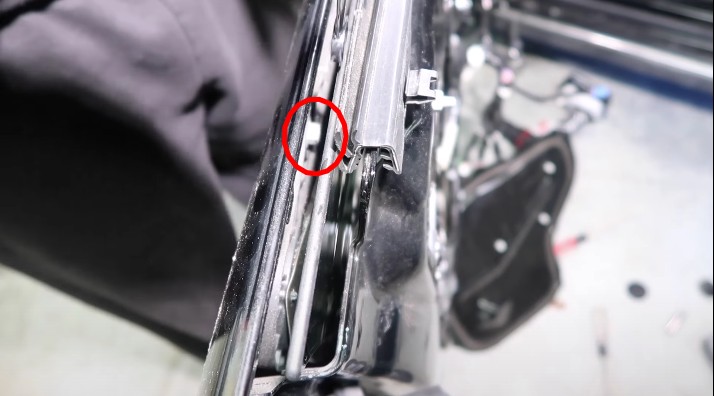
- Slide the pin back through and make sure the center notch on the pin is aligned with the middle slot. Install a new metal clip from the kit in the center notch.
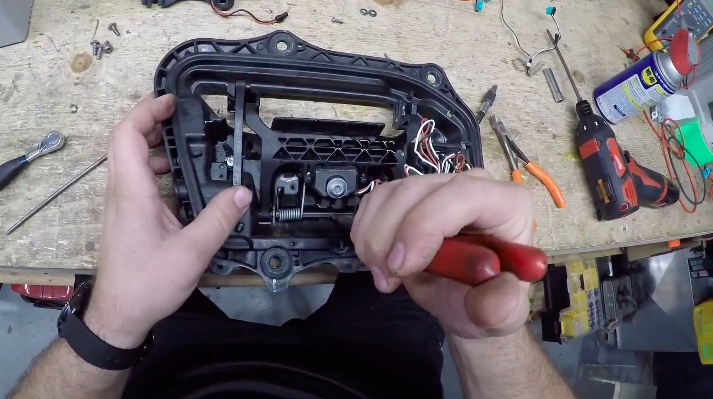
- Reinstall the screws that were removed in Step 4.
-
- Resecure the main power wire for the door handle to the bottom of the assembly with zip ties.
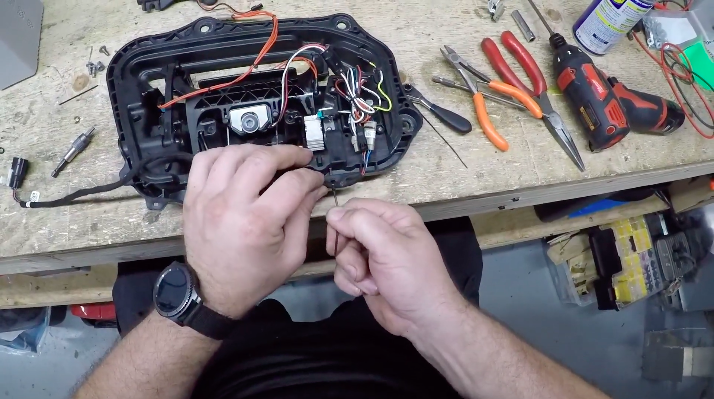
- Reinstall the motor from Step 3 and resecure it with the appropriate screws.
- Resecure all wires with zip ties and reapply the vapor cover.
-
Tesla Model S Door Handle DIY Repair Kit

Firmware
Tesla unlocks in-car web conferencing to extend Google Meet, Teams and beyond
Tesla’s Summer Update lets owners join Google Meet, Teams, and Discord calls via cabin camera.
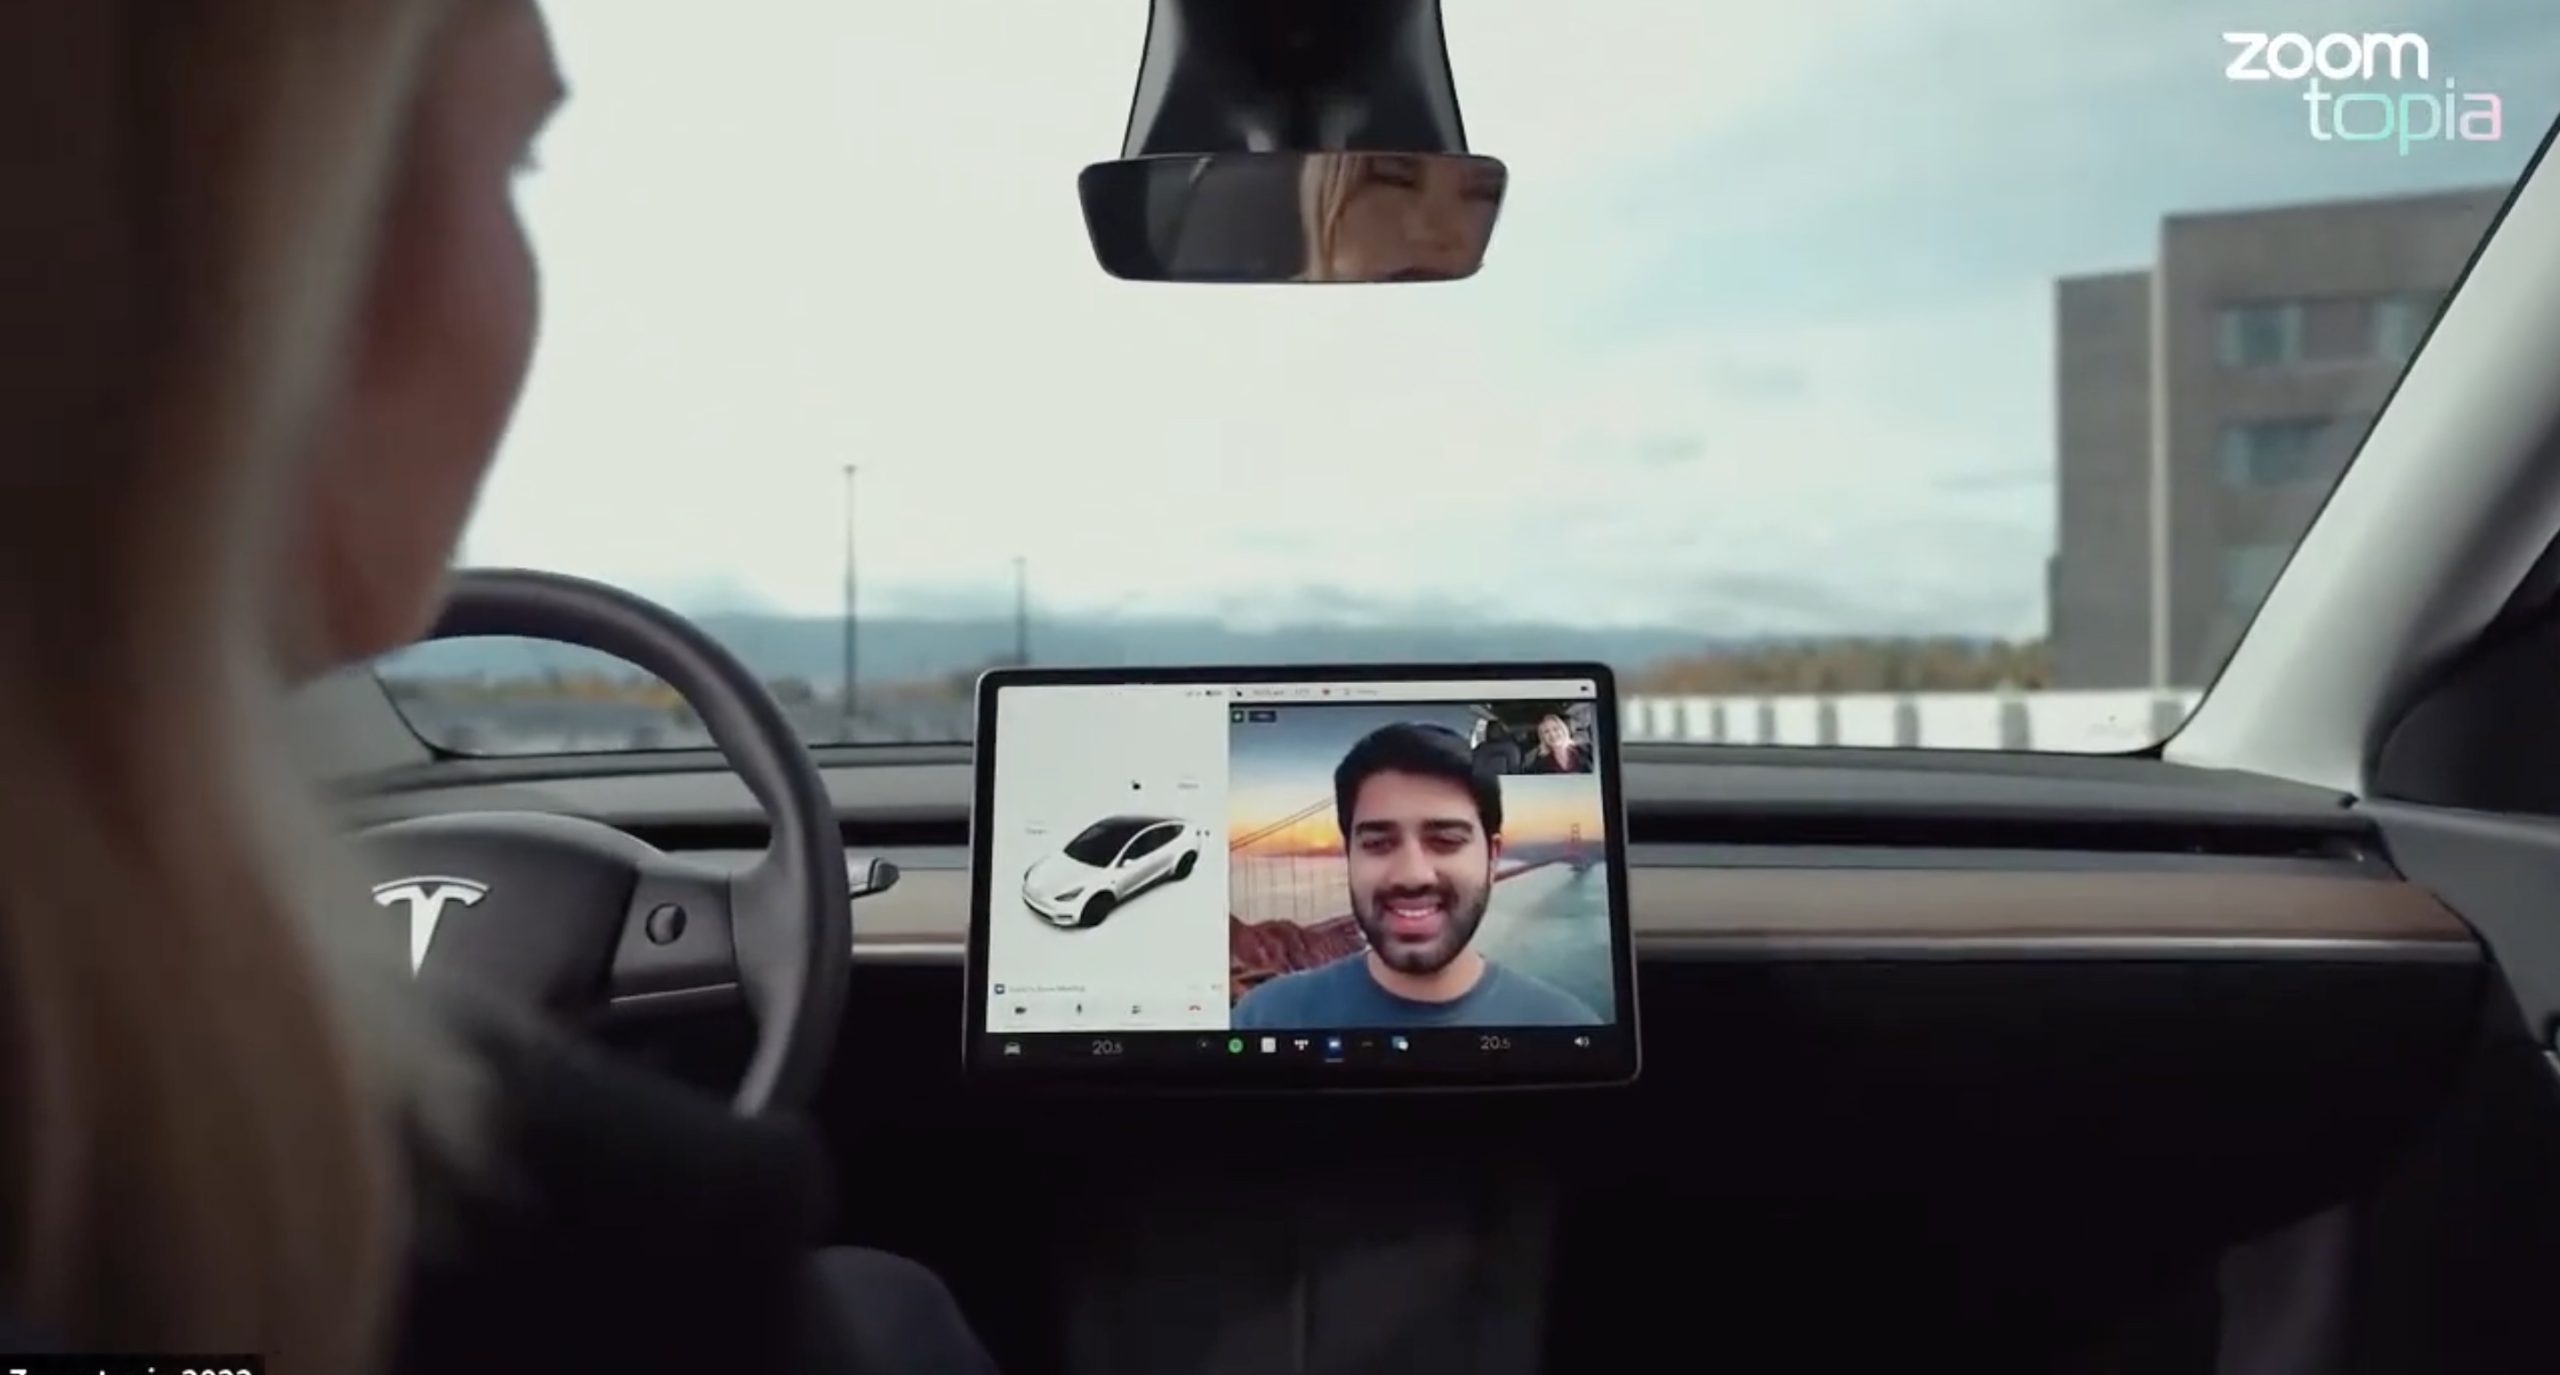
Tesla’s 2026 Summer Update, which just began rolling out to customer vehicles, now links the built-in web browser with the in-cabin camera feed and microphone input, thereby letting owners join video calls on nearly any browser-based service instead of just Zoom.
The change appears in Tesla’s own release notes for software version 2026.26 under “Web Browser,” which states that the vehicle can now use its interior camera and cabin microphone when a website requests access, with permission granted the same way a desktop browser handles it. As NotATeslaApp notes, this feature opens the door to Google Meet, Microsoft Teams, Discord, and other webcam-enabled sites to activate the in-car cabin-facing camera. The feed automatically crops and zooms to center the driver in frame.
Tesla has offered in-car video calling before, but only through a dedicated Zoom app that launched at the end of 2022, a stripped-down browser preloaded with Zoom’s own web client and gated behind Premium Connectivity. Opening the full browser to any camera-requesting site removes that walled garden. Elon Musk first called video conferencing “definitely a future feature” back in 2020, when the pandemic pushed remote meetings into daily life, so this update effectively finishes something Tesla has been promising for six years.
Tesla Summer Update begins rolling out: a look at the new features
The feature keeps the same restrictions that applied to Zoom on Tesla vehicles. It only works while the car is parked; shifting into Drive disables the camera feed, according to the release notes. It is also limited to vehicles running Tesla’s AMD Ryzen infotainment hardware, meaning older Intel-based Model S and Model X units, along with early Model 3 and Model Y builds, don’t get it.
Turning the browser into a general entry point for the in-cabin camera, rather than routing everything through one local app, widens the number of third-party sites that can ask for access, even though Tesla’s permission prompt.
With the Summer update only days into its rollout, be sure to stay with us on TikTok and X to see the latest video demonstrations.
-
Elon Musk escalated his monthslong feud with Christopher Nolan’s The Odyssey this week, pledging that his own AI video tool will produce a competing version before the year is out. Responding to a fan-made, AI-generated clip of the ancient epic, Musk wrote on X, “Before this year ends, Grok Imagine will make a full-length movie of The Odyssey that is historically accurate and true to the art of Homer.”
In June, Musk quoted an xAI-shared trailer built entirely with Grok Imagine Video 1.5, a two-minute-plus reimagining of The Odyssey styled after a 1970s classical Hollywood epic, and predicted “full movies by the end of the year,” as Teslarati reported at the time. That trailer, built from 36 consistent shots by a single creator, was Musk’s proof of concept. This week’s pledge turns that prediction into a specific commitment, tied directly to Homer’s text rather than a generic demo.
Before this year ends, Grok Imagine will make a full-length movie of The Odyssey that is historically accurate and true to the art of Homer https://t.co/bVHzUmY9WN
— Elon Musk (@elonmusk) July 22, 2026
When a fan separately proposed that Musk fund a live-action alternative, to “give Mel Gibson $100 million to film an Odyssey adaptation with painstakingly historically accurate ships, armour, weapons, and casting, with all dialogue taken straight from the original poem and delivered in Homeric Greek,” Musk replied with two words: “I’m down.”
The Grok Imagine pledge lands as the tool’s underlying infrastructure has changed hands. Grok is no longer a standalone product, it folded into SpaceXAI after SpaceX’s acquisition of xAI closed in February, meaning the compute behind any Odyssey production traces back to the same Colossus supercomputers now bundled into SpaceX’s pitch to investors. Musk has separately said SpaceX’s own engineering data is being fed into the next major Grok training run, a two trillion parameter model he’s called the “2T run.”
Whether Grok Imagine can sustain a feature length narrative, rather than a series of impressive individual shots, remains the open question.
-
Cybertruck
Tesla Mobile App gets a new feature that wrap fans are going to love
Tesla’s Summer Update removes the USB drive step from customizing your car’s digital wrap design.

Tesla’s latest 2026 Summer Update quietly closes out one of the more tedious steps in personalizing a Tesla’s digital appearance. Uploading a custom wrap design used to require a USB drive. Now it doesn’t.
The feature is listed in Tesla’s release notes as “Send Custom Wraps from Mobile App.” The company described it plainly: “Skip the USB drive and upload a custom wrap of your car from the mobile app. Instructions for creating a custom wrap here: github.com/teslamotors/custom-wraps.”
The digital wrap tool has been around since Tesla’s 2024 Holiday Update, when it launched for Cybertruck owners first, as Teslarati reported at the time. Getting a design onto the car meant formatting a USB drive, creating a folder named exactly “Wraps,” dropping in PNG files sized between 512×512 and 1024×1024 pixels and under 1 MB each, then plugging the drive in and applying the wrap through Toybox. Tesla expanded the tool to other models and renamed it from “Colorizer” to “Paint Shop” with the 2025 Holiday Update, while also adding license plate and window tint customization alongside the wraps.
Custom wraps via mobile app https://t.co/5OydZ26g9p pic.twitter.com/uexU0ZePxu
— Tesla (@Tesla) July 22, 2026
The latest Summer Update removes the USB step from that process. Owners will be able to pull a design from wherever they saved it, whether that’s a download from social media or something built from Tesla’s own GitHub templates, and push it to the car directly through the app.
Tesla reveals 2026 Summer Update with crazy fixes to Nav and more
-
It’s a small fix relative to the rest of this latest release, which also included expanded Grok voice commands, automatic navigation that learns regular routes, and self-driving stats inside the mobile app, all detailed in our rundown of the full Summer Update. The USB requirement was one of the more common complaints about Paint Shop since it launched. Tesla did not say when the wrap upload change would reach individual vehicles, only that the broader update is rolling out now in waves.

Elon Musk updates the SpaceX timeline for Mars

SpaceX gets an absolutely crazy price target after rough IPO


