Lifestyle
How to Carbon Fiber Wrap the Model S Center Console
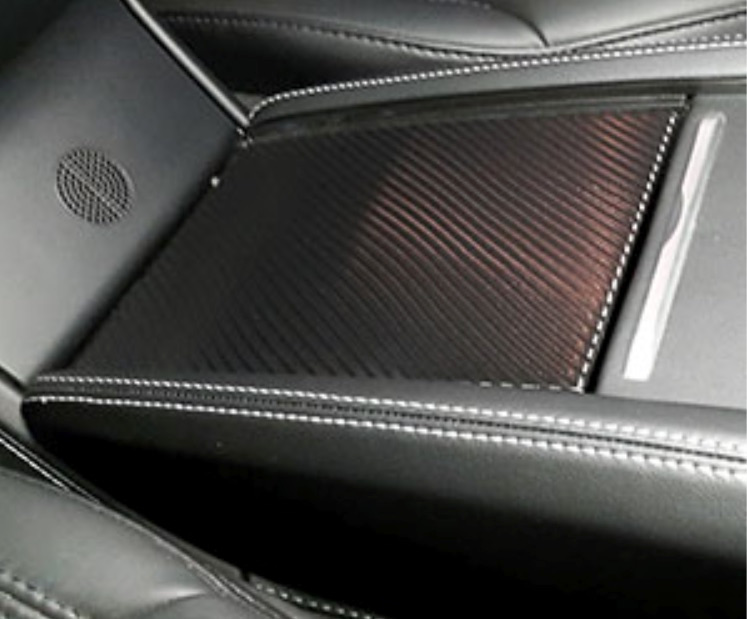
Following our recent step-by-step guide on how to add a carbon fiber interior trim to the Tesla Model S, we’ll be rounding out the rest of the interior by performing a carbon fiber wrap on Tesla’s factory Premium Center Console add-on.
Required
- Material: 3M di-noc Carbon Fiber Flex Wrap
- Time needed: 45 min.
Procedure
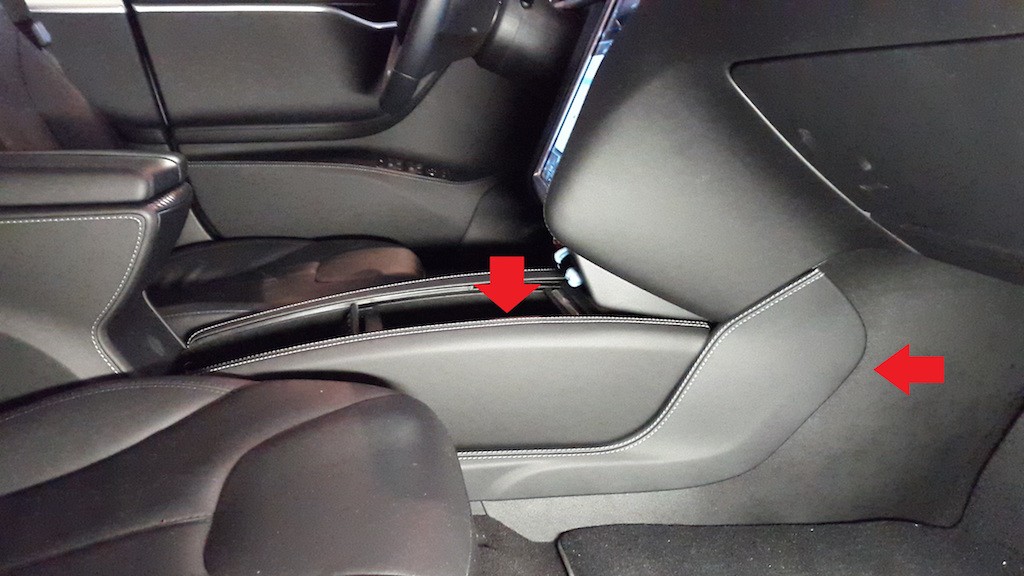
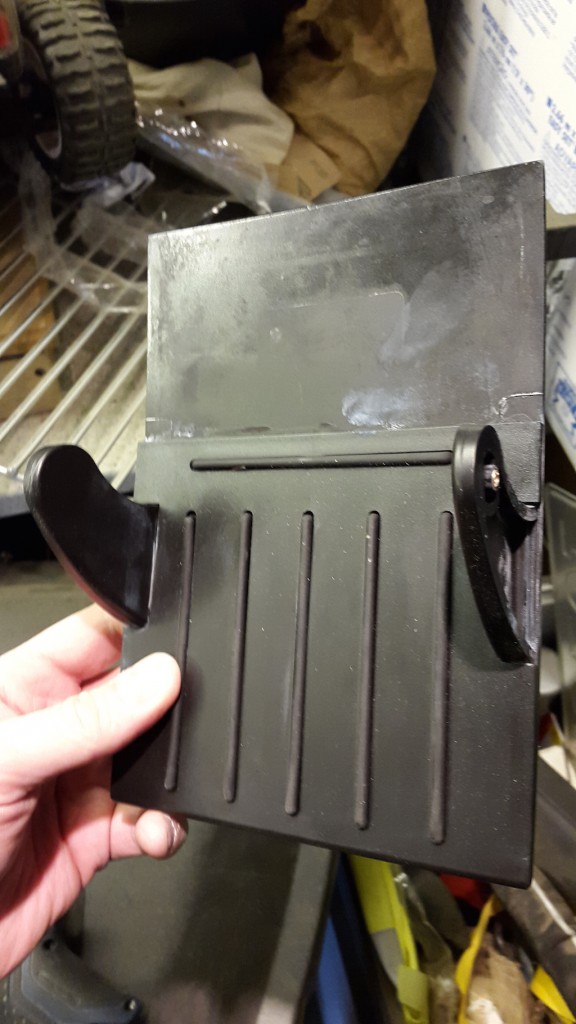
The big picture is to remove the top panel to Tesla’s center console add-on so that it can be wrapped in carbon fiber. We start by removing the two panels along each side of the factory center console unit. The paneling is secured by metal clips which can be easily pulled out without breaking.
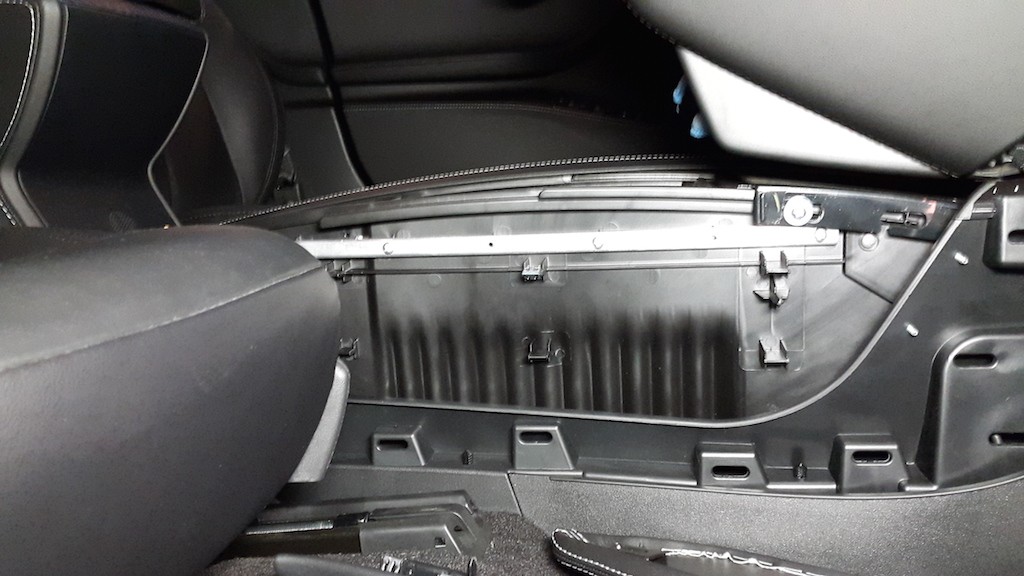
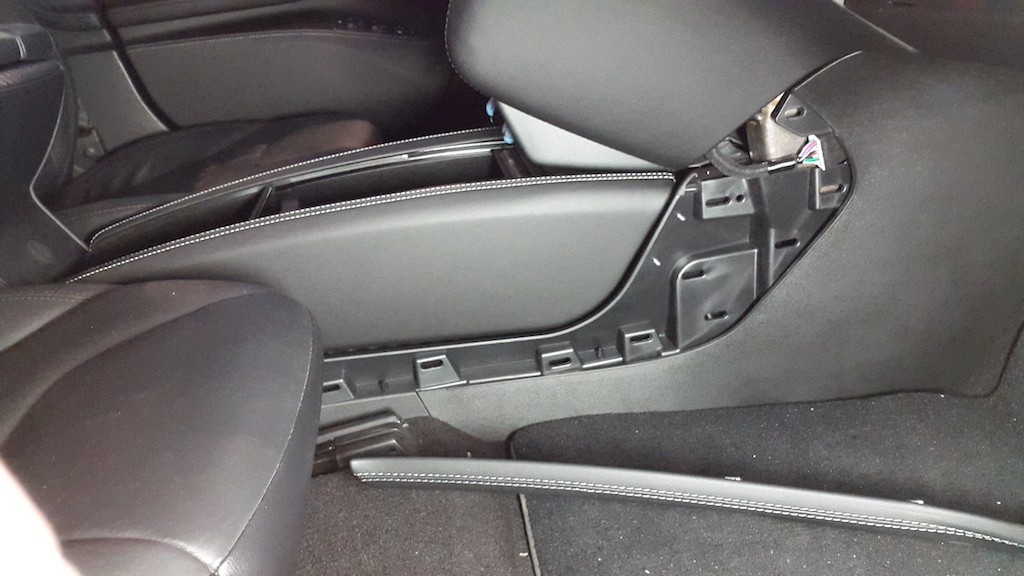
Side panels to the Premium Center Console removed.
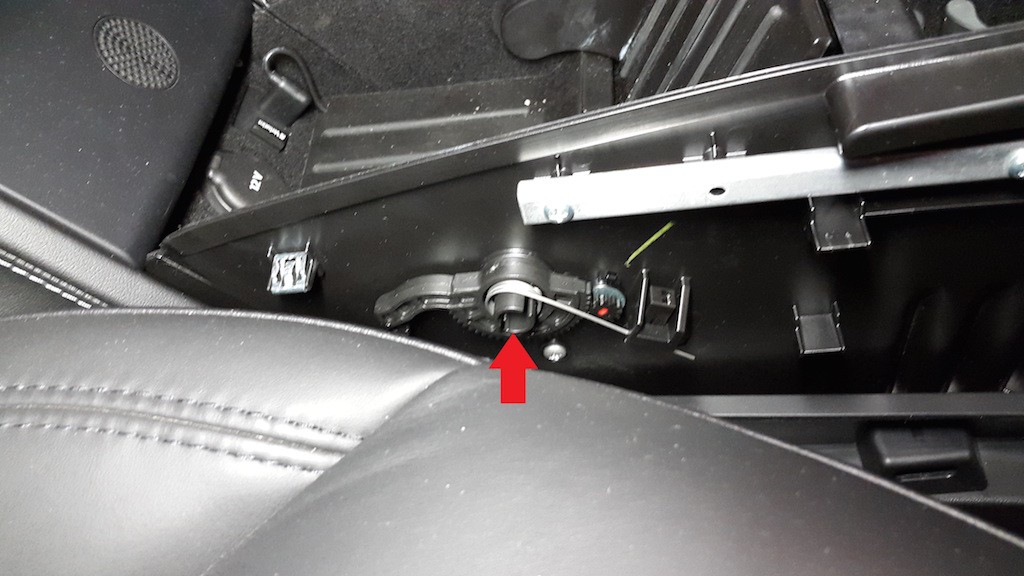
With the panels removed, you can clearly see the mounting points along with a spring loaded wheel/gear which controls the Piano black sliding top to the center console. Everything up until now should have been relatively easy to do.
The next step requires removal of the spring.
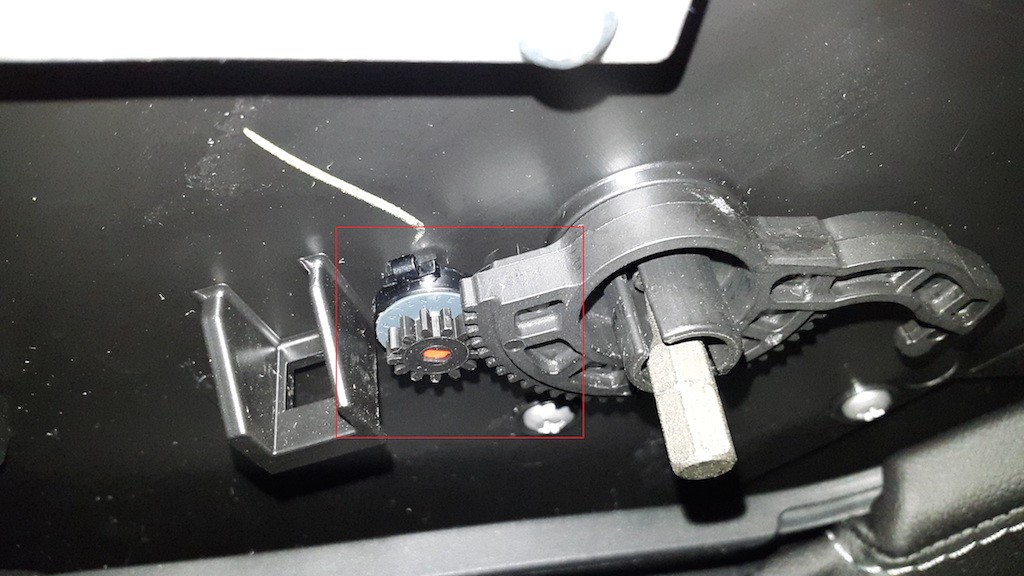
Take note of the position for each of the components making up the spring loaded gears assembly.
Remove the spring – remember the position and direction.
Inside the mount is a Philips screw. There’s not much room to operate here so I opted to use a flare key to loosen it.
Once the Philips head screw is remove, go ahead and remove the wheel/gear assembly being careful that it doesn’t get lost. The top panel to center console should now be easily removable.
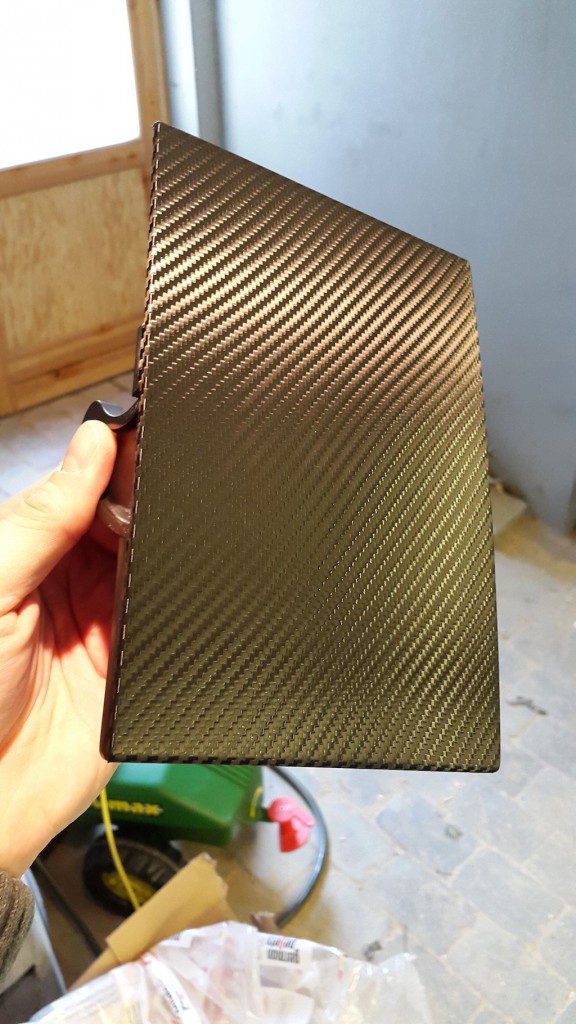
Remove the top panel and start wrapping!
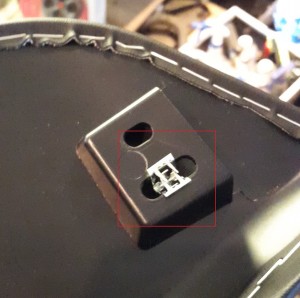 Once the panel is wrapped, put the wheel/gear assembly and spring back into its original place on the center console. Be sure the sliding mechanisms on the center console are fully functioning.
Check that none of the metal clips are stuck on the panel. Secure the clips to the mounting holes. If the clip happens to fall out, simply bend the “teeth” back down and remount the clip onto the console.
Remount the panels by reversing the steps taken from earlier. Finally, sit back and enjoy your newly wrapped center console.
ALSO SEE: How to add a Carbon Fiber Interior Trim to the Model S
Content provided by channel partner: Teslafied.eu
Elon Musk
X account with 184 followers inadvertently saves US space program amid Musk-Trump row
Needless to say, the X user has far more than 184 followers today after his level-headed feat.
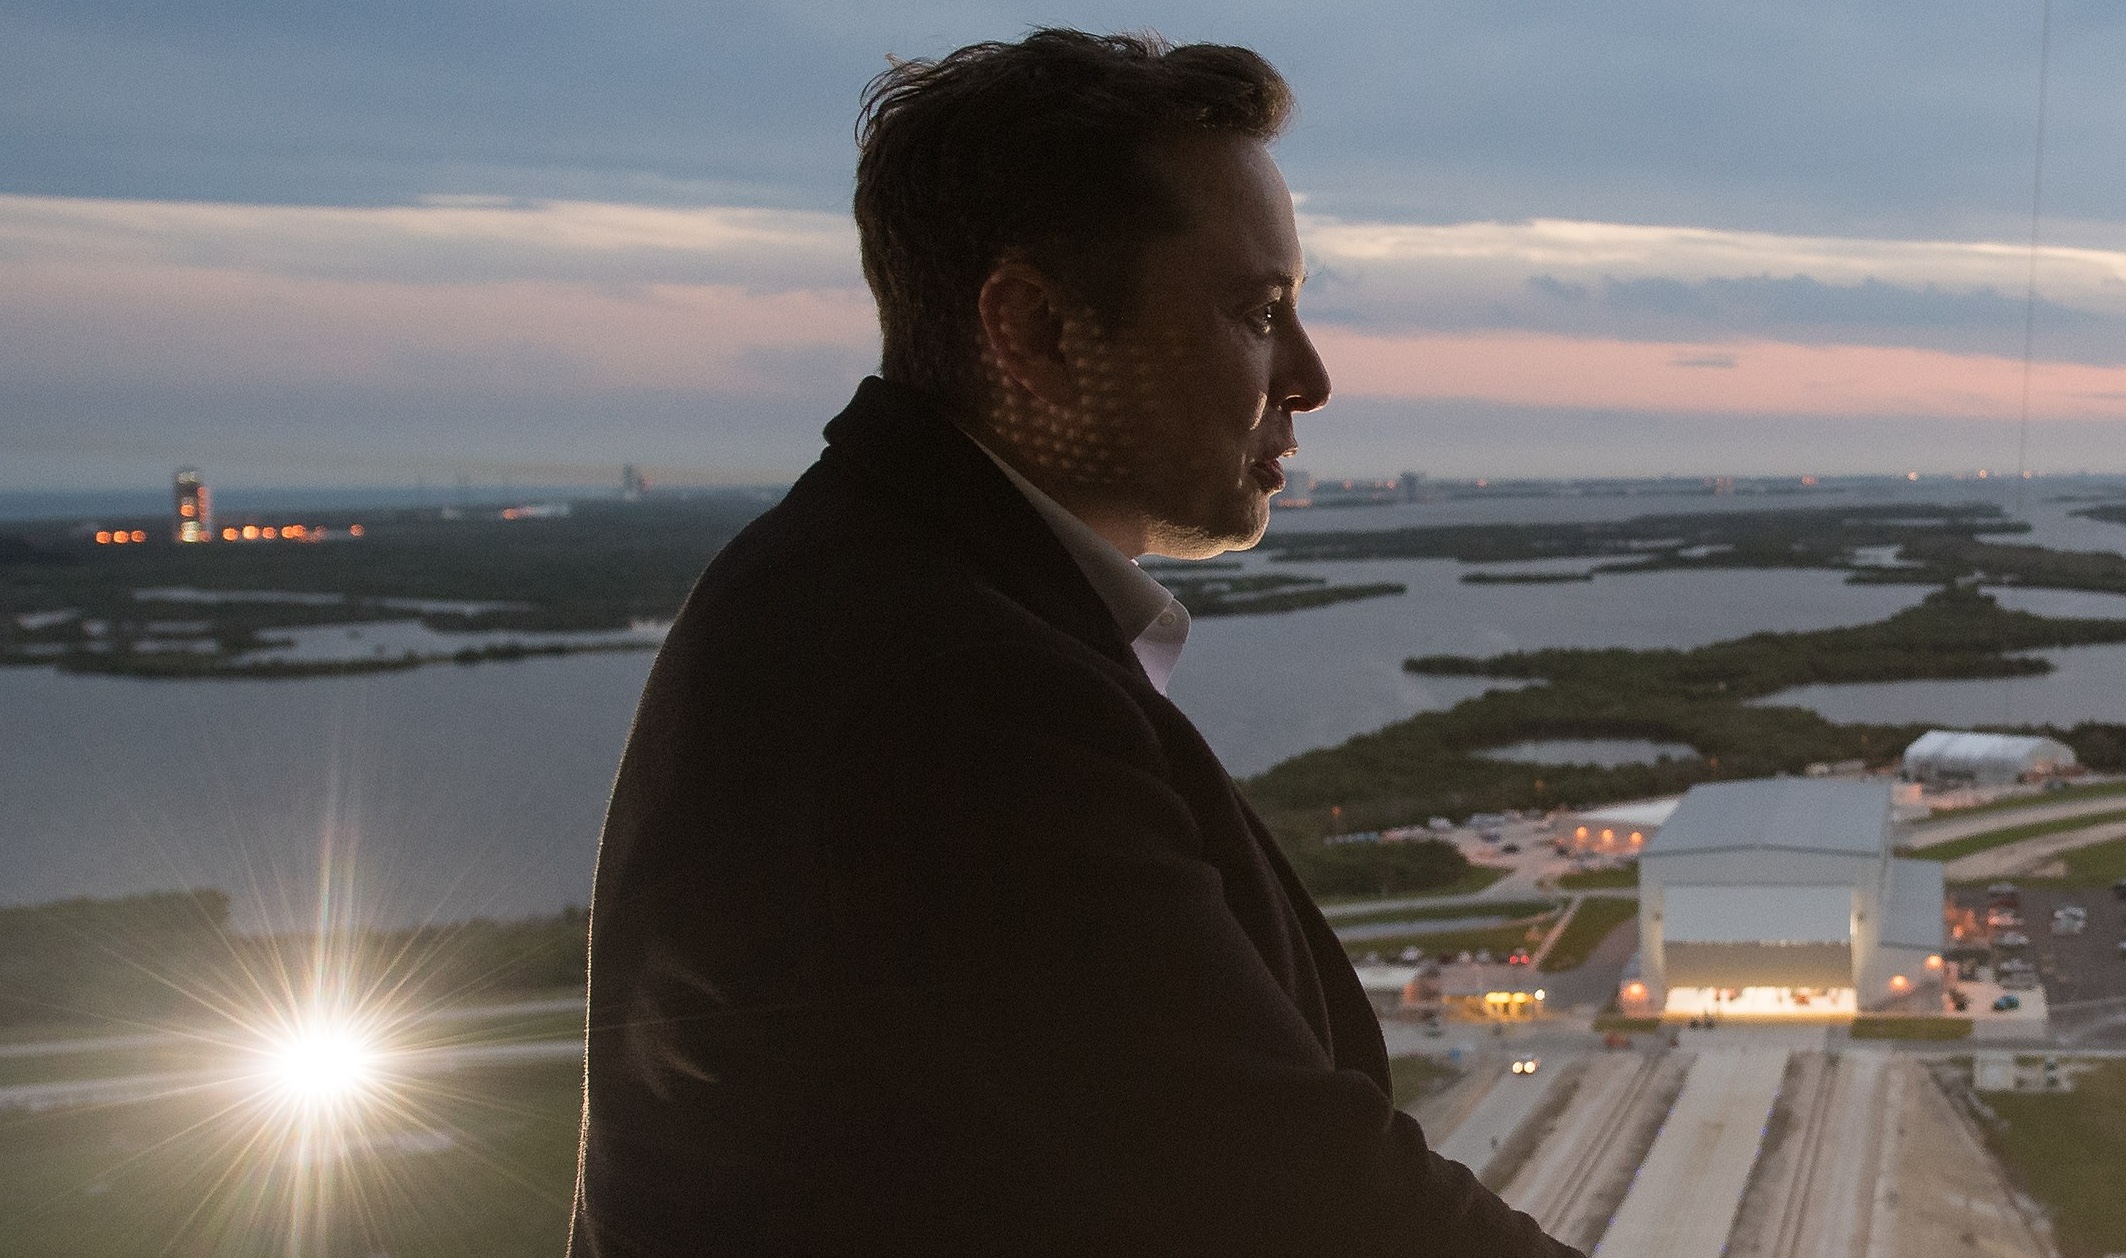
An X user with 184 followers has become the unlikely hero of the United States’ space program by effectively de-escalating a row between SpaceX CEO Elon Musk and President Donald Trump on social media.
Needless to say, the X user has far more than 184 followers today after his level-headed feat.
A Near Fall
During Elon Musk and Donald Trump’s fallout last week, the U.S. President stated in a post on Truth Social that a good way for the United States government to save money would be to terminate subsidies and contracts from the CEO’s companies. Musk responded to Trump’s post by stating that SpaceX will start decommissioning its Dragon spacecraft immediately.
Musk’s comment was received with shock among the space community, partly because the U.S. space program is currently reliant on SpaceX to send supplies and astronauts to the International Space Station (ISS). Without Dragon, the United States will likely have to utilize Russia’s Soyuz for the same services—at a significantly higher price.
X User to the Rescue
It was evident among X users that Musk’s comments about Dragon being decommissioned were posted while emotions were high. It was then no surprise that an X account with 184 followers, @Fab25june, commented on Musk’s post, urging the CEO to rethink his decision. “This is a shame this back and forth. You are both better than this. Cool off and take a step back for a couple days,” the X user wrote in a reply.
Much to the social media platform’s surprise, Musk responded to the user. Even more surprising, the CEO stated that SpaceX would not be decommissioning Dragon after all. “Good advice. Ok, we won’t decommission Dragon,” Musk wrote in a post on X.
Not Planned, But Welcomed
The X user’s comment and Musk’s response were received extremely well by social media users, many of whom noted that @Fab25june’s X comment effectively saved the U.S. space program. In a follow-up comment, the X user, who has over 9,100 followers as of writing, stated that he did not really plan on being a mediator between Musk and Trump.
“Elon Musk replied to me. Somehow, I became the accidental peace broker between two billionaires. I didn’t plan this. I was just being me. Two great minds can do wonders. Sometimes, all it takes is a breather. Grateful for every like, DM, and new follow. Life’s weird. The internet’s weirder. Let’s ride. (Manifesting peace… and maybe a Model Y.)” the X user wrote.
Lifestyle
Tesla Cybertruck takes a bump from epic failing Dodge Charger
The Cybertruck seemed unharmed by the charging Charger.
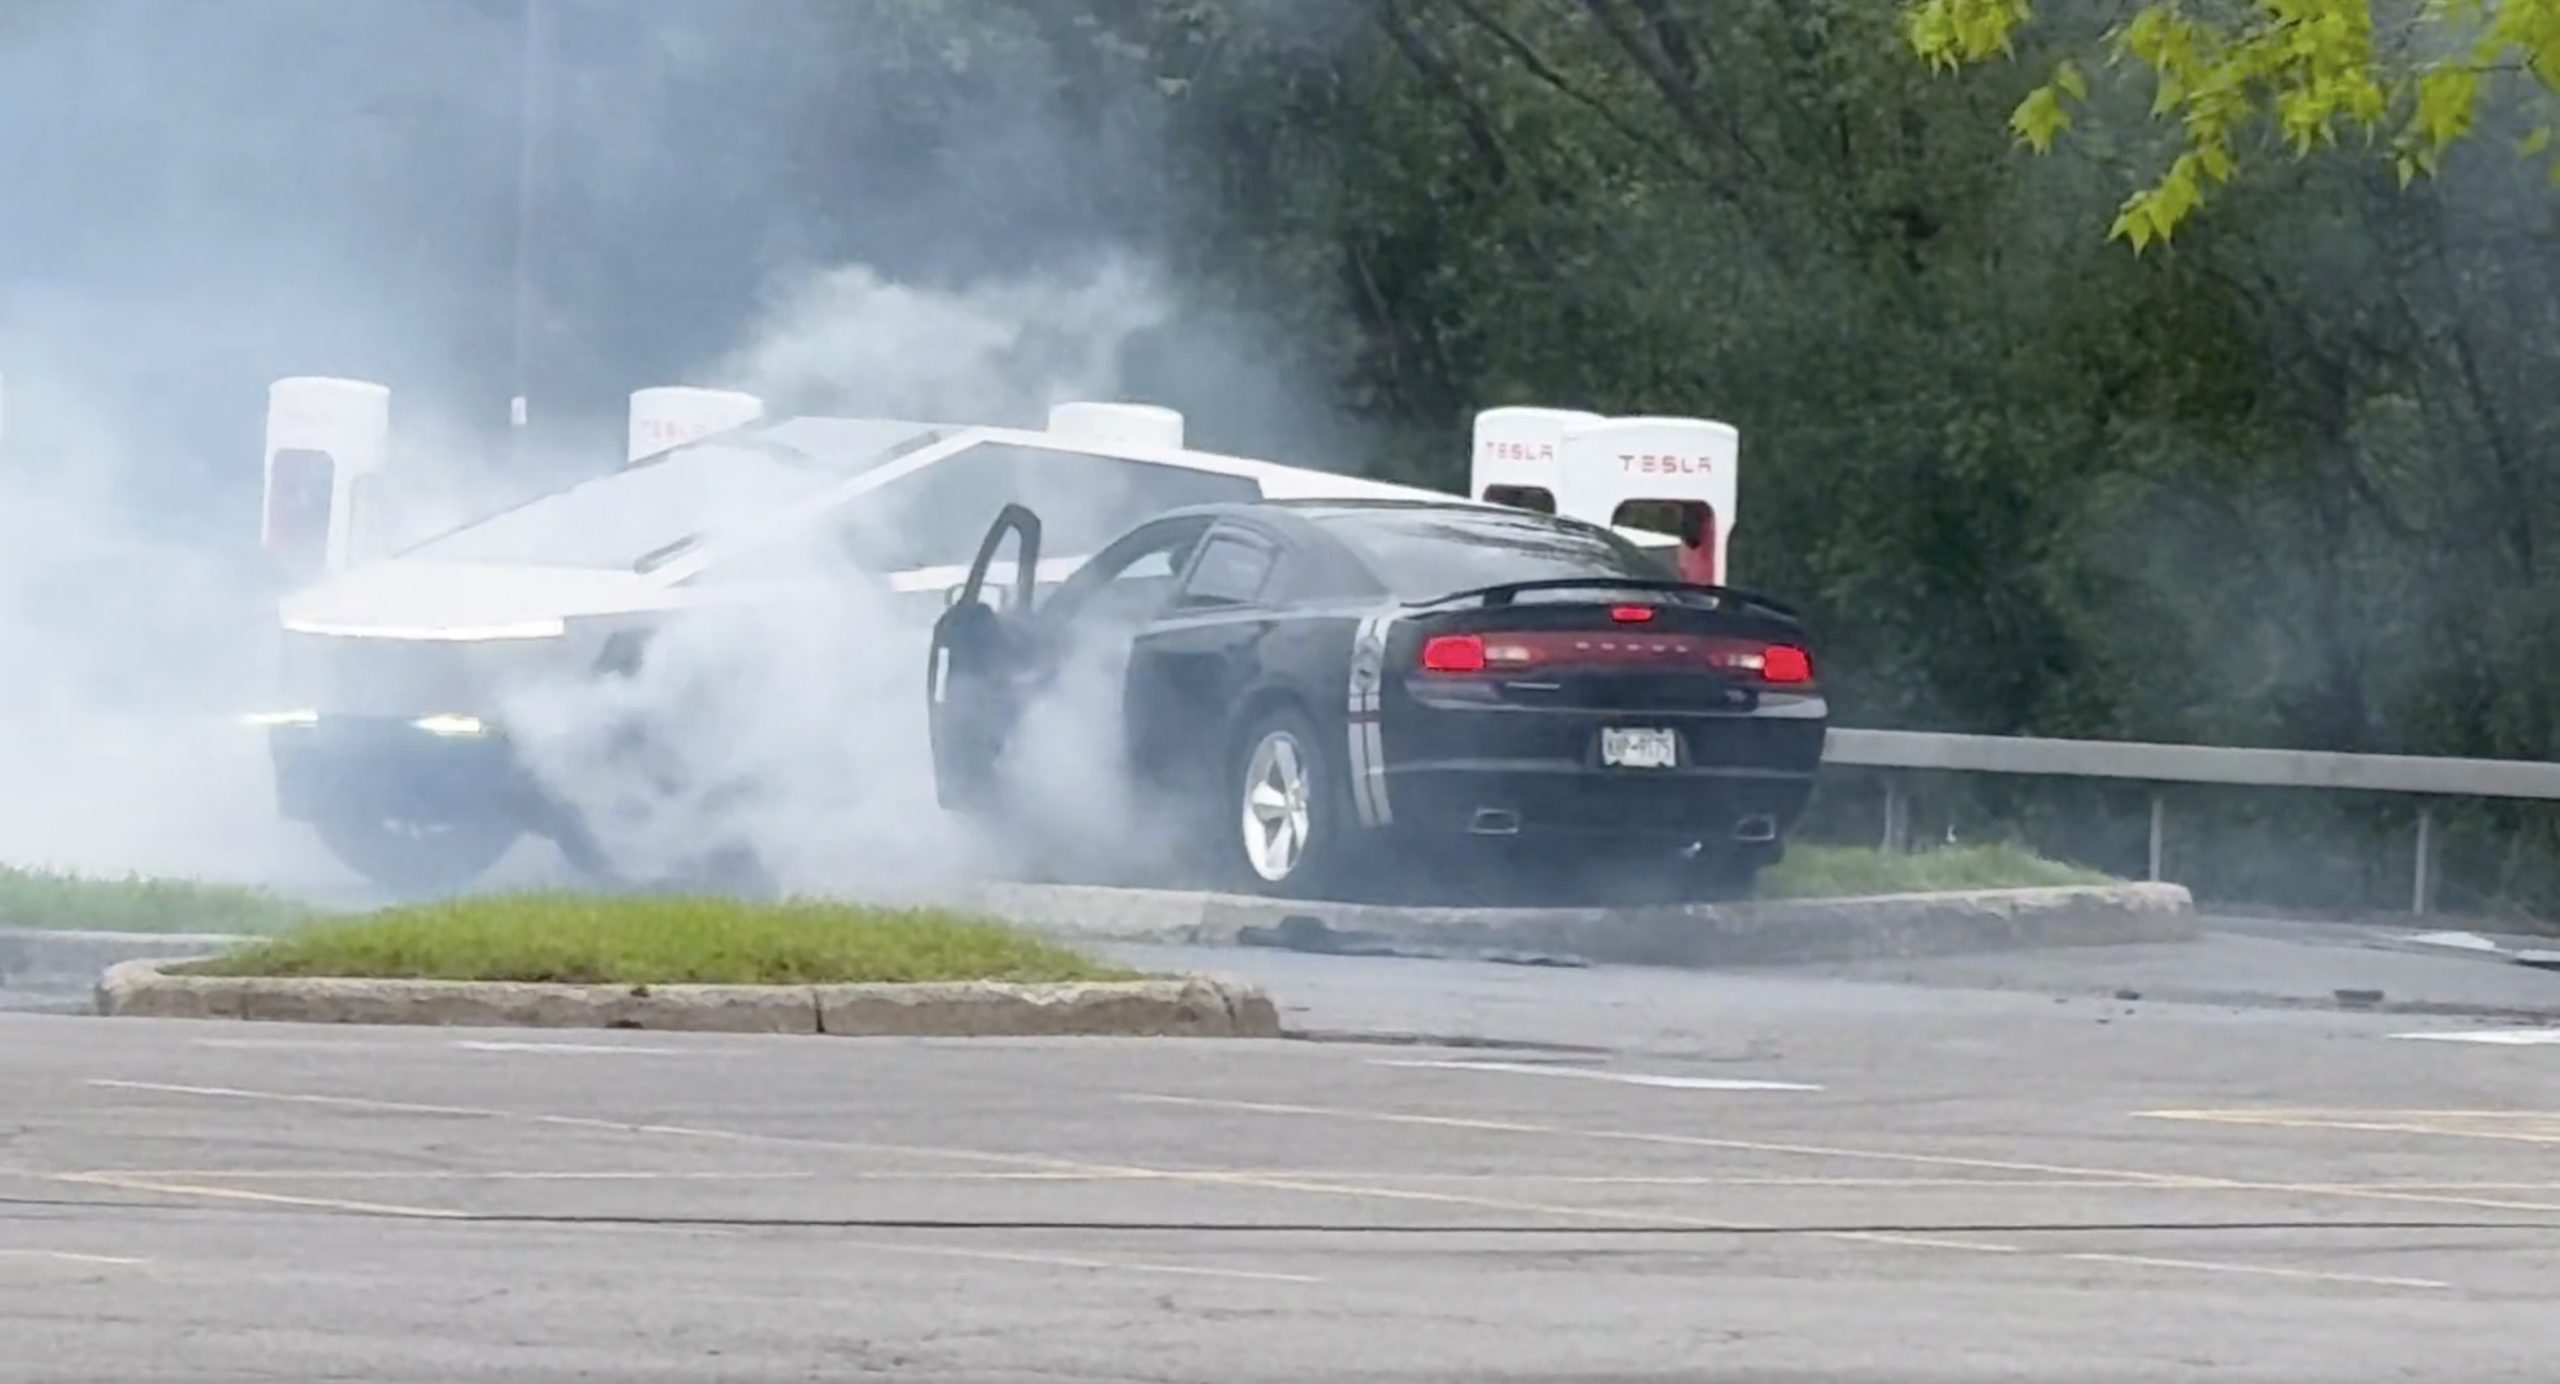
There comes a time in a driver’s life when one is faced with one’s limitations. For the driver of a Dodge Charger, this time came when he lost control and crashed into a Tesla Cybertruck–an absolute epic fail.
A video of the rather unfortunate incident was shared on the r/TeslaLounge subreddit.
Charging Charger Fails
As could be seen in the video, which was posted on the subreddit by Model Y owner u/Hammer_of_something, a group of teens in a Dodge Charger decided to do some burnouts at a Tesla Supercharger. Unfortunately, the driver of the Charger failed in his burnout or donut attempt, resulting in the mopar sedan going over a curb and bumping a charging Cybertruck.
Ironically, the Dodge Charger seemed to have been parked at a Supercharger stall before its driver decided to perform the failed stunt. This suggests that the vehicle was likely ICE-ing a charging stall before it had its epic fail moment. Amusingly enough, the subreddit member noted that the Cybertruck did not seem like it took any damage at all despite its bump. The Charger, however, seemed like it ran into some trouble after crashing into the truck.
Alleged Aftermath
As per the the r/TeslaLounge subreddit member, the Cybertruck owner came rushing out to his vehicle after the Dodge Charger crashed into it. The Model Y owner then sent over the full video of the incident, which clearly showed the Charger attempting a burnout, failing, and bumping into the Cybertruck. The Cybertruck owner likely appreciated the video, in part because it showed the driver of the Dodge Charger absolutely freaking out after the incident.
The Cybertruck is not an impregnable vehicle, but it can take bumps pretty well thanks to its thick stainless steel body. Based on this video, it appears that the Cybertruck can even take bumps from a charging Charger, all while chilling and charging at a Supercharger. As for the teens in the Dodge, they likely had to provide a long explanation to authorities after the incident, since the cops were called to the location.
Lifestyle
Anti-Elon Musk group crushes Tesla Model 3 with Sherman tank–with unexpected results
Ironically enough, the group’s video ended up highlighting something very positive for Tesla.

Anti-Elon Musk protesters and critics tend to show their disdain for the CEO in various ways, but a recent video from political action group Led By Donkeys definitely takes the cake when it comes to creativity.
Ironially enough, the group’s video also ended up highlighting something very positive for Tesla.
Tank vs. Tesla
In its video, Led By Donkeys featured Ken Turner, a 98-year-old veteran who served in the British army during World War II. The veteran stated that Elon Musk, the richest man in the world, is “using his immense power to support the far-right in Europe, and his money comes from Tesla cars.”
He also noted that he had a message for the Tesla CEO: “We’ve crushed fascism before and we’ll crush it again.” To emphasize his point, the veteran proceeded to drive a Sherman tank over a blue Tesla Model 3 sedan, which, of course, had a plate that read “Fascism.”
The heavy tank crushed the Model 3’s glass roof and windows, much to the delight of Led By Donkeys’ commenters on its official YouTube channel. But at the end of it all, the aftermath of the anti-Elon Musk demonstration ended up showcasing something positive for the electric vehicle maker.
Tesla Model 3 Tanks the Tank?
As could be seen from the wreckage of the Tesla Model 3 after its Sherman encounter, only the glass roof and windows of the all-electric sedan were crushed. Looking at the wreckage of the Model 3, it seemed like its doors could still be opened, and everything on its lower section looked intact.
Considering that a standard M4 Sherman weighs about 66,800 to 84,000 pounds, the Model 3 actually weathered the tank’s assault really well. Granted, the vehicle’s suspension height before the political action group’s demonstration suggests that the Model 3’s high voltage battery had been removed beforehand. But even if it hadn’t been taken off, it seemed like the vehicle’s battery would have survived the heavy ordeal without much incident.
This was highlighted in comments from users on social media platform X, many of whom noted that a person in the Model 3 could very well have survived the ordeal with the Sherman. And that, ultimately, just speaks to the safety of Tesla’s vehicles. There is a reason why Teslas consistently rank among the safest cars on the road, after all.
-

 Elon Musk3 days ago
Tesla investors will be shocked by Jim Cramer’s latest assessment
-

 News1 week ago
Tesla Robotaxi’s biggest challenge seems to be this one thing
-
 News2 weeks ago
Texas lawmakers urge Tesla to delay Austin robotaxi launch to September
-
 Elon Musk2 weeks ago
First Look at Tesla’s Robotaxi App: features, design, and more
-

 Elon Musk2 weeks ago
xAI’s Grok 3 partners with Oracle Cloud for corporate AI innovation
-

 News2 weeks ago
SpaceX and Elon Musk share insights on Starship Ship 36’s RUD
-

 News2 weeks ago
Watch Tesla’s first driverless public Robotaxi rides in Texas
-
 News2 weeks ago
Tesla has started rolling out initial round of Robotaxi invites

